Showing posts with label Artistically Inked. Show all posts

Tuesday, December 27, 2022

Happiness Abounds Fun Fold Card

Hello friends!  Yikes!  It's still freezing cold weather around here.  Definitely winter!  So I'm still going to poke my head in the sand, keep stamping flowers, and wish for spring.  What about you?  Are you a warm weather person or do you love the cold weather and play at winter sports?  I used to love downhill skiing, but I gave that up years ago.  Now I have trouble staying warm enough to want to spend much time outside.  But I can stamp in any weather, and that's what I've been doing!  

I still had thoughts of the Hues of Happiness DSP that I used on my last card rolling around in my mind.  I wanted to play with that a little more, so I got out the Happiness Abounds stamp set and went to work.  I actually made a fun fold card for this.  It's not a new fold, but a card layout that I've used before that's nice and simple.  Besides I like the look of it!  So, we're going to use it again here.

The card starts with a Basic White Thick card base that measures 4 1/4" x 9".  This is scored at 5 1/2" so it's a regular size card when finished.  I next started with the Hues of Happiness DSP print that is covered with flowers in a rainbow of colors.  So pretty!  This is cut to 3" x 3 3/4" for the left side.   To contrast, I chose the "painted" backside of another print that has pinks, roses, and yellow/gold brushstrokes.  This piece measures 1 1/2" x 3 3/4" and is for the right side of the card.  Now, I need to be perfectly honest here and tell you I made a mistake in cutting the smaller piece.  You can see I cut it 1/4" too skinny, but I didn't have any more of that paper.  Boo hoo!  Since the card was almost finished by the time I noticed the problem, I went with the paper I did have.  So sorry!

Next, I decided on Melon Mambo for the framing layers.  These were cut to measure 3 1/4" x 4" for the left side, and 1 3/4" x 4" for the right side.  Now would be a good time to attach the layers together and then attach them to your card base to make sure you measured your pieces better than I did!  😁 

I die-cut several flowers from the DSP with the coordinating dies.  I didn't have enough leaves from the DSP, so I stamped the leaves with Granny Apple Green ink and also die-cut them.  The sentiment layer is a die-cut from the Labels Aglow Dies in the July - December Mini Catalog.  (only a few days left to order this!)  It's die-cut from Basic White and I used Melon Mambo ink to stamp the sentiment which is from the Artistically Inked set.  

Then I played around with all the pieces that I had ready.   I was struggling to get it where I liked it because the extra flowers just kept getting lost on the flowered print no matter how I positioned them.  Then I had an ah-ha moment!  I added a layer of vellum over the flower print and voila!  It worked out just as I had hoped.  Some sequins were added to finish off the look.

I had so much fun making this card and my card stash was a little on the low side.  So why not use this same fun fold and make a couple more cards that I needed.  So, here's a few more pictures for ideas on using this fun fold with whatever DSP you have sitting around.

Sentiment - Framed Florets
DSP - Fitting Florets
Die-cut pieces - Framed Florets
Bling - Festive Pearls


Flower stamps - Artistically Inked
Sentiment - Celebrating You
DSP - Expressions in Ink
Gold branches - Tree Rings Hybrid Embossing Folder
Sentiment Label - Labels Aglow Die
Bling - small gold rhinestones

Flowers & Leaves - Artistically Inked
Sentiment - Framed Florets
DSP - Expressions in Ink
Bling - iridescent sequins


Hope you have gotten some inspiration from today's post.  Rethink some of your favorite layouts and recycle them into something fresh and new by using different DSP or stamps.  Even color combos change the look of something that you do all the time.  

Looking forward to making many more posts in the new year!  Hope you'll come back often to see what's been happening here and visit on a regular basis.  Can you believe this year is pretty much over and done with?  In many ways it's been a rough one.  But God is still blessing us every day and God willing, I'll continue to walk with Him in the coming year.  I pray for God to bless you with His love and grace and fill you with His peace in the new year!

Happy stamping and creating,
Sharon

Friday, July 1, 2022

Nature's Prints Wreath

 Good morning from sunny Florida!  We're down here for our grandson's baseball team which is playing in a tournament over the next week.  Yesterday there were skill matches for homerun hitting, accuracy and distance in throwing, and timed running.  He took place in all three events along with droves of other boys.  There was supposed to be a parade of teams and opening ceremonies last night, but they were cancelled because storms moved in late in the afternoon. There are so many teams here!  Some from as far away as Oklahoma and Texas.  What an awesome complex to play at and be part of all the fun.  But we have run into a few glitches while here.  Like neither the internet nor bathrooms working in the rental house all the time.  Not that those two are connected, but ewwww!  Right now, the septic tank is being worked on.  And the internet is connected at the moment, so I'm trying to get a post in here quick before it's lost again.  So, let's talk about card making, shall we?

I made this card almost two weeks ago, but never got around to getting it posted.  I love wreaths - on doors, inside houses, or on cards.  So when I saw the Natural Prints Dies had a wreath die, it was on my list right away.  I had all these ideas for cards, but then struggled to get the first one made.  The little add-ons to the wreath have been changed three times trying different colors and flowers.  I finally got it the way I liked it, so I'm sharing it with you.  

The card base is the new In Color Tahitian Tide.  Isn't it a pretty, clear turquoise color?  The first layer is Basic White that measures 4" x 5 1/4".  To add texture and interest to this, it was embossed with the Brick and Mortar 3D Embossing Folder.  To help define the bricks just a bit, a light rubbing of Sahara Sand with a Blending Brush was used.  It was attached to the folded card base with Multi Purpose Liquid Glue, then set aside while I worked on the rest of the design.

The wreath was my next step.  I cut the wreath from Garden Green cardstock first.  The Natural Print Dies also has several medium to short greenery stems you can cut.  For this card, several of each size were cut from Granny Apple Green and tried some yellow flowers with that.  Honestly, for some reason it just didn't look right to me, so off they came.  Next I tried Mint Macaron, but after looking at it awhile, that idea was ditched too.  That's when the whole idea was shelved for another day.

Ok, here it is another day, and I give it another try.  This time I went darker for the add-ons and used Evening Evergreen. I even cut a couple extra pieces from Garden Green too. The Garden Green pieces have a brushing of Garden Green ink on the edges using the Blending Brushes.

I also switched the flowers I was trying to use to the Artistically Inked little trio of flowers.  Then changed the color to Fresh Freesia ink, stamped them and die-cut them with the matching Artistic Dies.  Much better mix of colors in my humble opinion.  Ok, let's see if I can get this card actually finished.

The wreath is attached to the card front with Multi Purpose Liquid Glue.  Then the bits and pieces were laid out in a generally pleasing fashion but weren't all attached yet.  I wanted to get the sentiment ready before the final layout was finished.

The sentiment is from the Nature's Prints set.  It's one of four sentiments that have this cool, funky font that I just love.  It's stamped on a piece of Basic White cardstock using Garden Green ink.  It's then die-cut using a label die that's part of this same Nature's Prints Bundle.  It has just a tiny bit of Tahitian Tide brushed around the edges using a Blending Brush.  It's positioned on the wreath and attached with Dimensionals.  The extra pieces of greenery were tucked in and around the wreath.  Some were attached with adhesive, and a few were attached with Mini Glue Dots.   Each of the flowers were attached with a Mini Glue Dot just in the center and curved a bit on the edges so they weren't totally flat.

Three of the littlest flowers were attached to the front of the label along with a little greenery.  It needed a bit of bling to finish it off.  I tried rhinestones, pearls and sequins and none of them really enhanced the card at all.  Then I remembered those cute little Brushed Brass Butterflies!  Three of them were added to the card and I pronounced it finished, before I decided to change something on it again!

Hope you like wreaths too and want to give this one a try.  Usually I have no problems putting wreaths together, but this time it took a little more effort.  Guess my mind was thinking on other things instead.

If you're planning on placing an order, there is a new Host Code listed at the top of the blog page.  Please consider using it - I would appreciate it greatly!  And thanks for waiting around for me to get another post for you.  Hopefully we'll have internet connections here tomorrow too.  Take care and get creative.

Happy stamping and creating,
Sharon
 

Friday, February 4, 2022

Get Well Card in Neutrals

I don't know about you, but I've had a run on my 'get well' cards lately.  I don't have any left, so it was necessary to get some made quickly.  Since I've been sending cards to both men and women lately, I was trying to make some cards that would work for either.  That is, until I have time to make more specific cards.  At least that was my idea.  Usually, neutrals work quite well for both, so that was my starting point.  I hadn't used the Artistically Inked stamp set in a long while, and the flowers weren't too over the top feminine.  Let's go with that and see where it ends up.

The base of this card is Crumb Cake cut at 8 1/2" x 5 1/2", then scored and folded in half.  I had a 2 3/4" x 4" piece of Basic White just hanging out on my desk, so that is what I used.  The large flower from Artistically Inked was stamped with Crumb Cake ink on the two opposite corners.  Both of them were positioned partially off the white cardstock.  

On a scrap paper, I tested a couple of green colors for leaves and So Saffron for the flower center.   I didn't care for the center stamped in, so it's left plain on this one.  Pear Pizzazz was chosen as the color for the leaves.  There are four sets of two leaves each stamped around the flowers.  Some of these are 2nd generation stamped.  (This is when you ink up a stamp and stamp twice without re-inking in between.)

To make this very soft pastel design stand out, it was layered onto a Basic Black cardstock piece cut 3" x 4 1/4".  This gives such a nice bold frame around the stamped layer and defines it from the card base.  All those soft neutrals needed a bold pop of black to offset them.  

For the sentiment, the Inspired Thoughts stamp set in the Annual Catalog has some words that worked well here.  They are stamped on a Basic White 1/2" strip.  After stamping the words with Memento Tuxedo Black ink, the strips were cut down to 2 1/2" long.  It was layered onto a Basic Black strip that's 3/4" x 2 3/4".  

At this time, I played with the stamped layer and the sentiment to see how to place it onto the card base.  The stamped layer was attached with Dimensionals a little to the left and down from the center point.  The sentiment was attached over this with Dimensionals on the left, and double-layering the Dimensioinals on the right so it lays flat.

Three of the Classic Matte Dots in black (from the January - June Mini Catalog pg. 59) were added to the card for extra interest.  

The inside of the card has a layer of Basic White.  The same flower was stamped on two opposite corners with Crumb Cake ink, but this time they were off-stamped once to create a much softer color.  The leaves were stamped with Pear Pizzazz ink and were also off-stamped.  The effect is just gorgeous.  Unfortunately, it was so soft looking that I couldn't get a decent picture to show it off!


I made a second card with the same colors but with a different size of Basic White cardstock because it was already cut.  Then I went ahead and made one with Rococo Rose.  Remember that color from last year's In Colors?  It was one of my all-time favorite colors and was fun to use again.   I think it turned out just gorgeous and hope you like it too.

That's it for today's posting.  Hope you enjoyed the idea and see how easily it is to adapt to different sizes of the focal layer.  Each of the cards were made the way they were because of a piece of Basic White cardstock that was left-over from a different project.  

I didn't use anything from the Sale-a-bration brochure today.  I guess I'll have to work on something tomorrow using those fun free items before Sale-a-bration is a thing of the past.  Remember, it ends with the end of February.  So if you've been thinking about ordering, don't wait too long.  When these freebies are gone, that's it.  They won't be coming back.

Have fun creating something new and unique!
Sharon

Tuesday, October 12, 2021

Tale of Two Cards - part 2

Ok, are you ready for what I made with the leftover parts from yesterday?  Remember I had used the Blending Brushes on a piece of Very Vanilla cardstock to make a circle of Mango Melody.  I also had seven leaves in different sizes and colors made with the Love of Leaves stamp set and coordinating dies.  I also thought it would be fun to use a different fun fold to make this card.  So that's just what I did.

I hadn't made a book binding fun fold in forever, and thought this would work well with the pieces I had too work with.  I started out with a card base of Cajun Craze cut at 11" x 4 1/4", scored at 5 1/2" and a second score line at 6 3/4".  After folding on the scored lines, I folded in half.  Then opened on the side to put Multi Purpose Liquid Glue on the space between the two scored lines, and closed it up.  When it dried, it now opened like a book with the binding area on the left.  Great start.


The Very Vanilla cardstock that had the Mango Melody soft circle on it was up for the chopping block next.  The piece was 5 1/4" x 4".  I cut off the 4" that included the Mango Melody circle to end up with a 4" x 4" square for the front of the card.  That left a piece 1 1/4" x 4" that I trimmed down to 1" x 4".  I had a lot of fun playing with the stamp that looked like alcohol inking yesterday, so I tried it again on that 1" piece.  This time I used Mango Melody, Daffodil Delight, Old Olive, and Cajun Craze inks.  Granted there were only small portions of each color, but it gave me the look I wanted.  

The leaves I had to work with were all inked with a rock 'n roll technique using mixtures of Mango Melody, Pumpkin Pie, Old Olive, Cajun Craze, Bumblebee, and Crumb Cake.  Each leaf has at least two colors and some have three.  After shuffling them around on the Very Vanilla square of cardstock, I found I had two problems.  One, the background space was too bare.  To fix that problem, a Blending Brush was used to add some Mango Melody on the outside edges with a bit of Pumpkin Pie added in.  The second problem was solved by die-cutting a branch from Soft Suede cardstock using the Harvest Dies.  I love using that branch (as a whole or cutting pieces from it) to tuck in some interest on so many cards.  It's a natural addition for florals, but it works well for a Halloween special effect too.

Here is the card standing up so you can see how it's put together.  

The sentiment was stamped on the small strip of Very Vanilla cardstock.  The words are from the Love of Leaves stamp set and I used Cajun Craze ink to stamp it.  The Banner Pick-a-Punch was used to trim the left edge.  I added a bit of Mango Melody and Pumpkin Pie ink to the edges with the Blending Brushes.  Have I mentioned how much I love those things?!  This was added to the card front with Multi Purpose Liquid Glue and  Dimensional on the left edge to keep it straight.

A double bow of Linen Thread was added to the tag with a Mini Glue Dot.  The same Linen Thread was wound around the book binding part of the card four times and tied off with a bow.

The last thing to do was finish the inside of the card.  Another 4" x 4" square of Very Vanilla was cut to fit.  The Blending Brushes came out again with Mango Melody and Pumpkin Pie inks to add a good amount of color all around the edges.  It was then attached inside the card with Multi Purpose Liquid Glue.  There was just one small leaf left over from the stash I was working with.  So it landed in the corner here.

After much thought and deliberation, this has ended up being a bling-free card.  It just seemed like it was already beautiful with all that bright, glorious color.  What more could be added to make nature even better?

It was fun doing these last two projects.  They truly didn't end up the way I envisioned either one when I started out, but that surely does keep things interesting.  Creating cards is a process where many things can end up going sideways instead of forward.  And this is how we learn as we go.  I once read that either you continue to learn something new each day, or you die.  So I'm planning on doing lots more learning for a good long time!   *big grins*

If you're thinking of placing an order soon, please use the Current Host Code that you'll find in the upper right corner of my blog post.  Thank you in advance for all your support.  I'd love to hear from you, whether it's a question or comment about any of my projects, or just to let me know that you're hanging out with me.  If there's something you'd like me to tackle, just ask.  Not sure if I can always figure it out, but I'll give it a try.  Thanks for stopping by again.  I miss all of you, my friends.  Hopefully I can get myself up to Michigan again soon and see you.

Happy creating and stamping,
Sharon

Monday, October 11, 2021

A Tale of Two Cards

 Hi there!  Welcome back to my stamping room where ideas run amuck, or something like that...  It's been a little frustrating in my stamping room the last two days. I've got ideas galore, but when I start putting all the components together it's kind of a ho-hum deal.  Yesterday I had a great idea to make a blending brush sort of halo background and play around with the Nature's Harvest Bundle again.  I just love the way the stamps and dies play so nicely together, but can stand on their own just fine.  Ok, I did the Blending Brush background in the upper middle of a piece of Very Vanilla cardstock using Mango Melody for a gorgeous soft golden-orangey color.  Turned out great, and is perfect for fall.  Next up I stamped the coneflower bouquet on Very Vanilla using Memento Tuxedo Black ink.  Colored in the images with the Stampin' Blends alcohol markers.  That turned out nice too.  Putting it together?  Not so much.  Really pretty dog-gone boring at this point.  So I set that all aside overnight to come back to later.

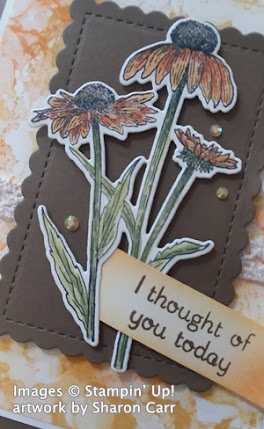
Today, the idea of using the Artistically Inked stamp that looks like a cool alcohol ink background (or maybe just a long smudge) to color a fall background and add some of the really bold Love of Leaves images to make a really bold fall card.  Yes, I did the background and loved it.  Then stamped seven of the leaves with multiple fall colors and die-cut them.  Good so far.  When I tried putting it together, it was all so busy together it gave me a headache.  Set that aside too.  So now these two bunches of card parts were just sitting there.  And that's when inspiration struck - why not switch out the backgrounds and see what happens!  So here is one of them.  Tomorrow you'll get the second one.  Hope you like...

This shows the background using the Artistically Inked stamp.  Isn't is awesome?  The background piece of Very Vanilla has three different inks - Mango Melody, Daffodil Delight, and Bumblebee.  My Bumblebee ink pad is so juicy I had to off-stamp to get a decent color, likewise with the Mango Melody pad.  The inks were stamped to cover, but not really overlapping, the cardstock piece that is 5" x 3 3/4".   It's really fun to see how these stamps quickly make this alcohol-inked background.

After stamping, this was layered onto a piece of Very Vanilla cardstock that is 5 3/8" x 3 7/8".  It just needed a little sliver of Very Vanilla to go between the colors and the dark card base I wanted to use.  I chose Soft Suede for this which is cut to 8 1/2" x 5 1/2", scored and folded in half.  Each layer here was attached with the Multi Purpose Liquid Glue.


Like I mentioned earlier, the coneflowers were stamped with Memento Tuxedo Black ink and colored with Stampin' Blends.  The colors used were Mango Melody D, Pumpkin Pie L&D, Cajun Craze L, Old Olive L, Mossy Meadow L, and Crumb Cake D.  After coloring, it was die-cut using the coordinating die from the Harvest Dies.

To have these pretty flowers stand out from the background, I die-cut a piece of Soft Suede cardstock using the Stitched So Sweetly Dies.  It is a perfect foil for the flowers.  They are attached using Dimensionals and Mini Dimensionals where needed.

The sentiment comes from the Love of Leaves stamp set.  It was stamped on a strip of Very Vanilla cardstock using Soft Suede ink.  The one end was punched with the Banner Pick-a-punch.  One end was tucked under a flower stem and attached with adhesive.  The other end has a Dimensional popping it up.  

As I was putting the layers together, I noticed a piece of the Diamond Weave Ribbon that had been cut, but never used.  Hmmm...  I liked how it looked with the rest of the card, so why not?  I just used adhesive to attach it to the center of the card and then attached the focal piece to the card with Dimensionals.  Of course, I felt it needed just a little bling.  I used the 2021-2022 In Color Rhinestones that matched nicely.

The inside was finished simply with a little stamping with the same alcohol-ink stamp and some off-stamped Mango Melody ink and a little bit of the Daffodil Delight ink.  This is on the Very Vanilla layer and attached to the card base with the Liquid Glue.  

I figured this card would be used for one of my many notes I mail out to friends, so there are no sentiments stamped inside.  That's up to me to provide.

Well, that's it for the first installment on a Tale of Two Cards.  Hope you can see that the creative process doesn't always go smoothly, but you can usually do something with the unused parts and pieces.  It might not be exactly what you envisioned in your pretty little head.  But you never know, it might just be better!

Just a quick reminder that the current host code is on the top right corner of my blog post.  Thank you for your orders.  They are so appreciated, and so are you!  Enjoy your day, and don't get frustrated when your stamping projects don't turn out quite as planned.  You can always shuffle the pieces around and come up with something totally different.  There are no mistakes!  You can even pull the pieces of a card apart and start over.  And if there is absolutely no saving it?  Throw it away - it's only paper!  (OMG, did I say that?)  Start fresh and have fun!  That's what it's all about.

Blessings and many hugs,
Sharon

Tuesday, June 8, 2021

Artistically Inked Hello

 Welcome back!  You know when you've got some left-over card pieces sitting on your work table and you just look at them a couple of days before something clicks?  No?  You don't ever have left-over card parts or you don't take days and days to figure out what to do with them?  Lucky you, if that's the case.  Not so for me.  I've been looking at two pieces left from a card last week, and I finally had some inspiration today and got it finished.  Hooray!!

And not only got it finished, but I used a new bundle for the very first time.  Makes my day!  Isn't the new Artistically Inked set just the coolest?  I love the watercolor-y look to the different flowers and leaves.  This is one that I'll have to spend more time playing with for sure!

I started out with some Thick White cardstock cut to 8 1/2" x 5 1/2", scored and folded in half.  I already had the piece of the striped You're A Peach Designer Series Paper left over from a few days ago.  And also had the piece of Basic White that had been die-cut with the scallop edge from the Scalloped Contours Dies to make the pretty stitched looking edge.  And again I went with Pacific Point cardstock for the framing layer on the card front.  Before attaching to the card base, I wrapped a length of the sheer dotted ribbon around it and tied with a knot.  This was then added to the card base using Dimensionals for a little pop.

I inked up the large watercolor flower with Daffodil Delight ink, then used a Sponge Dauber to sponge on a little bit of Mango Melody ink in around the flower center area before stamping on Basic White cardstock.  Then I stamped the small circle-ish piece with Mango Melody ink on the cardstock.  Next stamped 1 double leaf, and 2 single leaves with Granny Apple Green ink.  There is also a trio of tiny flowers that I needed.  These were stamped with Balmy Blue ink.  Then everything was die-cut using the coordinating Artistic Dies.

The flowers and leaves were juggled around to find a pleasing look to me, then were attached using Dimensionals under the larger flower and double leaves.  Everything else was just attached with adhesive and tucked under and around the main flower.

The sentiment was stamped with Night of Navy ink using the Many Messages stamp and die-cut using the Messages Dies.  This set is one large stamp and one large die that make 19 little sentiment pieces all at the same time.  Actually I have this set stamped up in both black and navy on white and die-cut so they are ready to use whenever needed.  Handy little set to have on hand all ready to go.  The sentiment was popped up on this card with Dimensionals also. 

The card only needed a bit of bling to satisfy me.  The Artistry Blooms Adhesive-backed Sequins had a pretty blue that I thought went nicely with the card, so 3 of them were added.  And then it was done.  Nice and easy, but pretty too.

In case you'd like to order any of these products this month, please use the Host Code shown here.  Of course, it's greatly appreciated.  And I love to spoil my customers with cards and/or little gifts just for them.  I'd love to count you as one of my customers too.

That's it for today.  I love blues and yellows together - they remind me of summer for some reason.  So with all the heat we've had lately, this seemed like just the right card to make.  Thanks for hanging out with me today.   Hope you stop by again soon.

Inky hugs and smooches,
Sharon