Showing posts with label Darling Details Bundle. Show all posts

Monday, April 29, 2024

More Translucent Florals

 Hello friends!  What a glorious day it is outside.  Blue skies with puffy white clouds, lots of sunshine, and warm weather too.  What the heck am I doing inside?  Well, I figured it had been a while since my last post, so here I am.  I was so happy to see that the Translucent Florals stamp set and matching dies will be in the new Annual Catalog.  But the pretty designer paper that matches it will not.  So, I have this last little hurrah for the DSP to share with you.

Besides being beautiful, one of the things I liked about the paper was that some of the flowers could easily be die cut for a quick card.  This card has both a die-cut paper flower and one that I stamped to use.  I think they blended well together to give me a fuller look.  (I was running out of flowers to cut from the DSP!)

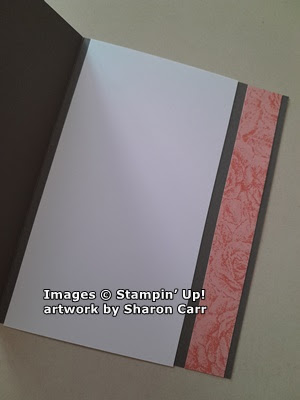
I started with a Basic White cardstock base that measures 8 1/2" x 5 1/2".  It's scored at 4 1/4" and folded in half.  The DSP print piece measures 5" x 3 3/4".  It's attached to a Berry Burst cardstock piece that measures 5 1/4" x 4".  They are attached together with adhesive.  Then they're attached to the card base using Dimensionals.

The Blackberry Bliss flower along with the two leaves are from the DSP.  They're cut with the matching die.  The Berry Burst flower is stamped on Basic White and die-cut.  There are two single leaves and one double leaf set that are stamped onto Basic White cardstock.  All of the leaves are a mix of Granny Apple Green and Shaded Spruce inks.  The stamps were inked with the Granny Apple Green and then rolled gently on one edge into the Shaded Spruce ink.  This gives you the two colors that blended into each other.

The little open-work flower stems are a die-cut from the Darling Details set of dies.  I used the Soft Shimmer Specialty Paper Combo Pack.  This is in the retiring catalog, but I just checked and it's still available.  Two of the stems were die-cut from the Berry Burst color of glimmer paper, but only one of the Bubble Bath color.  The Bubble Bath stem was cut in two to make two small accents.

One more punched accent was added to the mix.  The Bough Punch was used to punch three of the flower bud stems.  For this I used Shaded Spruce cardstock.

The sentiment is from the Softly Sophisticated stamp set from Sale-a-bration.  I really like these sentiments, so I'm still using them even though they're not available.  The die used to cut the Basic White label is from the Thoughtful Expressions die set.  The sentiment is stamped on this with Gray Granite ink.

After all the pieces were ready to put together, I played around with the pieces to get something that was pleasing to me.  Both of the flowers and the sentiment are all attached with Dimensionals.  The extra leaves, flower bud stems, and shimmer flower stems were all tucked in around this and attached with adhesive.  

As a final accent to the card, I added three of the Glossy Dots in the Melon Mambo color to the design.  

There you have today's card idea.  I love the small floral print on the DSP as an accent for the larger flowers in the focal images.  I wish more of these items were carrying over to the new catalog, but I'm sure I'll find comparable new items to choose instead.  Hope you like this idea with so many old products that were used.  If you check your stash, you probably have most if not all of these items.  Yes, it's time to get them out and play with them while you still remember you have them!  If you're like me, you tend to play with the new goodies and forget about the good old standbys that were your favorites.  Next post, we'll go totally new - new colors, stamps & dies, embellishments.  What fun!  It's interesting getting the feel for new colors and stamps.  Come back and see what I've been playing with!  You'll be able to order from the new Annual Catalog on May 1st!  Are you ready??

Happy stamping and creating,
Sharon

Wednesday, March 20, 2024

Two Tone Flora Fancy Card

Hello friends!  Here we are with what might be my last Easter card before they all get in the mail so they can arrive on time.  This time I didn't really use a set that is focused on Easter.  I went with a pretty spring-time floral instead.  So of course, this card would be very versatile to have on hand.  It would all depend on what kind of sentiment was used inside the card to determine its use.  I like that kind of versatile card to have on hand.  Just add a sentiment inside and you're good to go.

Isn't this pretty?  I wanted to stick with pastels for spring, and this worked out just fine.  Let's create together.

I started with a card base of Soft Sea Foam that measures 8 1/2" x 5 1/2", scored at 4 1/4" and folded in half.  The lacy frame is one of the Darling Details Dies.  It leaves a pretty lacy window to build this floral bouquet on.  The Basic White Thick layer of cardstock measures 5 1/4" x 4".  The lacy window was die-cut from the center of the cardstock piece.  This is attached to the Soft Sea Foam card base by using Tombow Multi Purpose Glue along the outer edges so that the lacy edge wasn't attached flat but has a shadowy effect that enhances the lace.

Next up is making the pretty floral bouquet.  All of the flowers and leaves for the card are from the Two-Tone Flora stamp and die set.  All the pieces are stamped on Basic White cardstock.  The two largest flowers are stamped with Flirty Flamingo ink.  The darker one is stamped full strength, then stamped again to get the lighter one.  The detail stamp uses Poppy Parade ink.  Again, it's stamped full strength on the darker one and then stamped again on the lighter one without re-inking.

The medium sized flower is also stamped with Flirty Flamingo ink that is off-stamped for the solid stamp and full strength for the detail stamp.  

The tiny flower clusters were off-stamped with Flirty Flamingo ink and the detail stamp was also off-stamped.  There were also two of these flower clusters stamped with Coastal Cabana ink that was off-stamped on the solid stamp and full strength on the detail.  


The leafy spray was stamped with Garden Green ink that was off-stamped first, then stamped twice on the Basic White.  That made one spray even lighter than the first.

Lastly are some two leaf sets that are stamped with Shaded Spruce ink.  These were all off-stamped to lighten them up a lot.  After stamping all of these pieces, they were die-cut with the coordinating Two-Tone Flora Dies.  

Next was positioning all the pieces into a pleasing bouquet.  I did cut apart the flowers from the pink tiny flower cluster.  I liked the look of tucking the individual flowers around the bouquet.  Some of the flowers and leaves are attached flat with just adhesive, while some of them have Dimensionals to build up the layers.  

The butterfly is from the Paper Butterfly Accents.  These are fun to add to your project with minimal fuss.  For this butterfly, I used a Blending Brush and a tiny bit of Flirty Flamingo ink on the outer edges of the wings.  The body and antennae were lightly colored in with a Basic Gray marker.  It's attached with two Mini Glue Dots under the body area.

The inside of the card has a layer of Basic White cardstock.  It measures 5 1/4" x 4".  The same flowers and leaves were stamped inside the card making sure to off-stamp each of the elements.

The sentiment is one I've had for years and years.  I love the words of the sentiment and also the unique font that was used.  Sorry, I have no idea who the stamp company is so I cannot give any credit.

I wasn't going to use any sort of bling on the card, but obviously I couldn't help myself!  There are five of the Iridescent Rhinestone Basic Jewels tucked in and around the design.  They pick up all the spring colors and really enhanced the design.

That's all I have for you today.  The retired list is out, but I've been struggling to get it posted on my blog.  Technology has done me in again today.  When my hubby gets a minute, I'll ask him to help me out here so I can share the list with you.  Believe me, it's a huge one and there are some good discounts on some of the items.  Stay tuned...

Thank you for sharing some of your valuable time with me today.  It's always wonderful to hear from you and have you share what you've been creating.  Keep up the creativity and make sure you mail out those beautiful cards you've been making.

Happy stamping and creating,
Sharon 


Tuesday, February 13, 2024

Painted Lavender Bouquet

Hello, hello.  I can't believe the sun is finally shining again after several rainy days in a row.  I've had more than enough rain this winter.  Of course, in the middle of a dry, hot summer I'll be praying for some of that rain, won't I?  And instead of whining about the excessive rain, I should be thankful it wasn't all snow!!  Seems like we're still adjusting to things down here, but certainly loving it.  Thinking ahead to spring, I was ready to make a card with the Painted Lavender Bundle.  These pieces make a up a bouquet in no time at all.  

I haven't made a gatefold card in awhile, so that was my plan.  For a summery feel, I chose a card base of Garden Green.  This measures 8 1/2" x 5 1/2", and it's scored at 2 1/8" and 6 3/8".  Folding these two sides in should give you a nice gatefold card as your base.

There are two pieces of Soft Sea Foam cut to layer onto the sides.  These measure 2" x 5 1/4".  To add some interest to these panels, they were embossed with the Softly Sophisticated Embossing Folder which is one of the Sale-a-bration items.  I love the delicate design on this embossing folder.  Can't tell you how many times I've used it already!  After embossing, the panels were attached to the card front using "green glue" making sure they lined up top and bottom.

Next, the Basic White panel was die-cut with the Perennial Postage dies.  I used the 2nd largest die, but it was still too wide for what I wanted to do.  Taking the largest die, I placed it over my die-cut piece and lined up the postage edge cutting off about 1/2" from one side.  This worked out pretty well.  I used two bits of washi tape to hold it in place while cutting.  A second piece was cut and left the full size to go inside the card for the sentiment.

On the trimmed down die-cut piece, first there is some Soft Sea Foam ink that is added to the center of the white using a Blending Brush.   The leafy stem was stamped with Garden Green ink in this area of the card at least twice and several times using 2nd and 3rd generation stamping to fill in a bouquet shape.  This gives a good base for all the die-cut stems that are coming next.

The die with the two flower stems was used to die-cut most of the pieces.  Stems were cut from Gorgeous Grape and Fresh Freesia cardstock.  There were also a set of stems cut from the Soft Shimmer 12" x 12" Specialty Paper in the Bubble Bath color.  A smaller die was used to cut stems from Highland Heather cardstock.   A Granny Apple Green Blender Pen was used to color the stems in-between the flowers.  

They were layered up in this order: 2 Gorgeous Grape stems, 2 Fresh Freesia stems, 2 Bubble Bath Shimmer stems, and the one Highland Heather stem last.  They were all staggered as they were added so they weren't lined up like soldiers. The stems were attached only on the bottom two-thirds of each stem using "green glue".  This kept the tips of the flowers looser and more natural looking.  After all the flowers were added, the stem ends that were off the card were given a trim with Paper Snips.

Butterflies from the Painted Lavender set were stamped with Gorgeous Grape ink on Basic White cardstock.  They were die-cut with the matching dies from the set and attached with Mini Dimensionals.  The sentiment from Darling Details was stamped with Gorgeous Grape ink onto a Basic White strip.  The smallest Perennial Postage die was used to cut it out.  

The left half of the lavender bouquet label has two strips of Tear & Tape added to the length.  Then it's attached to the center of the card front.  Make sure there is no adhesive on the right side of the label, or it will be glued closed.   And you don't want that!  The birthday label is attached with Dimensionals under the left side only so it's free on the right edge.


The 2nd die-cut label has a faint blush of Soft Sea Foam ink added to the center with a Blending Brush.  Now it's ready to stamp.  I used a sentiment from Everyday Details stamp set.  It is stamped with Gorgeous Grape ink.  Those butterflies that were used earlier are now stamped inside the card with Highland Heather ink, so they are lighter than the sentiment.  The layer is attached in the center of the card with "green glue".
The final touches on the card are the Purple Fine Shimmer Gems.  These are so pretty and there are three different colors of purple in this set.  I used one of each of the colors on my card.  They all matched with the multiple purples I used for the lavender stems.  Can you find them tucked in the design?  There is also a double bow made from Linen Thread.  It's attached with a Mini Glue Dot.

That's my first attempt at creating with the Painted Lavender set.  It's kind of funny that there's almost no stamping on the card, but still a lot going on.  I'll have to try stamping those gorgeous lavender stems the next time around.

Thanks for stopping in to see what's new.  If you're looking for a demonstrator, I'd love to fill the position.  Don't forget the month of February is almost half over so that means Sale-a-bration is almost over too.  I don't want you to miss out on one of the fun Sale-a-bration items for you to earn free.  If you don't know how that works, feel free to contact me.  I'd love to help.  

Hope you enjoyed and were maybe inspired to give this idea a try.  It was fun creating with all of these purple shades on one card, and I love how they look together here.   Today was definitely a creatively fun day!

Have fun stamping and creating,
Sharon

Monday, February 5, 2024

Framed Open Window Card

Hello there.  Last week a friend asked me to explain how to do a Framed Open Window card.  After trying to explain it, I figured it would be easier to actually make the cuts for the card and text her the pictures.  That was fine, but I had this card base ready to go and it was just sitting there.  So, today was the day I finished up the card.  I figured I might as well post it in case anyone else doesn't know how to make it.  There are probably other ways to make this, but this is what I have found to work.  Hope it all makes sense to you.

This is where I start making the Framed Open Window card.  This measures 4" x 5 1/4" on the outside edge.  The inner part is die-cut with the 2nd largest die from the Scalloped Contours Die set.  Carefully center this on the layer before cutting.  I used two small pieces of washi tape to hold the die in place.  After die-cutting, the piece was embossed with the Softly Sophisticated Embossing Folder which is part of a free Sale-a-bration item.  I love the delicate design on this embossing folder and have used it very often already.
The next step is to place the die-cut layer onto the folded card base.  For this I used Bubble Bath cardstock.  It's already folded so I have the parameters for placing the white layer.  The 3rd largest Scalloped Contours die is placed inside the window and centered inside the white piece.  This die was also tacked down with washi tape to hold it in place while cutting.

TIP:  Sometimes washi tape can be too sticky to remove easily after using.  To help this, I usually tack it to my jeans 2-3 times to lessen the stickiness.  This helps when removing the tape, so it doesn't rip the cardstock.

After all the die-cutting and embossing is finished, the layer was attached to the Bubble Bath card front using "green" glue.

For finishing my card, I used the Darling Details Bundle found on page 68 in the Annual Catalog.  The large fluffy flower and the daisy-style flower were both stamped with Bubble Bath ink.  First the detailed layer was stamped with the ink full-strength.  Then the solid layer was off-stamped before stamping it over the flower details.  The leaves were stamped with Lost Lagoon ink.  The three-leaf cluster solid stamp was off-stamped first, then the veining was stamped full strength over this.

The tiny flowers which are also part of the set were stamped with Boho Blue and Berry Burst inks.  These colors were off-stamped to keep them a lighter tone to blend with the rest of the card.  Everything was die-cut with the matching dies in the bundle.  

All of the flowers and leaves are positioned on the rim of the opening.  The two larger flowers are attached first using Dimensionals in the center of each flower.  The single leaf is cut apart from the other two.  They are tucked in under the flowers.  The little flowers are tucked around the arrangement and attached with Mini Glue Dots.  

The inside of the card has a 4" x 5 1/4" layer of Basic White cardstock.  The sentiment from the Courage & Faith stamp set was stamped inside the window using Basic Gray ink.

The butterfly comes from the Paper Butterfly Accents in the Mini Catalog.  These are so pretty by themselves, but I decided to add a little color to the outer edges of the wings.  Using a Blender Brush and Berry Burst ink, the color is added very lightly and built up to the intensity that I wanted.  The center stayed white.  It was added to the card front using two Mini Glue Dots in the center.

For the finishing touches, the Iridescent Pearl Basic Jewels were tucked around the floral accent.  Three extra pearls were added to define the butterfly body.  

So, I still have the cut-out pieces from this card.  That will have to be the next project on my to-do list.  Still thinking on what I should make using those pieces.  

Don't forget about all the offerings available now for Sale-a-bration.  Time is fleeting and you don't want to miss out on those fabulous choices.  I've been loving both the Flight & Airy DSP and the Softly Sophisticated stamp and embossing folder bundle.  I tend to grab both of those often when the creating bug hits.  Both are turning into must-have items for me.

Thanks for hanging out with me today.  If you haven't made one of these cards before, you should give this a try.  You can use any shape of die for the window, as long as there are two consecutive sizes that work together.  A really good set of dies for this type of card would be the Stylish Shapes Dies.  Let me know if you try these.

Happy stamping and creating,
Sharon

Monday, January 8, 2024

Softly Stippled Quick Card

Merry Monday to you!  What?  You don't think it's merry today?  When I start thinking about the wonderful items you can get free during Sale-a-bration, that definitely makes me feel merry.  Today's card is very simple and really showcases one the Sale-a-bration free DSP packs.  This one is called Softly Stippled and was made to coordinate with the Stipple Roses set found on page 64 in the new 2024 January-April Mini Catalog.  The prints and soft colors used on this DSP pack are really gorgeous and will make up into some lovely cards.  Today I'm pairing two of the prints along with some Pebbled Path cardstock to make this card.

Here's the project that I'm sharing today.  As you can see, it's pretty basic, but there are some fun changes that make it anything but boring.

To start, measure and cut a piece of Pebbled Path cardstock to 8 1/2" x 5 1/2".  Cut 1" from the front edge, and score at 4 1/4" to make the card base.  Save the cut off piece for later.

Cut a piece of the floral print to measure 5 1/2" x 3".  This will fit nicely on the front flap.  Attach it with adhesive.  

Cut a 5 1/2" x 3/4" piece from another print from the set.  I chose to use a Calypso Coral print with tone-on-tone roses.  So pretty!  Attach this to the inside back of the card so the print rans along the edge with about 1/8" of cardstock showing on the right edge.

Let's do some die-cutting now.  With that 1" strip that was cut from the card base, die-cut the 2nd smallest tag from the Tailor Made Tags die set.  The die will just barely fit on the strip, but it works fine.  Also cut some Basic White cardstock using the smallest die in the set.

Stamp the sentiment from the Darling Details stamp set found on page 68 in the Annual Catalog.  This is stamped with Pebbled Path ink.  The two tags are held together with a Calypso Coral bit of ribbon from several years ago.  It's been so long, I'm not even going to guess how old this ribbon is, but it worked great here.  

There is a Dimensional between the two tags to hold in the position that I wanted.  Then the Pebbled Path tag was attached with adhesive to the card front.  Be sure you keep the adhesive only on the part that attaches to the card front, not the over-hang.

There is a piece of Basic White that's cut to fit inside the card for stamping a sentiment or writing your own thoughts.  It measures 5 1/2" x 3".  It's attached with adhesive inside the card.  Cutting the cardstock and DSP to the dimensions I gave; you'll end up with a strip of the card base showing through the inside of the card looking like another stripe.
Last picture that shows the little brown sequins attached to the card front.  These are from the Neutrals Adhesive-backed Sequins found on page 141 in the Annua Catalog.  I like how these sequins play off both the Pebbled Path and Calypso Coral tones of the card depending on how the light is hitting them.  Perfect finish!

Hope you enjoyed this simple card sample.  It really showcases this lovely Softly Stippled DSP.  I love it when the Sale-a-bration freebies are so versatile and truly in my kind of color palette.  This DSP is one of the items you can choose to receive free when you place an order of $50 or more.  Make sure you check out the Sale-a-bration brochure to see all the other possibilities for you!  If you don't have a brochure yet, or the new 2024 January -April Mini Catalog, please contact me and I'd be happy to mail one out to you.

Happy stamping and creating,
Sharon

Wednesday, December 20, 2023

The 2nd Meandering Meadow Card

Hi!  Ready for the second half of the Meandering meadow piece of DSP?  It was used to make the focal point on this card tucked between two pieces of "lace" on either side.  This idea was the entire reason I bought this paper.  I love the look of this, and it really can't get too much easier to make.  

Stamps:  I honestly don't know what stamp set this hello comes from.  Anything the right size will do.

Cardstock:  Night of Navy, Basic White, Vellum, and Meandering Meadow Designer Series Paper

Ink:  Night of Navy

Dies:  Darling Details Dies

Extras:  Double Oval Punch, pink 3/8" Sheer Ribbon Combo Pack, Adhesive-backed Glitter Sequins (retiring soon), Mini Glue Dots, and Dimensionals

Just die-cut two 2" strips of Basic White and tuck under the pretty DSP.  Make sure the top and bottom edges are trimmed straight.  Add your sentiment and ribbon.  Finish up with the glitter sequins.  What could be quicker than that?

Enjoy using this DSP - it's another fabulous scenery print DSP that is as wonderful as the last several they have had.  Are you ready to get back to the Christmas cards?  Come back tomorrow for the next installment.

Happy stamping and creating,
Sharon


Tuesday, September 12, 2023

All About Autumn in Moody Mauve

Hey there!  I don't know about you, but I am so ready for the weather to cool off a little.  I'd still like some sunny days mind you, but the heat has really been intense this summer and I've had enough.  So let's get on with the lovely, crisp fall weather here!  Trying to make my own fall weather, I've been making more fall cards with the All About Autumn 6" x 6" Designer Series Paper.  It also uses the Autumn Leaves Bundle for all the leaves decorating this focal point.  The Designer Paper is finally back in stock so make sure you order it soon in case it ends up on back-order again.  I've been holding off on posting a couple cards waiting for it to come back in stock, so let's get started with a super gorgeous fall card using Moody Mauve for the main color.  Yes, I know.  That isn't the color I think of for fall, but check this out and you might just change your mind!

Isn't this beautiful?  I just love it!!!  The mix of beiges, mauves, and grays is just fabulous!

Start with the card base of Moody Mauve that measures 11" x 4 1/4" and is scored at 5 1/2".  This makes the card a side fold which is a little different than usual. The middle layer for this card is Crumb Cake.  This measures 5 1/4" x 4".  It brings more definition between the DSP and the card base.  The DSP layer with all these gorgeous fall leaves measures 5" x 3 3/4" and is attached directly to the Crumb Cake with adhesive.  These layers are attached to the folded card base using Dimensionals.

Before I got started on the focal area, a 3" piece of natural ribbon from the Copper & Natural Ribbon Duo was added to the card front with adhesive.  Before attaching, a thread was pulled out from each end until there was about 1/2" fringe.

Now that the base is out of the way, on to the many parts of the focal point.  The sentiment is from the Autumn Leaves stamp set.  It's stamped with Moody Mauve ink onto a piece of Very Vanilla cardstock.  It's punched out with the 1 3/4" Scallop Circle Punch.  The layer behind it is Moody Mauve punched with the 2" Circle Punch.  They are attached using adhesive.

The leaves are a mixture of stamped and die-cut leaves from the set.  I stamped some with Moody Mauve both full strength and stamped off.  These were die-cut using the coordinating die from the set.  There are a couple leaves die-cut from the All About Autumn DSP - mauve with the copper design on them.  The small maple leaves and the larger oak(?) leaves are cut from the Oxidized Copper Specialty Paper.  (So gorgeous!!!)  The Crumb Cake branches are trees from the Horse & Sleigh Dies.  The small open-work stems are from the Darling Details Bundle and cut from Gold Shimmer Paper.  The leaves and branches were all built up and attached to the back of the sentiment layers.  After all the pieces were attached, the sentiment was attached over the ribbon using Dimenisonals.  At this time, the three little open-work stems in the gold shimmer were tucked in underneath the focal point and attached with adhesive.

The inside of the card is Very Vanilla to match the front.  I haven't decided on a sentiment in here yet.  Or I just might write a longer note instead.  We'll see...

The two oak(?) leaves attached in the corner were both die-cut from the same piece of DSP that had been used for the card front.  I added them so you can see both sides because I couldn't decide which way I wanted them to show.  Both of the designs together work out nicely and I like the mix.

Going back to the front of the card, I realized it could use a little more bling.  I guess the gorgeous Oxidized Copper leaves just weren't enough for me.  After trying all my different embellishments, I chose to use the Adhesive-backed Sparkle Gems in the Champagne (gold/copper) tone.  They seem to add enough extra sparkle without being too outrageous.  Yes, I like my glitz, but there is a limit as far as I'm concerned.  Yes, to each person his own tastes are the best.

Thanks so much for stopping in today to see what I have to share with you.  Feel free to leave a comment if you'd like.  It's always good to hear what you're thinking about my ideas.  I did mention that the All About Autumn Designer Series is back in stock.  I know several of you have been waiting patiently, so get it while it's available.  While shopping, check out the Online Exclusives, kits, and Clearance Rack that are available for you.  


And don't forget to look at the October Paper Pumpkin kit that you can pre-order until October 10th.  It looks like it's going to be adorable.  Create sparkling cards filled with warmth and light using the Home for the Holidays Paper Pumpkin Kit! 
Each kit comes with eight cards, four each of two designs, with festive coordinating envelopes. The shimmery details and traditional Christmas colors are sure to help you create cards that bring cheer and joy to any recipient. 
The kit this month also features special glitter glue! What a great way to add some extra twinkly details to your cards. And the best part? Your October Paper Pumpkin Kit will arrive in a beautiful box that coordinates with the theme and design of the cards in this kit. What a great way to bring inspiration to your crafting experience!  Subscribe by 10 October to get this cozy, Christmas village-themed kit!  Remember you can subscribe for just the one month or keep your subscription going until you're ready to take a break.   It's all about the ease of getting a crafting kit each month sent right to your door.  Ask me about information if you're interested.

Happy stamping and creating,
Sharon