Showing posts with label Nature's Prints Bundle. Show all posts

Friday, July 1, 2022

Nature's Prints Wreath

 Good morning from sunny Florida!  We're down here for our grandson's baseball team which is playing in a tournament over the next week.  Yesterday there were skill matches for homerun hitting, accuracy and distance in throwing, and timed running.  He took place in all three events along with droves of other boys.  There was supposed to be a parade of teams and opening ceremonies last night, but they were cancelled because storms moved in late in the afternoon. There are so many teams here!  Some from as far away as Oklahoma and Texas.  What an awesome complex to play at and be part of all the fun.  But we have run into a few glitches while here.  Like neither the internet nor bathrooms working in the rental house all the time.  Not that those two are connected, but ewwww!  Right now, the septic tank is being worked on.  And the internet is connected at the moment, so I'm trying to get a post in here quick before it's lost again.  So, let's talk about card making, shall we?

I made this card almost two weeks ago, but never got around to getting it posted.  I love wreaths - on doors, inside houses, or on cards.  So when I saw the Natural Prints Dies had a wreath die, it was on my list right away.  I had all these ideas for cards, but then struggled to get the first one made.  The little add-ons to the wreath have been changed three times trying different colors and flowers.  I finally got it the way I liked it, so I'm sharing it with you.  

The card base is the new In Color Tahitian Tide.  Isn't it a pretty, clear turquoise color?  The first layer is Basic White that measures 4" x 5 1/4".  To add texture and interest to this, it was embossed with the Brick and Mortar 3D Embossing Folder.  To help define the bricks just a bit, a light rubbing of Sahara Sand with a Blending Brush was used.  It was attached to the folded card base with Multi Purpose Liquid Glue, then set aside while I worked on the rest of the design.

The wreath was my next step.  I cut the wreath from Garden Green cardstock first.  The Natural Print Dies also has several medium to short greenery stems you can cut.  For this card, several of each size were cut from Granny Apple Green and tried some yellow flowers with that.  Honestly, for some reason it just didn't look right to me, so off they came.  Next I tried Mint Macaron, but after looking at it awhile, that idea was ditched too.  That's when the whole idea was shelved for another day.

Ok, here it is another day, and I give it another try.  This time I went darker for the add-ons and used Evening Evergreen. I even cut a couple extra pieces from Garden Green too. The Garden Green pieces have a brushing of Garden Green ink on the edges using the Blending Brushes.

I also switched the flowers I was trying to use to the Artistically Inked little trio of flowers.  Then changed the color to Fresh Freesia ink, stamped them and die-cut them with the matching Artistic Dies.  Much better mix of colors in my humble opinion.  Ok, let's see if I can get this card actually finished.

The wreath is attached to the card front with Multi Purpose Liquid Glue.  Then the bits and pieces were laid out in a generally pleasing fashion but weren't all attached yet.  I wanted to get the sentiment ready before the final layout was finished.

The sentiment is from the Nature's Prints set.  It's one of four sentiments that have this cool, funky font that I just love.  It's stamped on a piece of Basic White cardstock using Garden Green ink.  It's then die-cut using a label die that's part of this same Nature's Prints Bundle.  It has just a tiny bit of Tahitian Tide brushed around the edges using a Blending Brush.  It's positioned on the wreath and attached with Dimensionals.  The extra pieces of greenery were tucked in and around the wreath.  Some were attached with adhesive, and a few were attached with Mini Glue Dots.   Each of the flowers were attached with a Mini Glue Dot just in the center and curved a bit on the edges so they weren't totally flat.

Three of the littlest flowers were attached to the front of the label along with a little greenery.  It needed a bit of bling to finish it off.  I tried rhinestones, pearls and sequins and none of them really enhanced the card at all.  Then I remembered those cute little Brushed Brass Butterflies!  Three of them were added to the card and I pronounced it finished, before I decided to change something on it again!

Hope you like wreaths too and want to give this one a try.  Usually I have no problems putting wreaths together, but this time it took a little more effort.  Guess my mind was thinking on other things instead.

If you're planning on placing an order, there is a new Host Code listed at the top of the blog page.  Please consider using it - I would appreciate it greatly!  And thanks for waiting around for me to get another post for you.  Hopefully we'll have internet connections here tomorrow too.  Take care and get creative.

Happy stamping and creating,
Sharon
 

Monday, June 20, 2022

Vintage Nature's Prints

Hello Friend!  Hope you're having a fabulous Monday.  So far this has been a very productive day.  Hubby has been playing with the electrical stuff again, but we're all good and everything has power that's supposed to.  Yay!  It's been a while since the last post.  If you're one of those who have been praying for Rick's health, the procedure last Friday went well, and he came home from the hospital on Saturday.  Yay!  Health-wise, things are looking good right now and I thank God for it all!  But that, along with Father's Day, has kept me away from posting anything for awhile.  

While meandering around Pinterest the last week or two, I saw a good number of 'vintage-looking' ideas that I want to try making again.  It's been a while since I've made this kind of card and thought it was time to try again.  It's the idea of working more in the muted tones - usually browns, and many times with some collage type stamping in the background too.  I used the Nature's Prints stamp set and the matching Natural Prints dies.   So far, I've stamped this set in greens and blues.  Now it was time to try it in browns.  Here's what I came up with...

I love the tone-on-tone look of this and was very pleased how it turned out.  Just what I planned, (well mostly), and you know that doesn't usually happen!

It all starts with a card base of Soft Suede cardstock cut at 8 1/2" x 5 1/2", scored in half and folded.  At this point, I figured the next layer would be Early Espresso, with Very Vanilla cardstock on top of that.  So that's how I cut it.  

First I stamped on the Very Vanilla piece using Crumb Cake and the fern stamp.  This was stamped in around the outside edges.  I switched to the 'berry branch' stamp and used Soft Suede ink.  This was also stamped along the edges.   Then I added Crumb Cake ink around he edges with a Blending Brush.  This gave a nice soft color, but it needed more.  

This piece was embossed with the Timeworn Type 3D Embossing Folder to give added texture and interest to the layer.   After embossing, there was another layer of Crumb Cake ink added with the Blending Brush along the edges, and even a touch of Soft Suede ink brushed onto the corners.  It was good to go.

Time to work on the sentiment.  This sentiment is one of four that are part of the Nature's Prints set.  It was stamped with Early Espresso ink onto Very Vanilla.  It was die-cut using the sentiment label from the Natural Prints Dies.  The die gives a nice, embossed edge all around it.  Part of the 'berry branch' was stamped to the left side using Crumb Cake ink to fill in.

At this time, I decided a layer of gold paper would perk up the whole card which was getting pretty dark.  The Very Vanilla layer was cut down a bit to 3 3/4" x 5".  The Early Espresso layer was trimmed to  3 7/8" x 5 1/8".  And a gold layer was cut to 4" x 5 1/4".  Before layering it all up, I did a little die-cutting in both the gold and Early Espresso layers.  On the Early Espresso layer, I cut three of the longer stems and one of the short stems.  The gold layer has one long stem and also a sentiment label cut.  I just cut the ends of the label off to place under the sentiment so just the very end of the gold shows on each side.

The layers were all attached together with adhesive.  A piece of the crocheted trim (retired) that's Very Vanilla looked nice with this.  A 6" piece was banded across the card and attached in the back.  The layers were then attached to the Soft Suede card base using Dimensionals.

The sentiment was attached over the trim using Dimensionals.  The stems were all attached to the card under the sentiment layer on the left side.  The gold one was tucked in between all the browns.

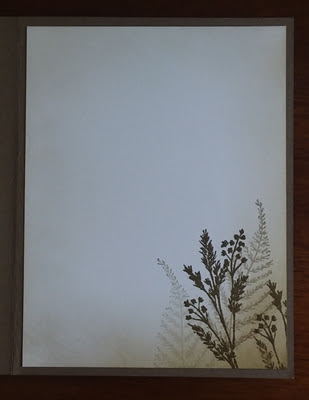
The inside of the card needed to match with the front design, so the fern was stamped twice with Crumb Cake ink.  The 'berry branch' was stamped twice with Soft Suede ink.  Then to carry the vintage look even more, the edges of the Very Vanilla layer were brushed with Crumb Cake on all edges and Soft Suede just on the bottom right corner where the stamping is.  Altogether it worked just fine. 

Do you ever get done making a card and then wish you had done just one more thing?  Looking at the "finished" card, I decided it needed some speckles added with the Early Espresso marker flicked on the card front.  So that was added and the card was finally pronounced finished.  Yay!

Hope you like this idea.  I think it came out quite nicely and is just what I wanted.  It's nice to go back to ideas I've used in the past and give them a redo with new stamps, dies, or whatever.

If you're placing an order soon, please use the Host Code shown at the top of my blog page.  I really appreciate it!  Hope you've gotten your new holiday mini catalog and Sale-a-Bration brochure by now.  If you don't have it yet, it should be coming soon.  If you don't get it by July 6th, let me know so I can send another one out to you.  Thanks for everything, especially your patience with me.  You're the very best!!

Happy stamping and creating,
Sharon


Tuesday, May 24, 2022

Blue and White Charm

 Hello friends!   Hope you haven't given up on me yet.  It's been a rough week in many respects.  Hubby is doing so well and is down on the farm for a visit.  I've learned I really don't like to be here by myself this past week.  It's never bothered me before when he goes out of town, because I had so many friends dropping by to stamp and/or do lunch.  Or stick around visiting after class or club was over til all hours of the night.  That's definitely not the case here.  There have been several days in a row when I haven't seen or talked to anyone.  And I've found that my own company gets pretty boring after a while.  It all seems to affect my creativity which has gone down the tubes lately.  That's enough fussing for now.  But on a brighter note, I have been going to see both of my grandsons play ball more often.  Now, you know us grandmas, I have to brag for just a moment.  Carson's 12 and Under baseball team is ranked 1st in South Carolina for their category, 3rd in the Eastern Conference, and 12th in the nation.  Isn't that awesome?  I'm so proud of him and his team.  They really work hard together and are all great team players.  In fact, Rick and I will be traveling to Florida for a big tournament over the 4th of July holiday to see them play.  Well, I guess that's enough chit-chat, so let's get on with the stamping!

When I first saw the catalog, the Sun Prints Suite really caught my eye.  I just love blue and white together - so clean and crisp looking!  The Sun Prints Suite has a nice stamp set, dies to coordinate with it, gorgeous designer paper, and an embossing folder that works with it!  Wow!  It has it all and is gorgeous too.  The first card I wanted to make with this needed to really focus in on the Sun Prints Designer Series Paper.  Oh my, so pretty!  

To make the card, I started out with the Basic White Thick cardstock cut at 8 1/2" x 5 1/2", scored and folded in half.  I like white on white layers, so the next layer is Basic White cut at 5 1/4" x 4".  This is embossed with the Fern 3D Embossing Folder that is part of the suite.  It's so pretty I hated to cover up the design.  It was attached to the folded card front using Multi Purpose Liquid Glue.  I find this works best with the deeply embossed layers.


I chose to use two different designs of the Sun Prints DSP.  The first print was pretty plain with various shadings of blue.  It's cut at 2" x 4 7/8".  To give it some added interest, it's embossed with the Wrapped in Texture Embossing Folders.  (Please, forgive me!  I thought this was a current embossing folder, but it is not.  Sorry!)  I did like how the embossing sort of 'broke' the finish on the DSP and the white center shows through on the design.  I'll have to try this on another embossing folder to see how it looks.  This layer was attached to the card front with Multi Purpose Liquid Glue.  

The second print was cut with the Stitched Rectangles Dies.  Love this print!  It also was attached to the card front with Multi Purpose Liquid Glue.  So far everything is attached flat, but now we're going to start adding some dimension to the design.

For this card, I dug out an older stamp set called Lovely You - still current.  It's been around for a few years, but the words in this set are definitely worth having.  There are eleven sentiments in the set and I've used them all quite often.  I stamped the sentiment on Basic White cardstock using Night of Navy ink.  The new Stylish Shapes Die set was used to die-cut a stitched banner for the card.  This was attached with Dimensionals across the two prints.

In the Nature's Prints stamp set, there's a single flower with a stem and bud.  I stamped this with Night of Navy ink on Basic White cardstock.  A Water Painter brush was used to soften the center of the flower.  It was die-cut with the matching die from the same set.  It was attached to the banner with adhesive.

I used a piece of Baker's Twine from the Essential Pack, plus a piece of navy twine that was retired.  I didn't like the white alone, but the two together seemed just right.

The Rhinestone Basic Jewels were colored with a Dark Balmy Blue Blends.  I sprinkled four of the over the card front for some bling.  I don't usually use an even number of gems, but it looked right.  So I stopped while I was happy with the look.

The inside of the card has the same small flower and bud stamped in Night of Navy in the bottom corner to carry the design inside.  This was off-stamped before adding to the inside to keep it a little softer looking.

This is a clean and simple card look.  I love the blue and white theme.  If you do too, check out the Sun Prints DSP on page 134 of the new Annual Catalog.  The prints are really gorgeous.  I'm glad you took time out of your busy day to check this out.  Hope you like this pretty card and you try out something similar.  This card idea really lets the designer paper be the star.  If you've got some prints that you totally love, let them shine with an idea like this.  Thanks for stopping by.

Happy stamping and creating!
Sharon

Sunday, May 1, 2022

Elegant Nature's Prints

 Happy Sunday to you!  Hope you were able to get to church today and refresh your body, mind, and soul.  I was not running at top speed this morning and walked into church a little late.  But oh my, it was an excellent sermon, so I'm glad I didn't miss it!  When I got home, I stood at the edge of our pond just admiring the goldfish and counting frogs.  I find it is so calming a peaceful for me to spend time with nature.  To my surprise, a little hummingbird flew right by me and inspected all the different plants there looking for something to eat.  I guess that means it's time for me to get my hummingbird feeder out of storage and out there feeding those lovely birds!  Since I've been thinking about nature today, it fits right in with the card idea.

Today's card features the new and fabulous Nature's Prints stamp set and die bundle.  Isn't it gorgeous?  Everything about this bundle in the catalog is shown in blue tones which is very lovely.  But I wanted to do a card in more traditional greens.  I started with a card base of Soft Succulent that was cut at 8 1/2" x 4 1/4", scored and folded in half.  Next was a panel of Gold Foil Paper that was cut to 5" x 3 1/4".  This was embossed with the new Fern 3D Embossing Folder.  This is just gorgeous the way the light plays off the embossing!  

I didn't want to cover it up too much, so the next layer of Evening Evergreen was cut thinner than I had originally planned.  It's cut at 5 1/2" x 2".  This is also embossed with the Fern Embossing Folder.  Still nice, but much more subtle.

The leafy images here are all from the Nature's Prints stamp sets and die cut with the coordinating dies.  The large, wider leaves were stamped with Evening Evergreen ink on Basic White cardstock.  A Water Painter filled with water was brushed over the leaves to soften and spread the leaf color before they were die-cut.   The smaller leafy stem was stamped with Soft Succulent ink and then die-cut.

There were other dies from the set used to cut the smaller stems from Soft Succulent cardstock and the taller stem from the Gold Foil Paper.  These were tucked in around the two main images.  

The sentiment is also from the Nature's Print set.  here are four sentiments to choose from and they all have two different fonts used on each sentiment.  That just makes them fun to use.  The words were stamped with Evening Evergreen ink on the Basic White cardstock piece, then fussy cut around the lettering.  

A small 4" piece of gold ribbon was trimmed and folded in half to tuck under the sentiment.  It's one of those treasures I have left over from last Christmas.  It seemed that the gold ribbon matched up nicely with the Gold Foil Paper.  Then I got some of the Gilded Gems to add to the card.  Again, the bright shiny gold just matched up perfectly.

That's it for today's walk with nature.  I'm so happy with how the card turned out.  I had made something similar using the Forever Fern set back a long while ago.  That sparked the idea, and I just went on from there.  Sometimes you don't need to look at other people's ideas, you can always CASE one of your own.  If you have a card that you made that you just love, take a good look at it and figure out how you can Copy it but with different colors or products.  It will make the idea fresh and new to you.    It's amazing how different two cards can look just because the colors are changed.  Or find a different stamp set to use instead.  Really, the possibilities are pretty much endless.  And FUN too!

Thanks for stopping in again to see what's going on here.  You've still got until the end of May 2nd to order from the old catalog.  Then it's on with the new!!  The new May 2022 - April 2023 Annual Catalog is live and ready for business on May 3rd.  So sit tight for another day if you want to order some of the new products I shared with you today.  I can't wait to share more new ideas and products with you in the coming days.  There's just so much to see and do and create!

Blessings this Sunday to you and your family!
Sharon