Showing posts with label Sneak Peek. Show all posts

Monday, August 17, 2026

Radiant Sunflowers Bundle Sneak Peek

Hello friends!  Whew, still in the mid 90's and that's the forecast for the next week at least.  It's so hard to spend time outside when you can't catch your breath and you feel you're melting on the spot.  I want to know why you can't melt off fat while doing this!  The way I feel in the heat, I'm sure I should be at least 10 pounds lighter by now!  😆  Unfortunately, life doesn't work that way, right?  So, with a mind over matter plan, today's card is another fall themed card.  I suppose it could be used for different seasons if you changed the colors, but this card exudes a strong autumn vibe to me.


See what I mean about a fall feel?  The first thing I did with this card was to stamp this flower cluster from the Radiant Sunflowers bundle onto Very Vanilla cardstock.  This bundle is coming in September, and I can hardly wait for you to use it!  I used Pecan Pie ink for this to stay on the warm side.  After stamping, the coloring began.  

Stampin'Blends were used for this part:
Sunflower petals - Daffodil Delight Light & Dark
Sunflower centers - Pecan Pie Light & Dark
Flower - Daffodil Delight Dark, Timid Tiger Light
Leaves - Old Olive Light & Dark

At this point several extra leaves from the set were stamped with Pecan Pie ink and colored with Old Olive Light & Dark Blends.

All the pieces were die-cut with the matching dies in the set.  Now it was time to decide what to add to these flowers to make the card.  The card base is Pecan Pie cardstock that measures 8 1/2" x 5 1/2".  It's scored at 4 1/4" and folded in half.

A wide strip 5 1/2" x 3 1/4" was cut from Crumb Cake cardstock.  A sentiment from the set was used to stamp onto this strip in the far bottom right corner.  Then comes the embossing.   I'm lovin' the new Softly Woven 3D Embossing Folder which was used on this to give lots of texture.

This strip was attached to the folded card front using Tombow MultiPurpose Glue to hold securely.

There are some great prints in the Sunflower Fields Designer Series Paper coming in the catalog in September.  This brown-on-brown check highlighted the flowers nicely.  It measures 2 1/4" x 4".   But it needed something extra to set it apart from all the other brown tones on the card.  

I could have used a cardstock piece, but I remembered a golden yellow print from spring maybe two plus years ago now.  I had a few odd pieces of it left, so it's used here.  It measures 2 1/2" x 4 1/4".  The brown checked print was adhered to this with adhesive.  Then both pieces were added to the card front using adhesive.

The design still needed something else.  The grid from the Lily of the Valley die set was used to die-cut gold foil cardstock.  The two pieces were attached under the sunflower cluster using adhesive.  That bit of gold peeking out at the top and bottom was perfect.  The sunflowers were attached over the grids using Dimensionals.  Then the extra leaves were tucked in around the design to fill it out.

Several Gold Adhesive-backed Dots were sprinkled on the design.  Yep, they're in the new in the catalog coming out in September.

A smallish bow was made from the Crumb Cake color jute in the Neutrals Jute Combo that is also new in the catalog coming in September.  It's attached with a Mini Glue Dot.  The jute really continues the rustic feel of the finished card.

Hope this card idea gets you thinking fall.  Yes, I know there's still a couple weeks left in August for those last summer get-aways or picnics at the beach.  But this heat is so rough on me I'm really praying for cooler weather.  I do thank you for visiting my blog and hope you are inspired to give some of these products a try.  If you're looking for a demonstrator, I'd be happy to work with you.  If you are one of my customers and you haven't received your new September - December 2026 Catalog in the mail from me, please let me know so I can see what's going on.  Most of my customers really do become my friends, and I appreciate each one of you!

Happy stamping and creating,
Sharon

Monday, April 20, 2026

Forever Florals and Peaceful Pine

Hello friends!  It's been a little rough going the past several days.  My AFib seems to be kicking up again and that's never easy to cope with as far as I'm concerned.  But life goes on and I do what I can manage.  I did spend a little time working on today's card.  It's actually taken three days to get it where I wanted it.  This morning I made another change after scutinizing the card again.  I'm happier with this latest "improvement" and I think it's time to share it with you.  I'll post the before picture at the end and you can let me know what you think - before, after, or scrap it.

This is the latest incarnation of the card.  I'm still a little iffy about it, but I'll give you the details on how it was made.  The idea started with the Bloom Boutique Specialty Designer Series Paper which I absolutely love.  The print with tiny white flowers on the Peaceful Pine background was used for this card.  It was cut with the frame die in the Forever Florals Dies to create the greenery frame.

I thought I'd like the print on a white background, but it just looked too busy for me.  So next I thought of creating a frame to go over it with just a small amount of the leaves showing through.  A 5 1/4" x 4" piece of Peaceful Pine was cut.  Then the center was die-cut with one of the Branching Out frame dies.  

I liked the look of these two together, but I didn't really care for it on the white background.  After trying a few possibilities, I settled on using Lemon Lolly for the card base.  The two die-cut layers were attached together with "green glue".  Then they were attached to the card base with the same glue.

Using dies from the same set, one each of the two different flower clusters were die-cut from Basic White cardstock.  The leafy stem was cut from Peaceful Pine cardstock.  It seemed to get lost on the card.   So, using Basic White cardstock and a Blending Brush, Peaceful Pine ink was swirled onto the cardstock until I had a slightly lighter green to work with.  Three more of the leaves were die-cut from this paper.

At this point, I used one of the sentiments to stamp on the Lemon Lolly cardstock inside the frame.  Peaceful Pine ink was used.  As you can see on this card, I wasn't happy with it, and I changed it this morning.

The die-cut leaves were arranged in opposite corners and attached with adhesive.  Then the flower clusters were attached with tiny bits of Dimensionals.  

A double strand of White Baker's Twine was used to make a small bow.  This was tucked in under the flowers and attached with a Mini Glue Dot.

Three of the pretty 2026-2028 In Color Butterflies were sprinkled across the card front.  These are the Peaceful Pine color.

And that's what the card looked like until this morning when I die-cut one of the labels in the set from Basic White cardstock.  The same sentiment was stamped on it with Peaceful Pine ink.  

It was then attached with Dimensionals right over the stamped words.  One of the butterflies had been pried off and reattached onto the label.  Much happier with this version.  The white label seemed to help balance the card better.

I did say I would share the before card also.   So, keep scrolling.  It's right there.

Okay, now I need some feedback.  Was I right to add the white label?  Or should I have left it as is?  Please let me know your thoughts on the matter.

Just wanted to remind you that everything I used to make this card is in the new May - August 2026 Catalog.  The catalog will go live on May 5th - yay!  I can't wait until you can get these products too and have time to play and create with them!  I hope you love all these items as much as I do.  Especially the new In Colors.  They are fabulous and the little butterflies are just darling.  You'll want to add them everywhere!

Okay, that's four of the new In Colors that I've shared so far.  Just one more to go.  I've got a pretty card and also a card layout to share with you to showcase the Barely Blush color.  I think you'll like it.

Hope you're inspired to get out your stamps and paper a go create something special.  And then don't forget to drop it in the mail to make someone happy.

Happy stamping and creating,
Sharon

Thursday, January 2, 2025

New Mixed Florals!

Happy New Year dear friends!  Yes, this is a day late, but I can explain.  Hopefully you're all having a better transition time from last year to this year.  I was really enjoying all the holiday busyness and then Christmas day with my family.   But the cold and sinus bug decided to strike on the 26th.  And that was that for the end of the year.  So not fun!  I'm finally starting to get back my energy and can think straight again, so here I am.  The cards I want to share today were actually made before Christmas and were a fun Sneak Peek of new things to come, but time has slipped away, and the new mini catalog time is almost upon us.  And not just the new mini catalog, but Sale-a-bration and new Online Exclusives too!!  Wow!  So many good things are coming on January 7th.  What a way to start the new year off right!  

When I saw the new Online Exclusives that would be joining the line-up, something caught my eye, and I just had to order it to play with as quickly as possible.  Of course, it was a floral set!  I thought this would be a cute bundle to work with and I was so right.  I've seen some adorable and lovely cards using the tulips in the new Mixed Florals Bundle, but I was drawn to the daisies first.  So, on with the not-so-early Sneak Peek of both the Mixed Florals Bundle and the Mixed Labels Bundle that're coming soon.  Plus, the card is a Fun Fold!  Bonus!

These were so easy to make, and I loved the look so much that I decided to make several of them.  Here are two with just slight changes between them with the placement of the sentiment.

To make this fun fold, start with a card base that measures 8 1/2" x 4 1/4".  It's scored in half, so when folded you have a 4 1/4" square card.  I used Moody Mauve cardstock on these cards.

As an accent, I added a bit of the new Timeless Plaid 6" x 6" DSP from the new mini catalog.  Isn't it pretty with the Moody Mauve and Petal Pink used together in the plaid?  For the card, I used a 4" x 2" piece to go across the bottom of the card.  It's attached with adhesive near the bottom edge.

Next up is the main section of the card.  A piece of Basic White was cut at 4" x 2 3/4" for stamping the daisies.  Memento Tuxedo Black ink was used for this.  The daisies are a little longer than the cardstock, so they were positioned at the top and any excess on the bottom was ignored.

For coloring the flowers, Stampin' Blends were used.
Daisy Petals (only near the centers):  Petal Pink Dark
Daisy Centers:  Pecan Pie Light & Dark
Stems & Leaves:  Old Olive Light & Dark
Tiny Flowers:  Moody Mauve Light & Dark

After stamping and coloring, it seemed to need a little extra color.  I used the Moody Mauve Light Blends to spatter some color overall.  Then, just because, I spattered Wink of Stella on this to give it a little bit of sparkle too.

To finish making the card, a 3" x 4 1/4" piece of Moody Mauve was cut to back the design.  They're attached together with adhesive.  To fit this onto the card base, place the top over the folded base and measure to keep the height no more than 5 1/2" so it fits in the envelopes.  I ended up with a height of 5 1/4" on mine.  Lightly mark on the back of design piece to gauge how much area needs to be left free of adhesive before you put any on the back.  You don't want to have to try to get the adhesive off, so be careful.

Next comes the sentiment which is from the new bundle called Mixed Labels.  Lots of cute sentiments here to choose from in the set.  I chose a simple friendship one and stamped it with Memento Tuxedo Black ink.  Then it's trimmed down to make a small tag that measures about 1/2" by a little less than 2".  Just trim to fit.  This is attached with a Dimensionals strip that is only on the part of the label that is on the design area, so it floats on the right edge.

I'm having trouble keeping track of which ribbons are current or not.  This is a retired ribbon that is Petal Pink and 1/8" wide.  Just perfect for the card.  If you have nothing to match, use a Petal Pink Stampin' Blend or Marker on a white ribbon.  Instant match!  My ribbon is attached with Mini Glue Dots to the bottom of the bouquet on this card.

The inside of the card has a 4" x 4" piece of Basic White cardstock.  Another sentiment from the Mixed Labels was stamped with the same black ink used on the card.  There is a smaller flower stamp in the set that matches the front design.  This was stamped with Moody Mauve in the corner to compliment the design.

Just a last up-close and personal look at this design.  I was surprised that it only took about 10 minutes to do the coloring on this design.  So, this a quick card to make when you're in a hurry, but it looks like you spent more time on it than you did.  Plus, a fun fold card always gets a little more attention.

Hope you're excited to see all the new items that will be available coming on January 7th.  I'm sure you'll find a thing or two that is just what you need.  There are so many different styles and products from which to choose. 

IMPORTANT - Stampin'Up! made a change to the Sale-a-bration requirements.  The basic amount needed to earn a free item is now $60 (or $120 on a few larger ticket items).  So please pay attention to the amount of your order and don't miss out on anything.

Thanks for stopping by today.  Hope you have a happy and healthy new year!  And as always, have fun creating and sharing those creations with your family and friends.

Happy stamping and creating,
Sharon

Saturday, November 30, 2024

Happiest Day Card

Hello friends!  Just wanted to let you know that I'm trying to work on some of those 'works in progress' stacks sitting on my countertops instead of constantly starting something new.  So far, I've managed just fine, but this is only the first day.  Will I make it for a whole week?  We'll see.  But today was an especially productive day.  No, I didn't get started putting away Thanksgiving decorations and getting started on the Christmas decor, even though I should have.  Instead, I finished putting together the Christmas treats for my Sunday School ladies.  I always had so much fun sharing cards or little treats and goodies with my friends in Michigan.  Guess if I start doing it here on a regular basis, maybe some others will catch on to the idea.  I used all retired products for my goodies, so I don't think I'll share that.  But... when I finished them, I picked up a card that was semi-finished and got it out of the way.  I'm pleased with how it turned out, so that's what I'm sharing today.

So Not Christmas!  Or even winter related!  But I was in the mood for pastels and that makes me think of spring.  And these cute little dragonflies from the Happiest Day set are just the perfect fit for spring.  Wouldn't it brighten your day having this show up in your mailbox on a sloppy, grey winter day?  Hope so.

To make the card, I started with a layer of Basic White that measures 3 3/4" x 5".  All the stamping will be done on this layer.  I wanted a really skinny layer to accent the white, so a piece of Basic Gray cardstock was cut to measure 3 7/8" x 5 1/8" to fit.  Then the Basic White cardstock base was cut at 8 1/2" x 5 1/2" and then scored and folded in half.  These pieces were all set aside while I planned the color scheme for the card.

I stamped a bevy of dragonfly bodies to work with color choices.  These were stamped with Basic Gray ink to keep them just a little less harsh with all of those pastels.  And they were stamped on scrap pieces of Basic White cardstock.  I finally ended up with these colors:  Pretty in Pink, Summer Splash, Peach Pie, and Balmy Blue.  The wings on the dragonflies were stamped with some of these colors off-stamped to keep them a little lighter, especially the Summer Splash. Just try your colors out and see what you prefer. Unfortunately, this set does not come with matching dies.  Doggone it!  Luckily, these dragonflies aren't that difficult to cut out.  It only took a minute to cut each one out, so unless you have a whole swarm of them you need, you shouldn't have a problem.

After laying them out on the cardstock, I knew it needed something to really pop the color on the card more.  Using the smallest square die from Stylish Shapes Die set, I cut one small square of each color I used.  The idea was starting to come together but wasn't quite there yet.

The stamp set has several cute sentiments to choose from, and I didn't want the birthday one.  This one I chose is pretty generic and could fit the bill for many uses.  Doesn't it just make you want to smile?  It's stamped near the right edge about 1" up from the bottom edge.  I used Basic Gray ink again to keep it just a little softer.

At this point, the squares and dragonflies were laid out on the card to check spacing.  Still needed a little something more.  The stamp set also has a little bitty stamp with sparkles and dots that could add a little more color and interest.  With the squares held in place, one was removed, and the sparkles were stamped showing out of both sides.  Then the square was set back down to hold my place.  Don't fret when you have a muddled mess of stamping under the squares.  The stamping on either side overlaps in the middle but is covered up when put together.

After the stamping was complete, the squares were attached to the card front with "green glue" on each one.  One Mini Dimensional was placed under the center of each dragonfly and attached to the corresponding color square.

It still needed a little something else.  Ah hah!  Wink of Stella was added to each of the dragonfly wings.  Then I went ahead and spattered the entire front of the card with it too!  This is just so stinkin' gorgeous!  I wish I could have captured the shimmer with the pictures, but they just don't do the card justice.

After all the spattering dried, the white layer was attached flat to the Basic Gray with adhesive and then this was attached to the white card base with adhesive also.

One last little bit was added to my creation.  The little white sequins with a touch of iridescence to them.  I know, I said I was trying to leave all the new goodies alone until I freed up some space occupied with all my semi-finished projects.  But... this is a little sneak peek of a Sale-a-Bration freebie that is coming in January.  Woo Hoo!  Just a little something to look forward to playing with on those long winter days.  Love these!!!  They come in shades of purples and pinks and oh my, are they ever adorable.

Hope you enjoyed our little fast-forward trip to spring.  I really enjoyed playing with an assortment of colors trying to find just the look I wanted to create.  And that just means I've got more dragonflies and squares that are going to have to find their way to another project down the road.  Many times I have an idea that should be fabulous, but when all the pieces are there it's just not what I thought it would be.  Don't be afraid to scratch an idea and rethink the whole thing.  Keep an open mind.  You never know what you might come up with if you don't give up.

Happy stamping and creating,
Sharon


Friday, July 19, 2024

Another Winterly Tree Tops Card

Today I have a card for you that started out as one of the make & take projects Stampin' Up! had for this new stamp collection, Winterly Tree Tops.  It will be available in the new Mini Catalog that will be coming out soon.  I have to admit I really didn't care for the project - it just wasn't me.  Everyone has their own tastes in favorite color combos and design layouts, etc.  This project simply wasn't a favorite for me.  So, I took some of the components that I already had cut to make the project and made my own project instead.  This one might not be one of your favorites, but that doesn't mean you can't take parts of the card design and change them into something you prefer.  Here's my take on the project.  What will you make with this idea?

This project starts with the Mossy Meadow cardstock base.  For a previous project we made, we were told to keep the Basic Gray discard piece that was die-cut from the pine branch frame used for that card.  I didn't care for how the piece was used, so I did my own design with it.  The Basic White piece was cut to measure 5" x 3 5/8".  The Basic Gray discarded piece was attached onto this using Tombow Liquid Glue.  This makes it sort of a reverse design with the background in front and the white pine branches recessed into the design.

A 6 1/4" length of Black & White Checked Ribbon was attached around the layers a bit little below halfway and attached in the back.  All the design elements rest on this.  After adding the ribbon, the layers are added to the folded card base using the same Tombow Liquid Glue.

The bird comes from the coordinating Nests of Winter Designer Series Paper.  It's die-cut using the Winterly Tree Tops die set.  Isn't it wonderful when you can die-cut images right from the DSP, so everything matches up nicely?  It sure makes it easy on us!

The die set also has a couple of small pine branches too.  I cut out several from Basic White cardstock, but it looked like I needed another color in the design.  I tried adding Mossy Meadow pine branches, but I didn't really like that.  Next, I tried some silver branches from the Silver Foil Sheets.  What a perfect addition.  The shine of the silver brightens up the whole card!  The branches are attached behind the bird using adhesive.  Then the cluster was attached to the card over the band of ribbon on the front using Dimensionals.

The sentiment is from the new Greetings of the Season Bundle.  It is stamped on a label cut from one of the label dies that are part of the bundle.  It's stamped using Cherry Cobbler ink, then trimmed down on the bottom edge.  This is tucked up right next to the ribbon going across the card.  A bow made from the same ribbon is attached to the ribbon using Mini Glue Dots to hold in place.  

The bling used for this card is from the Cherry Cobbler & Pearl Adhesive-backed Berries.  I thought they carried the design of the berries the bird is holding to the entire front of the card.

The inside of the card has a layer of Basic White cardstock that measures 5 1/4" x 4".  On this another sentiment from the Greetings of the Season stamp set was stamped with Cherry Cobbler ink.  The extra white and silver pine branches that I die-cut earlier are added in the corner to finish.

Just a reminder that there is just over a week left of Stampin' Up! Bonus Days!  You don't want to miss out on this sale.  For every $50 you spend on merchandise from the catalog or On-Line Exclusives, you will receive a code in your email that is worth $5 off to be redeemed in August.  That's a win for you.  Just don't lose the code(s) that are sent to your email.  No one else has access to them but you, so if you lose it you lose out on the savings.  Have fun shopping.  I know I have!

Happy stamping and creating,
Sharon

Wednesday, July 10, 2024

New Winterly Tree Tops Bundle is Gorgeous!

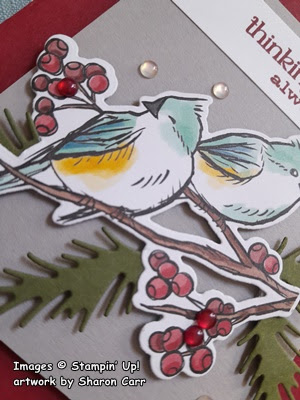
 Hello Friends!  I just have to give you a sneak peek to a lovely stamp and die bundle along with the gorgeous new DSP that coordinates with it!!  This will get you in the mood for Christmas, but that's not the only season it covers.  The images and sentiments are generic enough to work all year long.  This is a new collection that will be coming in the fall mini catalog soon.  Demonstrators were able to create with these this month to get a feel for them and come up with ideas.  The name of the bundle is called Winterly Tree Top, and the DSP is called Nests of Winter.  You can use all these items together, but they work just as well separately.  Stampin'Up! gave us instructions to make several projects and today I want to focus on one of them.  First, I'll share what my version of the first project was, then share the original project.  I think you'll love both versions!  On to the new Winterly Tree Tops!

Here is my version of the project.  This one has a Christmas feel to it with the Cherry Cobbler colors and the evergreen branches added to the design.  This layout is the same as the original project and is a good one to use anytime.  The dimensions are:
Cherry Cobbler - 8 1/2" x 5 1/2", folded in half
Gray Granite - 3 1/4" x 4"
Basic White - 3/4" x 3 3/4"

The main focal point of the birds come from one of the sheets of the Nests of Winter DSP that have birds that can be die-cut using the coordinating dies in the bundle.  Don't you love it when you've got these beautiful images you can use, and you don't even have to fussy cut them out!!  I know there are some of you that hate fussy cutting anything, so this is made for you.  How exciting, and it makes the creating so much faster.

After die-cutting the birds, I used another die from the set to cut four of the pine branches from Mossy Meadow cardstock as an accent for the card.

All of the design pieces would be built up of the Gray Granite cardstock piece, so I was using that to measure the placement of the pine branches.  They are attached behind the birds and attached with multiple Mini Glue Dots to hold in place.  When they were positioned how I liked, multiple Mini Dimensionals were added behind to hold everything in place and raise it up from the Gray Granite layer.

The sentiment is from the Winterly Tree Tops stamp set.  I love this sentiment and I've been using it on other projects already.  (Check back to one of the pear cards that it was used on.)  The sentiment is stamped with Cherry Cobbler to match.  Then the label is attached to the top of the Gray Granite layer overlapping on each end of the label.  It's attached with adhesive.

The Gray Granite layer is attached to the folded Cherry Cobbler card base using Dimensionals.  I was going to attach it flat, but it looks so much better with the Dimensionals.

The gems added to the design are from the Cherry Cobbler & Pearl Adhesive-backed Berries that are part of this collection.  Can you see the Cherry Cobbler dots are added to the berries?  The semi-clear dots are then added to the background.  The clear dots have just a hint of the Cherry Cobbler color to them which is a nice touch.

OK, that's my version of the original card that was part of the projects.  Let's see the differences.

The card base is Blackberry Bliss with the next layer of Crumb Cake.  Don't these changes already make a huge difference in the overall look?  This card makes me think more of fall with the warmer colors.

The birds and a few 'pussywillow' type branches are stamped with Memento Tuxedo Black ink onto Basic White cardstock.  The images are colored with Stampin' Blends.
Birds - Ivory Blends with Color Lifter to add highlights
Branches and beaks - Bronze Blends
Berries - Cherry Cobbler Blends with Color Lifter at the top of the berries

For this card, the sentiment is stamped with Mossy Meadow ink.  The strip of Basic White cardstock is about 5/8" wide.  

The card is put together the same with the sentiment on flat, the birds popped up with Dimensionals, and the whole Crumb Cake layer is popped up with Dimensionals also.

The gems were a surprise to me.  I know you can color rhinestones and pearls, but I never thought to color the Flat Adhesive-backed Pearls.  They have a lovely iridescent look to them that I never thought to try coloring.  These pearls are colored with the Bronze Blends and this gives the pearls a wonderful warm look to them.  Perfect for this card.  I'll have to remember this idea.

Well, there you have two ideas to get you started when you get the new Winterly Tree Tops Bundle in September.  It's definitely worth the wait and you're going to love the possibilities.

Thanks for checking in today.  Hope you like these two versions of basically the same card.  This is a great way plan your cardmaking when you're in a creative slump, and we all have them!  Find a layout you like and see how you can do your new version of it.  I've already got some ideas for this layout using the Cheerful Daisies and also the Magnolia Mood sets.  We'll have to see how they turn out.

Bonus Days are still going on through the end of July.  For every $50 you spend, Stampin' Up! will send you a coupon code for $5 off to use in August.  Don't you love those sales?!

Happy stamping and creating,
Sharon

Monday, June 24, 2024

Penciled Pears Again

Hello Friends!  I've got another card to share today that uses the interesting Penciled Pears again.  I wasn't sure this would be on my list of must-have stamps, but Connie proved me wrong.  I'm so happy I was able to give the set a trial run at her house.  It totally convinced me that it was a good idea to order it!  She had already made a card with the set when I got there that intrigued me, but it used several items that were not current SU! products.  I wanted to stay current with what I was using, so Connie and I made another set of cards basing them loosely on her original.  Let's look at them all and see what you think.

First, I'll share my version of her original card.  I seem to be on a kick of using the new Basic Beige cardstock and ink.  I just love this color that enhances any card with a neutral look.  It seems to be my new go-to color!  The card base measures 8 1/2" x 5 1/2" and is folded in half.  The strip of four Penciled Pears is stamped with Basic Beige ink.  I staggered them going across the card front so they look a little more random. 

The large pear is stamped using Basic Beige ink on Basic White cardstock.  A little extra color was added using Soft Seafoam Light & Dark Blends on the pear and leaf, Old Olive Light on the stem and light touches in the shading of the pear and leaf, and Gray Granite Light on the shadow under the pear.  This was die-cut using the Countryside Corners die set.  The pear was kept near the top of the die-cut area.  

A larger die from the set die-cut a piece of Soft Seafoam cardstock to frame the pear.

Sneak Peek Alert!!  I love the sentiment used here.  It's from a set called Winterly Tree Tops.  It won't be available for a few months, but it is coming!  All I can say is you'll love it!!  Anyway, the sentiment is stamped with Memento Tuxedo Black ink on the bottom area of the die-cut.  

After stamping, the Basic White layer is attached to the Soft Seafoam layer with adhesive.  Some Linen Thread was wrapped around three times and tied into a loose bow.

The die-cut layers are attached to the card front using Dimensionals.

Three Opal Rounds gems are added to the design.

Now on to Connie's version of this design...

The first change is the Basics Embossing Folder that was used for the background of her card base instead of the stamping.

The same Countryside Corners die set was used on the Basic White cardstock, but the layer is changed to Lemon Lime Twist.  This automatically gives the card a much greener look.  

The pear is stamped just about in the middle using Basic Beige ink.  Touches of color are added with Stampin' Blends:  Light Soft Seafoam, Light Crumb Cake, Light Old Olive, Light Gray Granite, and Light Granny Apple Green

After coloring, the two die-cuts are attached together with adhesive.  Then they are attached to the card front using Dimensionals with the top very close to the top of the card base.

The same sentiment is stamped on a strip of Basic White cardstock using Gray Granite ink.  Looks like the strip is about 3/4" x 4 1/4".  It's attached flat to the card front.

For an embellishment, three of the Tinsel Gems 4-pack are attached to the white die-cut under the pear.

This is a picture of the original card Connie made.  Looking at it you can see different elements we each picked out from it to focus on for our cards.

I'm not going to give you a list of items used, because I don't have it written down anywhere.  I'll just give you a quick summary instead.  

There is a light green foil used in the band across the card and to frame the sentiment.  

There is a yellow color added to parts of the pear for added interest.

There are three olive-toned gems added to the finished card for embellishment.


That's all I can give you today.  I hope you enjoy the three different versions using this interesting Penciled Pear stamp set.  Like I mentioned earlier, I didn't think I needed this set, but I've changed my mind after creating with the pears.  Hope you give this set a try and see what you create with it.

That's it for now.  I'm visiting the doctor tomorrow as this sneezing and coughing and congestion stuff is hanging on.  It's been almost two weeks now, and that's just too long!  Wish it didn't make me so exhausted all the time.  Maybe my doc has a miracle cure and I'll be back to myself soon.

Happy stamping and creating,
Sharon

Monday, November 6, 2023

Sneak Peek Times Two

Hello there!  Today I've got two cards that were made at the same time using one piece of 6" x 6" One Horse Open Sleigh Designer Series Paper.  But that's not all.  These two cards are also using the new Meandering Meadow Dies.  What are those you ask?  The Meandering Meadow Suite of products will be added to Online Exclusive lineup on the Stampin'Up!' website.  This is an awesome grouping of stamps, dies, DSP, and embellishments that you're gonna love!  And you can purchase any or all of this suite starting November 7th.  Woo Hoo!  That's why I figured today would be the perfect day to share this idea with all of you.

The first thing I noticed about this cool arched die is that it takes 3" of paper to cover the opening.  Instead of cutting a full 6"x 6" sheet, I cut it in half to get my first piece to use.  This is from the One Horse Open Sleigh DSP which is also one of those Online Exclusives.  And it's simply gorgeous!  I've already used most of my pack of this paper, so I was grateful to have a piece that looked perfect on this archway.  Did you notice the radiating hash marks around the archway?  This shows on both the inside (shown) and the outside of the die.  This will show up on the other project.

For this card, I started with a card base of Petal Pink that measures 11" x 4 1/4" scored and folded in half.  Next is a layer of Misty Moonlight cardstock that measures 5 1/4" x 4".  For some texture on this piece, I used the Exposed Brick Embossing Folder.  The die-cut DSP is attached to the center of this with 'green glue'.  

The next step was wrapping a length of Silver & White Sheer Ribbon around the two layers and tying into a knot in the front.  I like the sheerness of the ribbon, so the DSP print still shows through.  At this point, the layers are attached to the folded card front using Dimensionals.  I used six of them to hold the card layers up evenly.

As an accent, I liked the Adhesive-backed Snowflake Assortment for this.  The white snowflakes showed up nicely on both the DSP and the Misty Moonlight.

The inside of the card is a layer of Basic White that measures 5 1/4" x 4".  A sentiment is stamped with Misty Moonlight ink.  Some snowflakes from the Wishes All Around set were stamped in the corner with Petal Pink ink to coordinate with the card front.

Now on to the 2nd half of that piece of One Horse Open Sleigh DSP that is left over from this card.

Since I really liked the Petal Pink with this DSP print on the last card, I decided to stick with the same color palette.  

This time Misty Moonlight was used for the card base.  It measures 8 1/2" x 5 1/2".  It's scored then folded in half.  For the next layer, I reverted back to the Petal Pink cardstock.  This measures 5 1/4" x 4".  That same arched opening was die-cut close to the top of the piece, so I'd have enough room for a sentiment.  Can you see the tiny hash marks surrounding the archway?  Such a cute accent!

The sentiment is from the Night Divine stamp set.  It's one of the few sentiments I had that really fit into that skinny space.  It's stamped with Misty Moonlight ink.

The leftover 3" x 6" piece was positioned behind the die-cut the opening to my liking.  Then it was trimmed top and bottom to fit without showing.  It's attached with adhesive to the back of the opening.  

The ribbon that ties around these layers is from the Copper & Natural Ribbon Combo.  It looks a little harsh on the card here because you really don't see the metallic shine in the picture.  That shine really changes the look in person.

The layers are attached to the Misty Moonlight card base using Dimensionals to give it some depth.  The other accent on this card is also from the Adhesive-backed Snowflake Assortment.  I thought the copper color went really nicely with the soft pink and dusty blue in the DSP.

The inside on this card was finished off in the same manner as the first card.   Why mess with a good thing?

There you have it.  Two cards that are similar, yet almost opposites that totally focus on the arched die and the lovely print from the One Horse Open Sleigh DSP.  The Meandering Meadow Bundle has a coordinating Designer Paper pack, but I'd been looking for another way to use this paper.  So why not mix & match?

Remember I mentioned that the Meandering Meadow is available on November 7th for everybody.  It's going to be one of my favorites because there are stamps and dies that can be used year-round, not just for a single holiday.  You can find it at the Stampin'Up! Online Exclusive section.  Click HERE to go directly to that page.  Happy shopping.  Look around and see what's new.  You might just find the perfect gift for a family member or friend.  Thanks for shopping with me.  I appreciate all orders!

Happy stamping and creating,

Sharon 

Saturday, February 25, 2023

Irresistible Blooms

Hey!  Hope you're doing great today.  I've been playing with the Irresistible Blooms again.  Love that whole suite of gorgeous papers, stamps, dies, just all of it!  It seems so different than other sets.  Mostly because of those two "dotty dies" - the lines of dots that remind me of a beaded curtain, and the circular frame with dots.  Both are so unique and I'm having so much fun creating with them.  You're going to want to play with these goodies too.  Just a few more days and this suite will be available to you as an Online Exclusive, along with even more items that I don't even know about yet.  Can hardly wait.

Here is today's creation.  The colors here make it look so soft and misty.  Don't you just love it?  I hope so!  I've mentioned earlier that Stampin'Up! is bringing back the retired Lost Lagoon color when they do a color revamp on the next Annual Catalog.  Did I mention that I love that color!  Oh yeah, I guess I did.  Lost Lagoon is one of the major colors used on this card.  The die-cut layer is Lost Lagoon, the leaves are water-colored with that color, and the sentiment is stamped in that color.  Yes!  Let's get making it.

The first thing I did was cut the Lost Lagoon cardstock and die-cut it.  It measures 4 3/4" x 3 3/4".  Yes, that's an odd size for a layer, but I wanted to do something a little different.  The circular frame with dots was cut from the center of this piece.  

A piece of the new Hello, Irresistible Designer Series Paper was cut approximately 3 1/2" x 4" to fit behind the die-cut frame.  Adhesive was applied to the back of the frame only right near the frame, not the outside edges of the piece.  I did NOT put any adhesive on the dotty circle area either. 

Next a card base of Soft Sea Foam was cut.  It measures 10" x 4", scored at 5" and folded in half.  The layers that we just worked on are attached to this with Dimensionals.

The two different flower stamps were stamped on a Shimmery White cardstock scrap using VersaMark ink.  This paper is found on page 140 in the Annual Catalog.  I chose it because it's a little more forgiving when you're water-coloring and adding layers of ink and water.  The three sets of leaves were also stamped with VersaMark ink.  A coating of White Basic Embossing Powder was added to these pieces, then the excess was tapped off.  Carefully heat set with the Heat Tool so all the embossing powder melts but doesn't burn.  It's a little hard to see white on white, but I love this technique.

The images were water-colored with the Water Painter found on page 129 of the Annual Catalog.  While painting them I went outside of the lines because I didn't want a white cardstock edge competing with the white embossing.  For the flowers a Calypso Coral ink pad was used to create varying colors.  The leaves were water-colored with Lost Lagoon ink.  Both the flowers and leaves had touches of Daffodil Delight ink added to them.  After painting them, touches of Wink of Stella were added for shine.  Then all the pieces were die-cut using the coordinating dies.

The sentiment used is also from the Irresistible Blooms stamp set.  It's stamped on Basic White cardstock using Lost Lagoon ink.  Then it was fussy cut and ready to use.

The flowers and leaves were slightly curled with a Bone Folder to give a little dimension.  Then were arranged to my liking on the card front.  Most were attached with adhesive to be fairly flat.  The smaller flower was added with a Dimensional in the center.  The sentiment was tucked into the flower cluster and attached with Mini Dimensionals.

To stay with the dotty theme going on here with the DSP and the die-cut frame, some Loose Frosted Dots were scattered across the card.  I used both the pink and yellow ones and the three different sizes.  The larger ones are attached with a Mini Glue Dot.  The other two sizes are attached with just a touch of Multi Purpose Liquid Glue.

The finished card measures only 4" x 5", so it's smaller than usual.  I will still use a regular Medium (A2 size) envelope to mail out.

Thanks for stopping by to catch another sneak peek of this lovely new Online Exclusive stamp set bundle that will be showing up on the Stampin'Up! website on March 1st.  Just in time for all of your spring and Easter cards.  It was fun to heat emboss a project today.  I love the look and don't know why I keep forgetting to use it.  Maybe I need to just leave it sitting out on my work-table instead of putting it away.  Hmmm, what do you think?

Happy stamping and creating,
Sharon

Thursday, February 16, 2023

Irresistible Blooms Bundle

Hey friends, have I mentioned that I'm loving this new bundle that is an Online Exclusive?  I'm having so much fun creating with the different aspects of this bundle.  I love everything about it - the stamps, dies, DSP - all of it!  Today's card will focus more on the dies.  Especially one very special die and a helpful tip to go along with it.

This is a very clean looking card that looks a little plain until you really look at it.  Oh my, there's so much going on here, but it's not a hard card to make at all.   Let's walk through it together.

This card starts with a base of Basic White Thick cardstock that measures 8 1/2" x 5 1/2".  This is scored and folded in half.  

Tip:  Whenever I use the Basic White Thick cardstock for a card base, I always score it before folding.  This helps give you a crisp crease in the thicker cardstock.

The first layer we'll deal with is regular Basic White cardstock.  This measures 5 3/8" x 4 1/8".  It is embossed with the Timeworn Type 3D Embossing Folder.  This gives a nice randomly textured background.  It's set aside for use later.


Next, I measured the lines and circles die that is part of the Irresistible Blooms Die set.  Wasn't sure how this would work out, but that was my learning experience for today.  I cut a piece of the Hello Irresistible Designer Series Paper that measures 6" x 1 1/4".  It will go behind that darling die-cut piece.  The length is a little longer than needed, but that will be trimmed off later.

Tip:  When using this die, I've found that is works easiest when you put Adhesive Sheets (found on page 127 in the Annual Catalog) on the back of the cardstock before die-cutting.  Run it back and forth 2 - 3 times to make sure all the layers are cut.  This gives it a little more rigidity and you don't have a struggle to put adhesive on later to attach it to your project.

Die-cut the Basic White Thick piece of cardstock, then peel off the backing of the Adhesive Sheets.  Attach the die-cut to the DSP being careful to line it up straight.  Trim the ends to fit on the embossed layer.  Attach it all to the embossed layer about 1/2" from the left edge.  Use Tombow MultiPurpose Liquid Glue to attach these together.  Then use the same glue to attach it to the folded card front to keep everything pretty flat.

The sentiment is from the Irresistible Bloom set.  It is stamped with an old ink color, Lost Lagoon, that I've always loved.  (And have you heard that Stampin'Up! is planning a color revamp?  This favorite color of mine will be coming back!  I know Pretty Peacock will be returning also.  Woo Hoo!)

The sentiment is stamped on Basic Whie cardstock then die-cut with one of the longer Rectangle Stitched Dies.  It's attached to the card front with Dimensionals.

See, I told you the card really wasn't too hard.  Just follow the tip for using the lines and circles die and you'll do fine.  I love how crisp the card looks with large amounts of 'white space' to be calming, but all that texture and detail that makes it very interesting.  Hope you're inspired to give this idea a try.  This stamp bundle and more will be available on March 1st.  Don't forget to check all the goodies out.  Remember this is an Online Exclusive only, so don't bother looking in any of your catalogs for it.  You won't find it there!

Thanks for stopping in to see what's new.  More new goodies to come soon.  Stay tuned!

Happy Stamping and Creating!
Sharon

Wednesday, December 29, 2021

Amazing Silhouettes Sneak Peek

Wow, the time has been really flying by this past week.  I managed to design two cards and thought I'd have them posted already.  But alas, my planning isn't quite lining up with reality.  Today I'm sharing a card that I made to enclose with all the catalogs that I put in the mail today.  Yes, that's running slower than I had planned too.  But at least there are a whole pile of catalogs that were taken to the Post Office earlier today.  Now it's up to the Post Office to see how long it's going to take to get them to all my customers.  If you don't have one in the next ten days, please give me a call and I'll see what I can do.  Anyway, back to the card... 

As a demonstrator, I signed up for the Stampin' Up! Onstage event last November. One of the many fun things I received is this Amazing Silhouettes stamp set which will be available January 4th in the new January - June 2022 Mini Catalog.  It's so much fun getting stamps early!  There are three stamps in this set and they all look like this one with just a silhouette image.  I love the look of these stamps.   And I'm amazed at the amount of detail that shows from just having the image in silhouette like this.  They are really gorgeous.  This is the largest stamp, and after using it on these cards, I'm going to have to try out the other two stamps to see what I come up with.

Because I was making a whole pile of these cards, I was looking for a simple layout that wouldn't take too much time.  I set up the stamp on my Stampa-a-ratus and just stamped away on card after card.  What did I ever do before the Stamp-a-ratus?  It makes stamping multiples so quick and easy, and you always get the image exactly where you want it.  Some of the cards I stamped with Soft Succulent and some with Mint Macaron ink for a slightly softer look.

The color for the card base is the Soft Succulent cardstock cut at 8 1/2" x 5 1/2", scored and folded in half.  This seems to be my favorite color lately.  Out of the last three cards I've designed, all of them use Soft Succulent for the main color.  Hmmm, guess I really like it!  The next layer was Basic White cardstock cut 4"x 5 1/4".  The image was stamped over to the right side.  A 1" x 5 1/4" strip of Harvest Meadow Designer Series Paper was cut and attached to the left side on the Basic White cardstock piece using MultiPurpose Liquid Glue.  Then the Basic White layer was attached to the Soft Succulent base using the MultiPurpose Liquid Glue again.

I used the sentiment from the Inspired Thoughts stamp set that's found in the 2021-2022 Annual Catalog.  I like the way the font skips between all caps and all small letters.  Just something a little different.  I couldn't find a plain Thinking of You in the set, so I used a Soft Succulent marker and just inked the words I wanted.  This is actually a birthday sentiment, but you'd never know.  

TIP:  Make sure you really look at your sentiment stamps to see if you can use just a portion of the stamp to say what you want.  It's so easy to ink up only the words you need using a marker.

The sentiment was stamped on a Basic White strip and then backed with a slightly larger piece of Soft Succulent cardstock.  It was attached to the card front using several Dimensionals.  A tiny knot of Soft Succulent 3/8" Open Weave Ribbon was attached to the left side of the sentiment using a Mini Glue Dot.

As you can see on this last picture, I splatter-tapped some Wink of Stella on the front of this card.  Some cards I left simply plain.  After giving it a lot of thought, I decided to keep the card 'bling-less' this time around.  I really liked the nice, clean look of this card.  Hope you do too.

Well, that's it for today's installment.  Please continue to keep checking in with me.  I'll try my hardest to get more consistent with my posts.  You know, the best laid plans of mice and men oft times go astray.  And I seem to be having a lot of that 'astray' going on!  😁 

Happy creating and stamping!
Sharon

Thursday, November 18, 2021

Eden's Garden, Just Because

 Hey there!  Hope this finds you doing well and in a crafty mood.  I've been playing with my new Eden's Garden Bundle over the weekend.  This went so much better than the first sit down with this Bundle.  The first time around, I was so focused on making my samples something other than green, because that's what everyone else was doing.  I felt I needed to do something different so I wouldn't be copying what you've seen already.  Well, enough of that!  There are so many different ways to put the green cardstocks and DSP together without copying!!   So I finally sat down and just had fun with it.

Here's my card using all the parts of the Eden's Garden Bundle with both the Soft Succulent and Evening Evergreen colors.  I love how simple this came together!  Especially after struggling with it last time around.  

The card starts with a base of Soft Succulent cut  8 1/2" x 5 1/2" folded in half.  The first layer is one of the lovely green prints with just a tiny speckling of gold from the Ever Eden Specialty Designer Series Paper.  On each of the papers, one side has the addition of gold foil in different designs.  This print has teeny tiny dots.  So pretty!!  The DSP was cut 5 1/4" x 4"  and attached to the card base with adhesive.

Next, the large wreath die was used to cut the Evening Evergreen cardstock into this gorgeous open-leaf design.  Isn't it just beautiful?!?   If I'd been thinking, I'd have used some of the Adhesive Sheets behind the Evening Evergreen cardstock so I could have just peeled it and stuck it down.  Alas, I forgot about that and had to use my MultiPurpose Liquid Glue on the solid leaf images to hold it in place.  It's not really hard, but whenever you can make something easier and quicker, why not?

The leafy banner was die-cut from Soft Succulent cardstock.  It was attached across the center of the card using Dimensionals.  Now it's time for the sentiment.  I  chose to use the Lovely You stamp set this time.  The sentiments have a mix of fonts on each stamp which is a look I love.  And the sentiments seem to cover many of the everyday sayings you might want to use.  This was stamped on a scrap of Basic White cardstock using Evening Evergreen ink.  It was punched out using the Label Me Fancy Punch.  I stamped closer to the top so that I could add a few of the leaf parts that are scrap left-overs after die-cutting the wreath and banner.  Can you see where they pop out of the die-cut piece?

Did you notice the pretty rhinestones?  They're part of the Eden's Garden package.  There are marquise cut green tones and the round ones are Cherry Cobbler.  The rhinestones have an iridescent sheen to them, so on this shot it's really hard to tell the color.  But believe me, they're quite lovely.

Can you see the little dots between the greenery in this picture?   Those are the tiny gold foil dots.  I couldn't get a picture that really showed how nice the paper is.  So I guess you just need to take my word for it... or order some for yourself!  😄

That's it for this post.  I want to remind you that you too can get the Eden's Garden sneak peek items now through the end of the year - or until they run out.  The Ever Eden Specialty DSP, the Cotton Paper, and the Garden Gems all will be unavailable after they run out.  They will NOT be in the new mini catalog coming out in January.  So if you want them at all, now is the time!  The Eden's Garden stamp set and the Eden Dies WILL be in the next mini catalog.  So it's up to you to get them now or not.

If you're reading this on Nov. 18th, Stampin'Up! is having a Seasonal Sale.  This sale is only items from the large Annual Catalog.   Sorry I'm catching it at the end of the sale.  With friends in from MI I'm kind of all off kilter and not on top of things.  So Sorry!!!

     All regular cardstock is 10% off
     All SU! ink pads are 15% off
     All dies are 20% off

Hope you're enjoying some nice, crisp fall weather.  It's still pretty warm here, but the temps will be dropping the rest of the week.  But I have to say, I've truly been enjoying the weather in the low 70's.  It's been colder at night, and the leaves are changing colors - and they're falling a lot too!  Dear hubby is outside trying to corral those leaves as they fall today.   Have a very blessed day!

Happy stamping and creating,
Sharon