Showing posts with label Stylish Shapes Dies. Show all posts

Friday, August 15, 2025

Blended Background Prairie Grass

Hello Friends!  Today I'm going to step away from that fabulous Sunflowers 3D Embossing Folder and do a little creating with the new Prairie Grass stamp set I just received.  This is a little stand-alone stamp set that is a real treasure as far as I'm concerned.  There are three silhouette images and five sentiments to use.  You'll only find it in the Online Exclusives section in the online store.

The first time I saw this stamp set, I knew exactly what I wanted to do with it.  I love doing blended backgrounds and this would be the perfect setting for this large stamp.  The large stamp in the set almost covers a whole card front.  But it's still so delicate looking and the background shines through very nicely.  Let me walk you through the steps to make this lovely card.

The first decision was the color of the cardstock for the design layer.  I chose Basic White because I wanted the sun to be a bright white area instead of a vanilla shade.  The Basic White cardstock was cut to measure 3 3/4" x 5".  Then the large grass stamp was stamped onto this using Memento Tuxedo Black ink.  The image was positioned near the left side and the top of the grass was about 1/4" from the top of the cardstock.  This leaves a small bit of the stamp that is off the bottom of the cardstock.
The next step was die-cutting a 'mask' for the sun area.  I used one of the Stylish Shapes Dies to cut a circle from Masking Paper.  This is something I don't use often, but it really comes in handy to mask off an area when needed.  It can be re-used more than once if you're careful putting it on and off, so it's great when making multiples of the same card.

The mask is positioned tucked into the stamped design to make it look like the grasses were partially in front of the sun.

The first color that is blended onto the design is Daffodil Delight ink.  The ink is added heavier near the edge of the sun and blended out at least an inch.  Next some Coastal Cabana ink was very lightly added.  Then Balmy Blue ink was added to the edges in the sky area.

Next up is working in the ground portion of the picture.   First, I tried adding Granny Apple Green, but it didn't have enough depth to ground the card.  Then Old Olive ink was blended onto the design.  Perfect.

Carefully peel off the mask to use again if desired.  

The sentiment used here and inside the card is from the Hope You Know stamp set.  Lots of lovely sentiments in this set.  The hello was stamped with Memento Tuxedo Black ink inside the sun area.

I wanted some birds flying in the background.  The bird stamp in the Sunrise Sailing stamp set was stamped 3 times to fill the design a little.  Memento Tuxedo Black ink was used for these too.

It was time to get the card put together.  This layer was attached to a Basic Black layer that measures 4" x 5 1/4".  They are attached with adhesive.  After adhering together, Linen Thread was wrapped around the bottom of this three times then tied into a knot.  The ends of the thread were frayed.

This was all attached to a folded Old Olive cardstock base.  Dimensionals were used for this.

The inside of the card has a Basic White layer for the sentiment that measures 4" x 5 1/4".  This sentiment coordinates with the sentiment on the front and is stamped with Memento Tuxedo Black ink.

To coordinate with the front, I stamped part of the large image along the left bottom corner of this layer.

The edges all around this layer also have a small amount of Balmy Blue (top 2/3) and Old Olive (bottom 1/3) blended on.  I liked just a little bit of the extra color added here.  I also added a 1/4" strip of Basic Black cardstock to the bottom edge with adhesive.

This layer was added to the inside of the card with adhesive.

One last look at the final design.  Oops, I forgot to mention that two of the Adhesive-backed Dragonflies & Birds were added to the design.  I thought they coordinated well with the stamped birds and added just a small touch of bling.


Just a reminder that the 2025-2027 In Color Sale is going on through the end of the month of August.  There are actually three pages of products that are on sale for 15% off.  You don't want to miss this sale.

Thank you for stopping by today to see what I've been working on lately.  Hope you give this idea a try and then come back for another idea boost.  Should I add another card idea or two using the Sunflower 3D Embossing Folder?  I still have more ideas, but I don't want to totally bore you with them all.  Just because I'm nuts about this embossing folder doesn't mean everybody else is.  So, what do you think??  Whatever you prefer, make sure you keep creating and then sharing your "art with heart" with your family and friends.  It's sure to put a smile on someone's face!

Happy stamping and creating,
Sharon
sharoncarr50@gmail.com


Tuesday, July 15, 2025

Using a Basic Template

Hello friends.  Today I've got a whole pile of cards to share with you.  It all started with a Basic Template using a piece of 6" x 6" DSP to cut all the main pieces.  My template I used is very basic and can be cut either way, depending on the direction of the print and what you want to do with it.  First, I want to show you a picture of the 5 cards that are made from one 6" x 6" piece.  Then we'll get into the cutting and details to make these cards.

The DSP that was used for these cards is maybe my favorite print in the Floral Charm DSP pack that is part of the Charming Day collection.  The roses are a pretty soft color with Night of Navy and Pretty Peacock leaves.  It's just yummy.   Of course, when I create with the other prints in the set, I fall in love with the other designs too.  Guess this DSP pack is definitely my favorite at this point!

Anyway, can you see how just a small amount of this print can go a long way?  It's so pretty even when you've only got a 1 1/2" x 3 1/2" piece!

Let's get to the Basic Template that I used.

Sorry, this isn't all fancy like other people can make it.  When I'm working out a design, I just make a sketch and add dimensions for it.  That's it.  But you can see exactly what you need and how to cut.  Want to give it a try?

The first card up is using the top left piece of the Basic Template.  This measures 3" x 3 1/2".  I decided to use Fresh Freesia for the card base even though that's not one of the colors that are recommended for this.  I just liked how it looked, so that was my choice.  

The DSP is framed with a piece of Night of Navy cardstock that measures 3 1/4" x 3 3/4".  It's attached to the base with Dimensionals.

The sentiment is from the Charming Day set and is stamped onto a Basic White circle using Night of Navy ink.  It is die-cut with the Stylish Shapes Dies.  It's backed with the next largest circle cut from Night of Navy cardstock.  The circles are attached together with adhesive.  Then they are added to the card with adhesive where they overlap the DSP and Dimensionals on the right side to keep it flat.

A sheer white ribbon with silver edges was cut in half and then both pieces were tied into a pretty bow.  A trio of Purple Fine Shimmer Gems in the plummy color were added to finish the design.

Next up is one of the two left side pieces of the Template that measure 1 1/2" x 3 1/2".  This time the card base is Bubble Bath.

A 2 1/4" x 4 1/4" piece of Berry Burst was cut for an accent.  About 1/2" was ripped from the right edge.  Then it was embossed with the Distressed Tile Embossing Folder to give it extra interest.  This was attached about 1/2" up from the bottom of the card using Tombow Liquid Glue (green glue).

Next a piece of Night of Navy was cut to frame the DSP.  This measures 1 3/4" x 3 3/4".  They are attached together with adhesive.  Then they're attached flat to the card base right over the Berry Burst layer.  I used "green glue" again for this layer.

The sentiment for this card is from the Unbounded Love set.  It's stamped with Night of Navy ink onto a circle cut from the smallest circle die in the Stylish Shapes Dies.  It's backed with the next largest circle from the same die set.  This is attached over the corner of the DSP using both adhesive and Dimensionals so it lays flat on the card.  

I happened to have a small open leaf die-cut leftover from a precious project that was in Shaded Spruce.  This was tucked in slightly under the Berry Burst layer for some added interest.

There are three gems from the 2021-2023 In Color Dots that are added to the card.  They were originally supposed to match with Moody Mauve, but I loved the look on this card.

This card uses the 2nd small piece of DSP from the left side of the template.  I'll confess, I had quite a time making this card and I'm not sure I got it right.  If anyone has any suggestions, I'm open to hearing them!

This card started with a lovely die-cut from the Charming Day set.  It's cut in Berry Burst so I thought it would go with this idea.  

The card has a base of Pretty Peacock cardstock.  The DSP has a layer of Night of Navy framing it that measures 3 3/3" x 1 3/4".  It's attached near the bottom of the card front using Dimensionals.

The berry die-cut has some Mini Dimensionals under some of the wider areas to give it lift.  Then part of one of the flowers is tucked under the DSP and some leaves are brought forward on the design.

The sentiment used here is from the Perfectly Pears stamp set.  The die used to cut the label is from the same set.  It's stamped with Night of Navy ink.  There are Mini Dimensionals behind this to elevate it to match the rest.

Three of the Pecan Pie & Clear Ribboned Adhesive-backed Dots are added to the design to finish it.

The fourth design features the piece of DSP from the top right of the Basic Template.  This piece measures 2 1/2" x 4".  The layering piece is Night of Navy cardstock that measures 2 5/8" x 4 1/8".  The pieces are attached with adhesive. 

The card base for this design is Bubble Bath cardstock.  The two layers are attached to this with Dimensionals.

There is a die-cut of Pretty Peacock leaves added to the bottom left corner.  It's attached with dots of "green glue" on some of the leaves to hold in place.   

There is an open rose die in the same set that was used to cut this Berry Burst rose.  It's attached over the leaves with several Mini Dimensionals.

The sentiment is from the Perfectly Pears stamp set.  It's stamped onto a small label that's cut from the same set.  After stamping, it's attached flat to the card front with adhesive.

There are three of the Pecan Pie & Clear Ribboned Adhesive-backed Dots added as a pretty accent.

This one might be my favorite card of the batch.  At least for now!

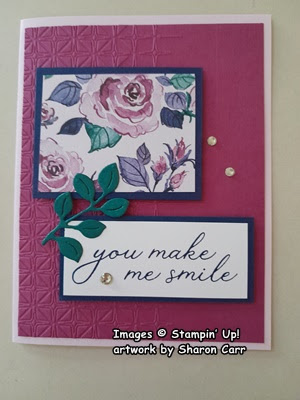
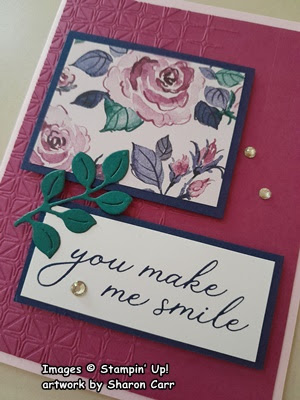
This is the last card of the batch.  It uses the DSP piece from the bottom right-hand corner.

The card base is Bubble Bath again.  There is a layer of Berry Burst that measures 5 1/4" x 4".    To add some interest to the layer, I used the Glass & Garden Embossing Folder for texture.  I like how subtle this is, but it does make a difference.

The sentiment is from the Sweet Blooms stamp set.  It's stamped with Night of Navy ink onto a 1 1/4" x 3" strip of Basic White cardstock.  It's framed with a layer of Night of Navy cardstock.

The DSP piece is layered with Night of Navy cardstock.  This piece and the sentiment label are positioned on the card front.  Both pieces are attached with Dimensionals.

There is another leafy sprig from the Charming Day set added here.  It's die-cut from Pretty Peacock cardstock.  It bridges the two pieces and is attached with adhesive under just a few leaves.

The last bits on the card are the Rhinestone Basic Jewels in clear.  I thought they were all that was needed.

Ok, you've now seen all five cards that were made from one 6" x 6" piece of the Floral Charm DSP.  It was challenging to stick with those five pieces and come up with cards I liked.  I found it quite fun to do, so I made another batch of cards using a different DSP.  I'm going to share the cards, but I won't be giving you the rundown of all the materials because I didn't write them down.  It would probably take me another couple of hours to figure that out, so you'll need to just use the cards as ideas to get your ideas flowing.  Let me know what you think of the Basic Template I made and the cards that came out of it.  I'd love to hear what you think.

All five cards from one piece.
top left of template
bottom left of template
top right of tamplate
bottom right of template


Hope these ideas all inspired you to try out this template.  Or even make a template of your own to use.  I keep reminding myself that it's only paper and if I really, really hate it, it can go in the circular file and get recycled!

Have fun with these ideas.

Happy stamping and creating,
Sharon

Monday, April 14, 2025

Sneak Peek and Last Chance Together

Hello stamping friends!  This catalog change-over time is always challenging deciding what stamps to use for blog posts.  Today is a bit of a mash-up with a favorite Thoughtful Wishes stamp set paired with the very new Sweet Blooms set and the new Pretty Florals stamp sets.  Oh, throw in some of the new Florals in Bloom Designer Series Paper just to keep things interesting.  In fact, both of the cards today are really focusing on the Florals in Bloom DSP just because I like it!  Oh my, it looks like I got my hands on some new goodies, and I just had to use it all!!  So, let's see what I've been stamping.

Here's my two lovely cards made with Florals in Bloom DSP for the main part of the card.  Don't you love these prints?  It's one of the very first items I needed to pre-order from the new Annual Catalog that you should be getting in the mail right about now.  These prints just scream spring as far as I'm concerned, so why not use them right away?  Let's get creating.  We'll make the pink one on the left first.

Love this print!  It looks like a flower garden just bursting with blooms!  I wanted to go and pick some.  Pretty in Pink is one of the coordinating colors, so this was my choice for the card base.  It measures 8 1/2" x 5 1/2" and is scored and folded in half.

The next layer is Basic White cardstock.  It measures 5 1/4" x 4".  The DSP layer measures 5 1/4" x 4" also.  This is scored on the right side 3/4" from the edge.  It's folded back to reveal these dabs of color that blend with the floral print, then it's glued down to stay put.  This is attached to the Basic White layer keeping the edges even.  I used "green glue" for this.  

A length of about 12"-13" of the Pretty in Pink 3/8" Bordered Ribbon was cut.  Then it's wrapped around the white and print layers and tied into a knot in the front of the card.  Make sure to trim the ends because they tend to fray when tying them.  I also tucked a Mini Glue Dot under the knot to hold it in place.


After adding the ribbon, attach these layers to the folded Pretty in Pink card base.  I used Dimensionals for this.

Next is the sentiment.  This is a nice one from the new Sweet Blooms set.  It's a nice font and I love the sentiment it conveys.  This is stamped on a Basic White label that's die-cut using the Countryside Corners Die set.  This is on the Last Chance List right now.  If you don't own this set of dies, you really should consider getting them while you still can.  I think they're very versatile and use them often.  While cutting the white label, cut a Daffodil Delight label as well.

Stamp the sentiment with Garden Green ink onto the white label.  Using the new Pretty Florals stamp set, stamp three partial stems of the tiny flower spires in Pretty in Pink ink.  I also used Pretty in Pink ink with Wink of Stella to color in some of the petals.  A few of them got two coats to make them a little darker with just a hint of shine.

Layer the Daffodil Delight label off-set behind the sentiment label and attach together with adhesive.  Then use Dimensionals to attach to the card front.  

For a little added bling, add three of the Lemon Lolly Rainbow Dots to the card front.

Ready for the next card?

This is another print from the Florals in Bloom DSP that I'm having fun with today.  This print is matched up with the Peach Pie 2024-2026 In Color and a new 2025-2027 In Color called Secret Sea.  This is a lovely dark navy/black color that will be a great neutral to have on hand.

The Peach Pie card base measures 8 1/2" x 5 1/2".  It's scored at 4 1/4" and folded in half.

The Secret Sea layer measures 5 1/4" x 4".  Then the DSP layer measures 5" x 3 3/4".  The two layers are attached together with adhesive.  Then the Peach Pie 3/8" Bordered Ribbon is wrapped around the layers and tied in a knot near the bottom.  

These layers are then attached to the folded base using Dimensionals for a little lift.


For this card, the Stylish Shapes dies were used to die-cut the circles.  The 2nd largest circle die was used to cut the Secret Sea layer.  The 3rd largest die was used to cut the Basic White circle.  The sentiment from Thoughtful Wishes (Last Chance List!) was stamped with Secret Sea in the center of the circle.  The patch of small flowers from the same set were stamped over the sentiment using Peach Pie ink.  I like how these flowers fill in the circle but don't detract from the sentiment.  

The two circles are attached with adhesive.  Then they're attached to the card front with Dimensionals.

It took a few tries to find just the right touch of bling for this card.  The Tinsel Gems Three-Pack have a Misty Moonlight gem that really picked up the blues in the leaves.  The lightly tinted gems are a perfect match here.  Unfortunately, they are on the Last Chance List also.  I think I might have to purchase another pack while I still can. 

Well, there you have the mash-up of old and new.  It's always fun to do a lot of mix and match projects when the old favorites are leaving, and the new goodies are just starting to show up.  Did you have fun with these simple ideas?  Hope you're inspired to get out your stamps, ink, and paper and get creative.

When your catalog arrives, I hope you have fun perusing it and marking all your favorites and must-haves.  Maybe you'll be choosing this gorgeous new Florals in Bloom DSP just like I did!

If I can be of assistance to you or you have some questions, feel free to email me.  I'll get back with you as soon as possible.  Thanks!

Happy stamping and creating,
Sharon
sharoncarr50@gmail.com

Sunday, February 2, 2025

Delightful Hugs Card

Well, here we are.  It's Sunday again and good heavens, it's already February.  January was rough with all the respiratory infections and the forever cough.  But I'm believing that we are beyond that now.  All that freezing weather we had should have killed off all those nasty germs, and now we can get on with life again.  Sounds like a good plan to me!

Today's card is a bright and cheerful everyday kind of card that use several items from the Delightful Wishes Bundle and the coordinating Designer Series Paper called Floral Delight DSP.  I love the bright yellows for spring.  It just makes me happy!  

See?  Isn't it a happy little card?  Just what someone needs to brighten these long dreary days of winter.

I started with a card base of Old Olive to pick up the greens in the DSP print.  This is cut to measure 8 1/2" x 5 1/2" then scored and folded in half.  I wanted some texture added, so a 5 1/4" x 4" piece of Old Ollive was cut.  Then it's embossed with the Dashing Designs 3D Embossing Folder which is found in the Annual Catalog.  This gives such an interesting and random background design with dashes and dots.  The two layers were attached with "green glue".  

Choosing which designs of the Floral Delight DSP was next.  I chose one floral and another design with dots and dashes to mimic the embossing.  These two pieces happen to be back-to-back.  The floral piece measures 3" x 2 1/4", and the other is 3 1/2" x 2".  Both pieces are backed with Daffodil Delight cardstock.  These measurements are - 3 1/4" x 2 1/2" and 3 3/4" x 2 1/4".  The DSP pieces are attached to the layers with adhesive.  These sections were both attached to the card front to form a sort of 'L' shape and were attached with "green glue".

The sentiment came next.  This one is from the Hugs for Love Bundle in the current Mini Catalog.  I love this sentiment so much and have used it multiple times already.  This time it is stamped with Pecan Pie ink onto Basic White cardstock.  It is cut with a die from the Stylish Shapes Dies.  This one is the 4th largest in size.

I didn't have my Daffodil Delight ribbon yet, so I grabbed a retired ribbon for the accent.  I cut about 6" and folded in half to form this loop.  I attached it to the back of the circle with adhesive.  Then Dimensionals were placed on the back to pop it up on the card design.  When the card was totally finished, I wish I had placed it about 1/2" lower on the card.  I tried to take it off and reposition after the card was finished, but it started ripping.  That was the sign I needed to tell me to leave it alone and just deal with it as is!

The 2-step flower in the set was stamped several times to add to the design and then die-cut.  The colors used for this were Daffodil Delight and Crushed Curry.  There were also a few leaves stamped with Old Olive ink and die-cut for the design.  

After playing with the flowers and leaves, I decided to die-cut a few flowers from Daffodil Delight cardstock using the single flower from the Heart Shaped set.  These were a perfect size and accent to the pieces I had already stamped.

Most of the flowers and leaves were attached flat using Mini Glue Dots.  The one larger flower was attached with one Dimensional in the center.  

For an embellishment, I used the golden tone gems from the Low Profile Dots.  These were placed in the center of the die-cut Daffodil Delight flowers with an extra one popped near the bottom of the design.

I forgot to take a picture of the inside.  Oops.  I used a sentiment from the Hope You Know set.  It's stamped on Basic White cardstock using Pecan Pie ink.  A couple of flowers and leaves were stamped on the inside of the card for an accent.  And a 1/2" strip of the same dotted DSP was attached to the bottom of the white layer.  This really bring the design into the inside of the card to match.

I hope you are ordering your favorite Sale-a-bration items when you place your orders.  It's so much fun opening that box and seeing your new treasures to create with and some of them even free!  Woo hoo!  There are only a few more weeks to take advantage of Sale-a-bration so don't put it off too long.  Thanks for hanging out with me for a while today.  Hope you liked the idea and are inspired to get out those stamps and dies and create!

Happy stamping and creating,
Sharon 
sharoncarr50@gmail.com

Thursday, January 30, 2025

Another Seagull Fun Fold

Hello friend!  I'm having fun playing with the Sale-a-bration set called Friendly Seagulls.  For some reason they just make me smile and think of silly ideas.  So today, you've got one seagull trying to get the attention of the second one.  If any of you are moms, you know the annoyance of kids saying, "Mom.  Mom.  MO-O-O-O-OMM!"  That was going through my head as I was designing this card and remembering those days with a mixture of fondness, but also relief that my grown kids don't do that anymore.  Well, except when they're fooling around.  😏 So, this card is sort of a remembrance back to those days of little people running around the house.


I thought this idea would translate well into a fun fold card, so that's what this is.  It looks like a regular, unassuming card, but there's a little twist to it.

The color for the card base is Pebbled Path, one of the In Colors.  It's cut at 11" x 4 1/4", then it's scored in half at 5 1/2".

At this point, you need to add one more score line.  This goes from the bottom corner of the center score line you just made up to the opposite upper corner on the right to create the fun fold.  It looks weird now, but trust me, it is fun.

Next a layer of Basic Beige cardstock is cut to measure 5 1/4" x 4".  Cut two of these - one for the front and one for inside the card.  This is what all the stamping is on.  On the piece for the front, die-cut a circle from a scrap of Basic White cardstock using the smallest die from the Stylish Shapes Dies.  This will be a mask that you will add some sky around.  Using a Blending Brush and Balmy Blue ink, lightly blend on some color around the "sun" and fade out to nothing.  Save this mask!

On both the pieces, use a Blending Brush and Wild Wheat ink to softly add a sandy beach on the bottom edge.  On the front I colored a larger area and built it up on the side a little more.    Both pieces also have the little pebbly sand stamp added to the sandy area.  Use Crumb Cake to lightly ink the stamp and stamp several times before reinking.  Randomly cover the sandy area while still leaving some open spaces.

The flying seagulls stamp is used to add some Pebbled Path birds in the sky.  I off-stamped before stamping the seagulls to keep them very light.  This was done on both inside and outside pieces.

The seagulls were from the batch I made the other day.  These are stamped with Memento Tuxedo Black ink and colored with Stampin' Blends:  Daffodil Delight Light, Gray Granite Light and Dark
After coloring they were fussy cut.

The strip of plaid on the left side is from the Timeless Plaid DSP.  It's 3/4" x 4".  To define it better on the card, a layer of Old Olive cardstock was added behind it.  This measures 1" x 4".  These are attached to the edge of the Basic Beige cardstock using adhesive.

The sentiments added to the front are a combination of stamping and markers.  For the first hey, I only inked that word before stamping, then did the full sentiment under this.  I couldn't find a sentiment that I wanted for the 2nd bird, so he's just done by hand.  Not perfect, but it gets the point across.  Actually, the sentiment looks kind of cranky to me.  The seagulls were added to the front at this time using Mini Dimensionals.

The inside was finished next.  The mask was used for the sentiment inside the card.  If it's not blue enough for your taste, blend a little more of the Balmy Blue ink on it.  The sentiment is from the Hope You Know sentiment stamp set.  It's stamped with Pebbled Path ink.  Then it's popped up near the bottom corner using a Dimensional.  I checked placement with the front of the card before attaching.

There is another of that flock of seagulls added inside just because they make me smile.  He's attached with adhesive, so he sits nice and flat.

When trimming the plaid DSP for the front, there was a 2" x 3/4" piece left.  I decided to punch three small hearts from this and add them to the inside of the card.  This brought the colors and design from the front into the card.  Plus, when the card is sitting up in its fun fold glory, you can see those three little hearts from the side.  They're attached with adhesive.

Then the card sections are ready to put together.  The Pebbled Path cardstock was folded shut.  Adhesive was added inside the edges of that bottom right side triangle.  Keep the adhesive at least a 1/4" from the edge!  Lay the Basic Beige layer onto this lining up all four sides to keep it in the center of the card.  Make sure the adhesive is holding it securely.  Open it slightly and fold on the crease to tuck the bottom edge under the sentiment.  Voila!

I added some Riverside Irregular Pearls to the scene for a little bling. These are an Online Exclusive item. They seem to pick up and enhance a lot of the yellows and greens from the card.

Here's a final look at my Friendly Seagulls.  In Michigan there always seemed to be bunches of them in the parking lots and parks.  And always loud and squawking to get attention.  This design just seemed appropriate.

Just a reminder that this set is one of the Sale-a-bration free items!  And it's definitely fun to create with as I have so thoroughly learned.

I'd love to help you with any of your stamping needs or questions.    If you have questions, send me an email and I'll get back to you.  If you'd like to order, please use the Host Code at the top of this post, and I'll send you a card and surprise as a thank you.  

Thank you for taking the time to visit my blog today. I hope you found something to make you smile and maybe something to inspire you too.

Happy stamping and creating,
Sharon
sharoncarr50@gmail.com

Monday, January 27, 2025

Book Binding Fun Fold

Hello, my stamping friends.  I'll let you in on a little secret.  I've been chuckling to myself ever since I made my oldest grandson's Valentine card.  He's very close to 15 and says he way too old for cutesy kittens and bears but doesn't want all the frills, flowers, and hearts of traditional Valentines.  Sooo....  What does he like?  Baseball, but I've made way too many baseball-related cards for both of the boys over the years and I'm so ready to move on to something else.  They just stopped over for a short visit and on the way had to get him some french fries because he was hungry, as usual.  Oh yes, he loves french fries and eats them as often as possible.  And there my idea was born.  Want to see the silly Valentine I made for him?

Like it?  Did it make you smile?  I had so much fun coming up with the idea and then making it.  This is a book binding fun fold card.  It's very easy but just gives you a slightly different card for fun.

The card base starts with Gray Granite cardstock that measures 11" x 4 1/4".  It's scored at 4 1/4" and 5 1/2".  There is some "green glue" used to hold closed the section to the left of the card front.  This gives you the book binding fun fold base.

I love this plaid paper from the Timeless Plaid DSP.  I used the colors that coordinated with this to make my color choices.  The darker gray color is Pebbled Path which is an In Color that I like but haven't used too often.  Don't these colors blend well together even though they are not mentioned on the back of the DSP as coordinating colors?

The Pebbled Path layer was cut at 4" x 4", and the plaid print was cut at 3 3/4" x 3 3/4".  They are attached together with adhesive, then attached to the card front with adhesive also.

There is also a piece of Pebbled Path cut to measure 1" x 4".  This is attached to the book binding area to the left side of the card front using adhesive.

Next came the seagulls.  I wasn't sure which colors I wanted to use, so I made a whole flock of the three different seagulls.  All totaled, there were 15 that were stamped with Memento Tuxedo Black ink then colored with Stampin' Blends.  I used a mixture of Smoky Slate Light & Dark, Gray Granite Light & Dark, Pebbled Path Light, Crumb Cake Light & Dark.  I also used Real Red Light & Dark and Daffodil Delight Light & Dark.  

For the seagulls on this card, Smoky Slate Dark and Gray Granite Light were used on the wings.  After trying several options, the french fries were colored with first just a light layer of Light Crumb Cake, then added a light layer of Light Daffodil Delight over it.  That's about as close as I could come to the color of fries. 

The Basic White layer for the focal point was cut with the Stylish Shapes Dies.  Some pebbly sand was added to this where the seagulls would be standing.  Crumb Cake ink was used for this.  

A frame was added under the white by cutting a piece of Real Red cardstock 2 1/2" x 2 1/2".  They're attached with adhesive.

Next the sentiment sections were stamped on strips of Basic White.  The upper sentiment was stamped with Pebbled Path and the lower sentiment with Real Red ink.  They were trimmed to fit the card.  

The seagull with the biggest mouth has a box of fries tucked in.  A Dimensional was added behind to hold this in place.  Both the seagulls were attached with Mini Dimensionals.  The upper sentiment was attached flat slightly tucking under the upper seagull.  The "fries" sentiment was attached with Dimensionals.  Lastly the whole thing was attached with Dimensionals to the front of the card.

The inside of the card carried on with the theme.  A piece of Basic White was cut at 4" x 4".  This sentiment comes from The Hearts of Elegance Bundle which is an Online Exclusive.  It's stamped in Real Red ink close to the middle of the card.  The heart is die-cut from the Marbled Excellence DSP.  It's attached flat to the layer.  

Pebbly sand is stamped on the bottom left side just like the card front.  This gives the 3rd seagull a place to stand. He's attached with adhesive.  Some seagulls were stamped in the sky with Gray Granite ink.  This whole layer was attached inside the card with adhesive too.

Just to kind of tease my grandson with something just a little girlie, I wrapped a ruffled Real Red Ribbon around the book binding part of the card.  It's tied in a loose knot.  This ribbon has been retired forever, but it seemed to work for the card.  No other bling was used on this card.  I had to let him keep some of his dignity so there was absolutely no adding lots of glitz!

This picture gives you a great look at the fold and how it works.  

Hope this card gives you an idea or two.  It was really fun making this card specifically for this picky grandson of mine.  I hope it makes him smile and think his grandma is a little quirky and has a slightly strange sense of humor.  Gotta stay one step ahead of those teenage boys.  Oh, excuse me, that should read young men.

Did you realize the Friendly Seagulls stamp set I was using is one of the Sale-a-bration items you can earn free right now?  It's one I wasn't sure I wanted, but I'm so happy I got it.  Now that it's in my stash I've got a few more ideas percolating that I want to try.  I hope you get this set too.  It's just plain fun!  And it can be yours with a $60 order right now.  If these silly seagulls aren't your cup of tea, there's plenty more options to choose.

Thanks for stopping by today.  I appreciate you taking the time to see what I've been doing.  If you'd like to place an order, I'd be happy to be your demonstrator.  And please use the current Host Code at the top of this post.  It would be so appreciated!

Happy stamping and creating,
Sharon 

Monday, December 2, 2024

More Winter Meadow Cards

 Hello my friends!  It's good to be back again with more cards finished that had been languishing on the corners of my table and all over my counters.  It's wonderful to see blank counter space showing!  There are just a few more piles I need to finish to feel I've really accomplished my goals.  Today's cards were actually planned as one of the designs for my shut-ins Christmas cards.  After consideration, I was worried that the ladies that are now helping make them would get a little frustrated trying to get the circle layers straight and also attach all those tiny snowflakes.  So instead, I finished the cards myself and also prepped a different batch of cards for the shut-ins here at church.  Yesterday afternoon was a very busy time.  If you want to try your hand at making these cards, it's really not hard if you have some crafting experience and can follow directions.

I totally love the look of a black and white card with a touch of Real Red to make it really pop.  These cards really fit the bill.  The gorgeous watercolor print found in the Winter Meadow Designer Series Paper pack is a perfect starting place for the card.  It's a misty looking forest with one deer peering out of the trees.  It's all in shades of gray but has just enough detail to be really interesting.  This sheet of paper can be cut in half, then cut into three 4" wide pieces to make six cards from one sheet of DSP.  As you can see, I had an extra piece, so I have seven cards.

Each piece of the DSP was trimmed to 4" x 5 1/4".  These pieces are attached to Real Red cardstock that is cut to measure 8 1/2" x 5 1/2" and folded in half.  They're attached with adhesive.  Now on to the good stuff!

I had a whole stack of white circles that were die-cut already but left over from another project.  These were cut from Basic White cardstock using the 2nd largest circle from the Stylish Shapes Dies.  I thought a red frame would look nice and was going to just cut a larger Real Red piece to lay under this.  But that would cover up too much of the DSP print.  Instead, I used both the 2nd and 3rd largest circles together and die-cut a frame that would fit over the white layer.  

It took a bit of hunting to find the sentiment that would fit nicely inside of the circle.  Not finding what I wanted to use in the current stash, I retreated to my retired stamps and found a wonderful sentiment.  It is from the Peaceful Cabin set from several years ago.  I loved that the sentiment really connected the winter scene with the wording.  It was stamped in the center of the large white circle using Real Red ink.  The Real Red frame was attached to the white circle with a small amount of "green glue" to hold in place.  This was all attached to the card front with Dimensionals.  

The last touch to finish my cards was the teensy weensy White Loose Snowflakes that are currently available.  Love these itty-bitty snowflakes!  They are small enough that they don't overpower the design but really enhance it.  I ended up using six snowflakes on my card.  I usually use an odd number for aesthetic reasons, but this card seemed to need six.  They are attached with a dot of "green glue" under each of them.  Wish I had some more micro glue dots which would have been quicker and easier to use, but I'm out at this time.

There is a layer of Basic White inside the card.  It measures 5 1/4" x 4".  Real Red ink was used to stamp the sentiment inside.  The small row of trees in the Peaceful Evergreens stamp set was stamped in the bottom corner with Memento Tuxedo Black ink as an accent.  It was the perfect idea to connect the outside design to the inside of the card.

Whew.  Another batch of cards finished and ready to roll.  I'm getting antsy to create with my new stash of goodies.  I've been doing a really good job sticking with my plan to get my unfinished clutter, I mean cards, under control before I get to play with new stuff.  I've held out for another day.  We'll see how long I can manage.  Or maybe I'll get all those unfinished projects out of the way?  I'll have to check if there's anything for a get-well card in the piles.  I'll be needing a couple soon for friends and acquaintances having upcoming surgeries.

Hope you like these simply lovely cards.  I can't believe how simple it is to make a card when the DSP print does all the work for you.  Easy peasy.  The hardest part was attaching those little snowflakes.  But I think they really make the card special, so the time was really worth it.

Come back for a visit soon to see what other treasures I'm unearthing from my counter clutter.  Should I say how much dear hubby is loving my de-cluttering efforts?  And I'm getting some of those wonderful designs thought out and finished!  It's a win for both of us!! 

Happy stamping and creating,
Sharon

Thursday, August 15, 2024

My Changing Leaves Card Collection

Hello friends!  I've been a little fixated on using the Changing Leaves Bundle.  Guess I've been thinking about autumn and these items work so well for that.  I gave myself a challenge of only using three basic colors and seeing what I can come up with this Bundle.  I'm so pleased with the different looking cards that came from this challenge and I might try this on other stamp and die bundles.  Let's see what I made...

Here is the trio of cards I created for this challenge I gave myself.  I think they all turned out quite different even though the card layers are very similar.  It was interesting working with different styles on each of the cards.  The colors I chose to use on them all are Old Olive, Pumpkin Pie, and Peach Pie.  We'll highlight the information on each card so you can see what was done.
The first card was the idea of a stamped background.  The card base is Very Vanilla that measured 8 1/2" x 5 1/2".  There is a layer of Old Olive cardstock that measured 5 1/4" x 4".  The stamped layer is Very Vanilla that measured 5" x 3 7/8".

The largest leaf clusters were stamped with Peach Pie ink on the vanilla layer.  The next largest leaf cluster was stamped with Old Olive that I stamped off to make a light shade of green.  Lastly, Pumpkin Pie ink was used to stamp the smaller skeleton leaf randomly to fill in open areas. 

An Old Olive Marker was flicked onto this layer to even out the design a bit.  When dry, the layer was attached to the Old Olive layer by using adhesive.  

The die used is from the Everyday Details Die Set and is cut from Very Vanilla cardstock.  The sentiment is from the Everyday Greetings stamp set and is stamped with Old Olive ink.  I thought the sentiment fit perfectly in this die-cut.   It needed some color behind it to make it stand out.  The Old Olive cardstock used measures 3 7/8" x 1 1/2".  They are attached together with adhesive.

The ribbon is an old Pumpkin Pie 1/4" ribbon that was part of a combo pack that's been retired over 5 years now.  Yeah, I know I keep everything, but it was the perfect addition to help balance the colors here.  It's wrapped around the two layers and attached in the back then added to the card base with Dimensionals.  After adding the sentiment with Dimensionals, the bow was attached with a Mini Glue Dot.  At this point, I added one of the skeleton leaves die-cut from Old Olive cardstock.  It's attached with a little adhesive where it tucks under the sentiment.

The bling added here comes from the Adhesive-backed Speckle Dots.  I love these more natural colors.  Three of the olive color gems were used.

The next card I made turned out so different from the first.  I started with a base of Pumpkin Pie.  A layer of Old Olive was cut that measures 5 1/4" x 4".  Then a layer of Very Vanilla was cut that measures 5" x 3 3/4".

The Very Vanilla layer was embossed with the Exposed Brick 3D Embossing Folder.  After embossing, I used a Blending Brush and Pecan Pie ink over it all to expose the design.  Then a Pecan Pie Marker was used to spatter ink over the background.  After drying, it was attached to the Old Olive layer with adhesive and to the card base using Dimensionals.

The large leaf cluster was inked by using Sponge Daubers starting with Pumkin Pie on the tips and Old Olive ink in the center.  This was off-stamped before stamping onto Very Vanilla cardstock.  It was die-cut with the matching die.  The same leaf cluster was die-cut from Old Olive cardstock also.  These two were attached but off-set a little to let the green stand out against the background.  


Then the smaller leaf cluster was stamped onto Very Vanilla using Pumpkin Pie ink and die-cut.  One of the skeleton leaves was die-cut from Old Olive cardstock as an accent.  And a berry branch was die-cut from Pecan Pie.

The sentiment is from the Changing Leaves set.  It's stamped onto a Very Vanilla scrap using Old Olive ink.  It's die-cut with one of the dies from the same bundle.

The large leaves are attached to the card front with adhesive along with the Pumpkin Pie leaves.  The berry branch and the olive skeleton leaf are attached with some rolled up Mini Glue Dots.

Natural Tones Linen Thead (Online Exclusive) was wrapped around my finger three times and attached to the back of the label.  Then the label was attached with Dimensionals.

Three Neutrals Adhesive-backed Sequins in the brownish color are attached to the card to finish.

The last card I made I wanted to be simpler in looks.  There is a Very Vanilla card base, then a layer of Old Olive that measures 5 1/4" x 4".  Next is another layer of Very Vanilla.

I die-cut a 1/4 size piece of computer paper with the 2nd largest circle die from the Stylish Shapes dies.  Using this as a mask, I used a Blending Brush to add Peach Pie ink to the center.

With the mask still in place, I stamped the largest leaf cluster with Pumpkin Pie ink with only the leaf tips showing.  After removing the mask, the Vanilla piece was embossed with the So Swirly Embossing Folder.  This reminded me of swirls of wind on an autumn day.   This was attached to the Old Olive layer with Tombow Liquid Glue, then using Dimensionals attached both pieces to the card base.

Only the three top leaves were stamped on Very Vanilla cardstock using Old Olive ink and were die-cut with the matching die.  The sentiment is from the same stamp set.  It's stamped with Pumpkin Pie ink onto a Very Vanilla strip, then it's die-cut with the matching die.  Just a small bit of Peach Pie ink was blended around the edges to enhance it.

Both the leaves and the sentiment are attached with Dimensionals.  A small Linen Thread bow was attached to the leaf stem using Mini Glue Dots.  

The bling for this card is the same Adhesive-back Speckle Dots in the olive color that were used on the first card.

WHEW!  That's a lot of stamping and a lot of typing too!  I hope these ideas spark your creativity.  Every time you sit down to stamp - even with the same stamp over and over - you always get something new and exciting.  I just love seeing how you get different looks with the same products.  Stamping is never boring!

I hope you've had a chance to redeem your Bonus Days coupons codes.  If not, please don't forget to get that done before the end of the month.  And don't forget about my own extra 50th Wedding Anniversary promotion.  If you spend $50 with me in the month of August, I'll send you a card and a package of embellishments as a way of celebrating with you.  Thank you so much for your patronage!!

Happy stamping and creating,
Sharon