Showing posts with label Playing in the Rain Bundle. Show all posts

Friday, April 14, 2023

More Playing in the Rain Cards

Hello, hello!  Hope you're having a fabulous day today.  I had so much fun creating with the Playing in the Rain Suite the other day that I got some of those same pieces out again today and did a different fun fold card.  I just adore this cute Rain or Shine DSP and I'm so sad it's retiring at the end of this month.  It's just a fun combo of colors and prints that always seems to make me smile - especially when it's raining (or just about to start up again)!

Here it is and isn't it sweet?  It's an easy fun fold card and I'm going to walk you through it.  Start with a card base that measures 8 1/2"x 5 1/2".  Score this at 4 1/4" and fold in half.  Open the card and cut 1" off the front flap on the card.  This allows you to add a cute DSP strip as an accent.  Cut another piece of cardstock that measures 3 1/4" x 4".  Score this at 1/2" on the long side and fold over to the back.  This gives you the flap that opens on the right side of the card.  Oops, forgot to mention that I used Mango Melody cardstock for my card.  It's one of those colors that are on the way out because of the Color Refresh.  If you like this color, pick up an extra pack right now.  There really isn't a color in the new color lineup that is anywhere close.

To make this card, we're going to start on the inside and work our way out.  So the next piece of cardstock you need is Basic White.  This is cut to measure 5 1/4" x 4".  The strip of checked DSP is from the Rain or Shine DSP.  It measures 1" x 5 1/4" and is attached to the Basic White piece right at the edge using MultiPurpose Liquid Glue.  

I used a piece of Tear & Tape along the inside 1/2" flap on the smaller Mango Melody cardstock.  Line the flap up carefully with the DSP and fold it around to the back side of the Basic White to create the front flap of the card.  After this is attached to the white, use adhesive to attach this layer to the center of the inside of the Mango Melody card as shown.

I used two different prints from the DSP.  The measurement for the left flap is 2 3/4" x 5".  It's attached to a Balmy Blue layer that's 3" x 5 1/4".  These layers are attached to the left flap of the card using adhesive.

The DSP layer on the right flap is 2 7/8" x 3 1/8".  This is attached to a Balmy Blue layer that is 3" x 3 1/4" using adhesive.  Then this is attached to the front flap of the card using adhesive.

The cute fox is die-cut from the Rain or Shine DSP using the coordinating dies.  Easy peasy.  The cloud was punched from Basic White using the Cloud Punch on page 153 in the Annual Catalog. The sentiment is stamped with Balmy Blue ink on it.  Then it's popped up on the card flap using Dimensionals.  The fox is also on Dimensionals and just barely over the cloud.  Some of the blue Pastel Adhesive-backed Sequins were added for a little rainy bling.

I haven't done any stamping inside the card.  I'll either save that for another day, or maybe just write out a note inside.  We'll see.  But wait, I'm not done yet...


I liked the last card so much, I sat back down and made another one.  This time I changed the background DSP to the umbrella print.  Thought that was really cute.  The fox is also changed for the bunny dancing in the rain.  Looking at these two cards together, I think I should have used the 'rainy-er' piece of the raindrop DSP print on the foxy card because she has an umbrella.  Oh well, maybe next time.  I really do think these cards came out so cute!  I wish this Rain or Shine DSP would be carrying over to the next catalog like the Playing in the Rain stamps and dies.  Oh well, I guess I can't have everything I want, now can I?  That means I have to be thankful for what I have and enjoy using it too!

Thanks for stopping by today to see what's new around here.  I've heard from some of you that your new Annual Catalog has arrived.  Woo Hoo!!  Hope you're having fun checking out everything that's new!  Please remember that you can't order anything from this new catalog until May 1st.  But you can still get some of your favorite retiring stamps, cardstock, ink, and embellishments until the end of April (if they are still in stock).  Some items are already sold out, so please don't wait too long.  Thank you!!

Happy stamping and creating,
Sharon

Friday, March 31, 2023

Playing in the Rain

Hello, hello!  It's almost time to say goodbye to so many of my favorite stamps and designer papers.  So today I'm sharing a card that focuses mostly on some DSP but uses the stamps and dies that coordinate as well.  The whole Rain or Shine Suite of products in the Mini Catalog are just too cute and fun to use.  I know the Rain or Shine Specialty DSP will not be available when the new Catalog comes out and it makes me sad.  It's been enjoyable to just die-cut some of those sweet animal images from the DSP and plop them on a card and it's almost finished!  Just that fast.  When you need something cute in a huge hurry, it doesn't get much quicker than that.

I love how quick this came together, but it's still adorable.  Start with a Balmy Blue card base that measures 11" x 4 1/4".  It's scored at 5 1/2" and folded in half.  The raindrops are from the Playing in the Rain stamp set.  They were stamped with Balmy Blue ink spaced out on the card front.

The Basic White cardstock for the focal point was cut with the Stitched Rectangles Die set that is in the Annual Catalog on page 174.  The rectangle size I used is about 2 5/8" x 4".  The same raindrops were stamped on the top half of this using the same Balmy Blue ink.  The sentiment is from the Nested Friends set page 25 in the Mini Catalog.  It's stamped with Memento Black ink.

The fox and turtle were both die cut from the Rain or Shine DSP with the coordinating dies.  Truthfully, the turtle is not fully there.  It was at the edge of the DSP and the edge of his shell was cut off, but I figured I could use it anyway and it wouldn't be a problem.  I think he looks just fine peeking out from the side of the layer.  In fact, if I didn't mention it, you probably wouldn't even notice.

Before adding the animals, a retired Balmy Blue ribbon was wrapped around the white layer and tied into a bow off to the side.  Then the turtle was tucked behind the top corner.  Both the white layer and the turtle were attached with Dimensionals.  Then Dimensionals were also used to attach the fox with the umbrella to pop it up on the white layer.

I just wanted to point out the glossy accents on the turtle and fox.  The turtle shell and daisy are glossy.  The hat and raincoat on the fox are also glossy. These are just fun touches to make the card special.  

Thank you for checking in again to see what's new.  This is just a fun card idea for you.  Hope it's just what you need.  Just wanted to remind you that the retiring list will be coming out soon and the new catalogs will be arriving soon after.  Keep watching the mail for your copy of the new Annual Catalog.  They'll be mailed out about the middle of April.  

Don't forget to order any of your ink refills you need now!  Stampin'Up! is doing a Color Refresh this year and we don't have all the information yet.  I know the In Colors usually retire each year.  So, if you need any of those refills, please order them now so you are able to get them.  It's good to be prepared.

Happy stamping and creating,
Sharon


Tuesday, January 24, 2023

Waterfall Fun Fold Card

Hello, hello!  Glad you stopped by today to see what's happening here.  I've been on a roll with my stamping and really cranking cards out.  I've worked myself into the role of sending cards out to all the shut-ins at church.  For Christmas, there were 19 cards I sent out.  I thought I'd get a head start on the valentines I needed to send in February, and 16 were already finished.  Last Sunday I received the updated list.  My goodness!  The list has expanded to 28 people needing cards sent to them.  So much for being ahead of the game.  I've got a bunch more valentines to make real soon.  I really needed a break from valentine cards though, so I tried my hand at making one of these waterfall cards.  I hadn't made any since November I think, so it was time to try another one with current stamps and paper.

Didn't this fun fold card turn out really cute?  And so very bright too!!  I guess I'm over-compensating for all the wet and dreary days we've been having lately.  Well, that's my excuse anyway.  You know, I much prefer pastels, but this card is pretty darn cute anyway.  I had to hold it closed for the picture because it kept wanting to pop open.

To make a waterfall card, start with cardstock that measures 11" x 4 1/4".  The cardstock I used is Mango Melody.  It's scored at 2 1/2", 3 3/4", 6 3/4", and 8 1/4" to make the cascading layers.  Starting with the left side, fold mountain, valley, mountain, and valley to make the card.  

For the layers on this card, I used the Dandy Designs Designer Series Paper that is one of the Sale-a-bration choices you have when you make a $100 purchase or more.  This is a huge pack of DSP that has four sheets of twelve different designs.  I thought the colors would be a little more pastel than they are, but still adorable.  


You can see I had no trouble switching to a brighter card.  Both of the prints measure 3 7/8" x 3 7/8" square.  To make cutting the DSP easier, I cut a 4" strip, cut off 4", then trimmed it to 3 7/8" on two sides.  For me that's easier than cutting it at 3 7/8" from the beginning.

There are two pieces of Basic White that measure 4" x 4" square.  These layer behind the two DSP prints.  There is a piece of Basic White that measures 3 1/4" x 2 1/4" for the sentiment on the last panel of the card.  And also a piece to cut the square for the front of the card using the Stylish Shapes Dies.  I almost forgot - scraps for stamping and die-cutting the two batches of flowers.

There are two pieces of Old Olive used on the card.  One is about 3" x 3" to cut the Stylish Shapes square to layer on the card front.  The other is 3 1/2" x 2 1/2" to layer the sentiment on the last panel.

Let's get the stamping done next.  The sentiment is from the Happy Thoughts set and is stamped with Memento Tuxedo Black ink near the top of the inside white piece.


The 'hey' is stamped on the very top right corner of the square white piece.  This is stamped with the same black ink.  The sentiment is from the Simply Fabulous set that you can find in the Annual Catalog on page 41.  I looked through all my sets to find a small 'hello-type' stamp that would fit in that area.

Don't forget to stamp the two flower patches on the white scrap of cardstock also.  After stamping, these were colored with Mango Melody, Calypso Coral, Old Olive, and Daffodil Delight markers before die-cutting.

Almost everything is stamped and die-cut now.  All except for the main attraction.  That little turtle from the Rain or Shine DSP is also die-cut with the die from the Playing if the Rain Bundle.  Isn't that awesome that you don't have to fussy cut him out?

Let's get things layered up and put together.  Attach each DSP print to a Basic White layer.  Adhere the floral print one to the front fold of the card base making sure the adhesive is only on the top half of the layer so it won't stick anywhere it shouldn't.  Adhere the geometric layer to the inside fold making sure it lines up with the top layer when the card is closed.  Again, pay attention to where you put the adhesive! Attach the two square die-cut pieces together.  Then adhere the turtle with adhesive.  And leave space, so there's room where the little add-ons will go.  Add this to the center of the card front with Dimensionals.

Attach one of the flower patches to the front of the card by the turtle using Mini Dimensionals.  Attach the second bunch to the center of the next layer using adhesive to keep it flat.

Attach the sentiment layer to the Old Olive cardstock for the last panel.  These are attached with adhesive right up near the fold so it can't be seen when the card is closed.

Final steps - those little Loose Daisy Embellishments.  They are so adorable and seem to be the perfect finish for the card.  You can find them in the January-April Mini Catalog on page 51.  I made a bouquet of them to cover the daisy the turtle is holding.  They are attached with a Mini Glue Dot for each of them.  I also added three of them on each of the other two panels.  Aren't they just the perfect touch?

I just wanted to add one more picture of a side view of the card so you can see the layering and folding a little better.  They say a picture is worth a thousand words, so hopefully this one says a lot!

Thanks for hanging out with me for a while.  Hope this post wasn't too long and gave you clear enough instructions for you to make your own waterfall card.  Once you've figured out the scoring, it's really quite easy to make.  If you're planning on placing an order anytime soon, please consider me as your demonstrator and use the Host Code at the top of this blog post.  And don't forget to choose the Dandy Designs Paper for one of your Sale-a-bration gifts.  Thank you!

Happy stamping and creating,
Sharon

Thursday, January 19, 2023

More Traditional Valentine for You

Hey there!  I'm still sort of stuck in Valentine mode.  There are more ideas out there to explore.  Today, I've used the Country Bouquet Bundle again to come up with a slightly more traditional valentine for you.  At least there are hearts on it this time!  And it is a fun fold, so that's always a bonus.  But wait!  There's more!  Just like those infomercials, I do have more for you today.  There is a second card that starts with the same color and fun fold and then goes on from there.  Hope you enjoy these cards and let me know what you think.

This card uses a very easy fun fold to get you started.  You need a piece of cardstock that measures 11" x 4 1/4" that is scored at 5 1/2".  For this card I used Balmy Blue. Then 2 3/4" is cut from the front flap.  This piece is then placed sideways across the front of the card.  Pretty quick and simple way to change the look of a card.

Let's start with the measurements on the DSP layers and get the base of the card finished before we move on.  Two different DSP's are used here - the Country Floral Lane DSP on page 9 in the 2023 January-April Mini Catalog and the Dandy Designs DSP found on page 14 in the 2023 January-February Sale-a-bration catalog.  They both have a base color of Balmy Blue to they work well together.

There are two pieces of the Country Floral Lane print.  The larger one measures 3 5/8" x 2 1/8", and smaller one 4 1/4" x 1".  If you're using this DSP, make sure you pay attention to the direction of the print.  The Dandy Designs print measures 5" x 3 3/4".

There are three pieces of Basic White cardstock used here.  The one for inside the card measures 4 1/8" x 2 5/8" to fit behind the cross piece on the front of the card. The next piece measures 3 3/4" x 2 1/4" and is for the left side of the card front.  The last piece needs to be big enough to die-cut the square and stamp the two hearts - approximately 2 1/4" x 5 1/2".

First attach the left-hand DSP to the Basic White layer and attach to the card front.  Next attach the striped DSP to the inside of the card.  Last, attach the 1" strip across the front piece of the card.  Use adhesive to attach all these layers flat to the card base.

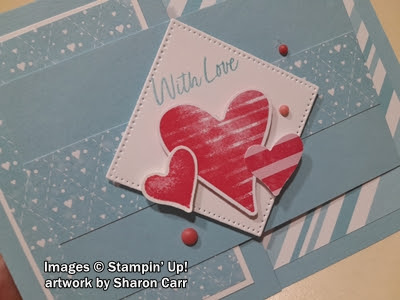
The square was cut using the Stylish Shapes Dies.  It's the one that measures just less than 2" x 2".  After cutting, the sentiment was stamped with Balmy Blue ink diagonally in the top corner.  The sentiment comes from the Country Bouquet stamp set.  This is one of the new sets that are available in the 2023 January-April Mini Catalog.  On the left-over piece of Basic White cardstock, the large and small hearts were stamped with Sweet Sorbet ink and punched out with the coordinating punch.  The two hearts are on one stamp and punch out together making it easy for you.  Another small heart was punched from a scrap of the Country Floral Lane DSP.  Overlapping each other, they were all attached to the square using Dimesionals. 

Attach the cross-wise piece to the front of the card making sure you have adhesive only on the half that fits on the left side flap of the card!  After adding this, line up the corners of the square and attach to it with Dimesionals.

Just one more picture showing the inside of the card.  Before attaching the last Basic White piece, stamp the sentiment and the small heart accent using Sweet Sorbet ink.

Last touches on the card are the 2022-2024 In Color Matte Decorative Dots.  They come in two sizes and different shades of the same colors - so cool!  I used a large size in the 2nd darkest color and two tiny ones in the lightest and darkest colors.  I like the extra contrast they give and really match the hearts on the front of the card perfectly.


OK, are you still with me?  The next card is made exactly the same as the first, except for the stamp set and the DSP used.  The measurements are all the same.

The stamp set and dies are called Playing in the Rain.  The bunny is die-cut from a piece of the Rain or Shine DSP, which makes it so easy.  I did fussy cut the two umbrellas used on this card.  It didn't take but a couple of minutes.

I haven't decided on adding bling.  I know I'll add something, just haven't decided on what yet.  I have some retired "rain drops" from several years ago.  They might be just what I need here.

Here's a quick picture of the inside of this card.  Isn't it cute?  Each of the animals has some glossy areas on their clothes and so do all the umbrellas.  It really adds to the look.  I hated covering up those darling umbrellas though!

Ok, that is definitely enough for today.  Thanks for stopping in to see what's new today.  I feel like I've been typing all afternoon.  Hope you didn't think there was too much information to get through.  It was fun creating these two cards - so similar, but yet so different looking.

Happy stamping and creating,
Sharon