Showing posts with label Punches. Show all posts

Saturday, September 14, 2024

Lavender and Butterflies

Hello and happy Saturday.  We have a perfect day out here and the boys ae playing a baseball tournament just a little too far away for us old folks.   We're paying attention to the play-by-play on GameChanger so we can see how they're doing.  They tied their first game this morning and are just starting the second game.  Oh, you didn't come here for game information?  Okay, we'll get back to card making instead.  On Thursday I met with four ladies, and we made the cards for the shut-ins.  Two were totally new and didn't even know how to use a tape runner.  But they jumped right in, and we all had a great time.  I had prepped for two cards that were the same layout but used different colors.  Thought you might like to see both of them.  Here's the first version.

Start with a card base of Highland Heather cardstock that measures 8 1/2" x 5 1/2".  This is scored and folded in half as usual.

There is cut a layer of the same color next that measures 5" x 3 3/4".

Next is the Perennial Lavender Designer Series Paper.  There are three strips of three different prints on each card.  The strips all measure 1" x 4".  The three strips are attached to the layer of Highland Heather.  Two of the strips are attached closer to the left side and one closer to the right side.  This makes them staggered with about a 1/2" overlap on each side as shown.

After the three strips were attached to the layer, it was embossed with the Dashing Designs 3D Embossing Folder.  This gives the whole layer a wonderful texture, even the DSP.  This layer was attached to the card base using Dimensionals to raise it up.

The sentiment for the cards comes from the Layering Leaves stamp set.  It's stamped onto Crumb Cake cardstock using Gorgeous Grape ink.  The sentiment is punched out with the Heartfelt Hexagon Punch.  This is attached to the center of the card front using Dimensionals.  

The final touches on the card really make it stand out.  The butterfly is one of the Paper Butterfly Accents that come already die-cut.  You just pop them out and add some adhesive to attach it.  Easy peasy.  For this butterfly, I used a Mini Glue Dot under the body to hold it in place.

There are also three gems added from the Tinsel Gems Three-Pack.  I used the light purple gems, but it was fun seeing the ladies choose other colors or even one of each color to add to the design.  It's funny that all three of the colors looked really pretty on this card.

Are you ready for the next version of this card?

The next batch of cards used the very same layout and stamp set, but they look so different because of the colors and the DSP used.  

I started with Old Olive for the base and layer.  I used the Beauty of the Earth Designer Series Paper for cards with a more masculine feel.  The DSP is retired, but this just looked like a good choice for this card design.

The whole layer is embossed with the same folder as the first card.  I just love the overall texture you get with this folder.

The sentiment from Layering Leaves was used again.  This time it is stamped on Crushed Curry cardstock using Early Espresso ink.

One of the open-work leaves from the set was stamped on Crushed Curry with Early Espresso ink then punched with the Bough Punch.  An extra leaf was punched from Mossy Meadow cardstock to accent the design.  

For embellishments on the card, this time I used the Adhesive-backed Textured Dots.  These look sort of old gold or maybe bronze, so I thought they'd be a good addition.

All in all, we put together 24 cards.  The insides were all finished and signed by all.  Then they were tucked into envelopes, stamped, and ready to go.  One of the ladies even offered to go to the Post Office to drop them off so I didn't have to.  So helpful!

I think these cards will cheer up the people that receive them.  Now it's time to start planning the cards for next month.  Yep, I'm thinking fall here.  Which way should I go here?  Pumpkins?  Spiders? Leaves?  Scary?  Sweet?  Silly?  So many choices!  You have any suggestions or ideas??

Thanks for stopping by today.  Hope you enjoyed these cards.  I love embossing for the added texture on designs, but I seldom think about embossing the DSP too. And this design is a terrific way to use up those beautiful DSP strips that you just can't throw away.  Bonus!

Happy stamping and creating,
Sharon

Friday, May 31, 2024

Country Birdhouse Friendship Card

 Hello my friends!  It's been too long since I posted, and I truly apologize for the absence.  We spent a week back in Michigan visiting friends and family.  That was so much fun!  Then we had the 11 hours on the road to get back home again.  That seemed to poorly affect each one of us that went of the trip.  I've spent the last two days recovering from the trip, but I think I'm back on track now.  All that said, it's time to share a card I made before the trip.  It uses the Country Birdhouse stamps and dies bundle but doesn't even use the birdhouse from the set.  I'll get around to that soon, I hope.  This turned out to be such a sweet card.  I hope you like the idea and give it a try.

My first thought was to use the gorgeous woodgrain DSP found in the coordinating Country Woods Designer Series Paper.  These woodgrain prints will be perfect for anything country, masculine, or beach themed.  In fact, today's card fits into the country theme and this print is a perfect fit.  

The card base is Misty Moonlight which is one of my favorites.  It's cut to 8 1/2" x 5 1/2", then scored and folded in half.  I wanted to conserve my DSP print, so it's cut only 3" wide and 5 1/2" tall.  To frame it on the card front, I layered a piece of Moody Mauve behind it that measures 3 1/4" x 5 1/2".  These two are layered onto the card base using "green glue" to attach.  This gives me the canvas to create the card.

One of the Everyday Details Dies was used to cut a Basic White circle to anchor the design.  This die set is still available as an Online Exclusive item.  It is a wonderful basic set that you'll use over and over again.

The bird from the Country Birdhouse set was stamped in Misty Moonlight ink on a Basic White piece of cardstock.  Using a Blender Pen, the edges of the stamped bird were softened, pulling the color into the design.  A Daffodil Delight Marker was used to add color to the beak and feet.

Two sets of leaves from the Layering Leaves set were stamped on Basic White using Garden Green ink.  The detail on these was also softened with a Blender Pen.  These were punched out with the Boughs Punch.  There were also two sets of leaves punched from Garden Green cardstock to fill out the design.

Three of the tiny flowers from the Birdhouse set was stamped with Moody Mauve ink onto white also.  The Blender Pen was used to soften the color on these too.  A Daffodil Delight Marker was used to dot in the color for the flower center.

The bird and flowers were die-cut using the coordinating dies to the stamp set.  The hanger and bow were die-cut from Misty Moonlight cardstock.  Now it was time to get all the pieces together to put the design together.

The first thing was making sure the white design circle was in the right place so the bow and hanger would reach the top of the card.  These were both attached with adhesive.

The solid green leaves were placed and attached with adhesive.  Then the stamped leaves were carefully attached over these using adhesive.  

The bird was attached over the leaves using Dimensionals.  One of the flowers was tucked into the leaves.  The other two were added to the design using Mini Dimensionals.

The sentiment used here is from the same Country Birdhouse stamp set.  It's stamped with Misty Moonlight ink on a piece of Basic White cardstock that is about 3/4" in height.  The two ends were angle cut to give it a little different look.  It's added to the design using Dimensionals.

To add a little more interest, three of the 2023-2025 In Color Opaque Sparkle Dots were added to the design.  These are the Moody Mauve color to match the design.  If you look really closely, you can see the sparkle in the dots.

There you have it, a country looking friendship card.  If you need a specific type of card, you can easily switch out the sentiment for something that fits.  I'm definitely happy with the card design as is.

Thank you for being patient with me.  This is going to be an interesting summer with several different trips planned.  Though none of them will require so many hours of travel.  Whew.  I am so definitely NOT a good traveler.  I like being where I want to be, but not the traveling to get there and back.  But with one comes the other.  Guess I can't have it both ways.  So happy you stopped in today to see what's new.  I'll try to be more timely in my posting for now (at least until the next trip 😁).

If you're thinking of placing an order, I'd love to be your demonstrator.  Consider using the Host Code at the top of this blog page.  I'd greatly appreciate it!

Happy stamping and creating,
Sharon

Wednesday, January 31, 2024

Another Flight and Airy Card

Hello friends.  What a gorgeous day we are blessed with today!  The sun is shining brightly even though it's rather cold outside.  I'm sitting here in front of the window with the sun's warmth on my shoulders.  What a perfectly wonderful day!  Since I had so much fun playing with the Flight & Airy DSP a while back, I thought I'd use some of that lovely Sale-a-bration paper again.  Let me know what you think of this one.

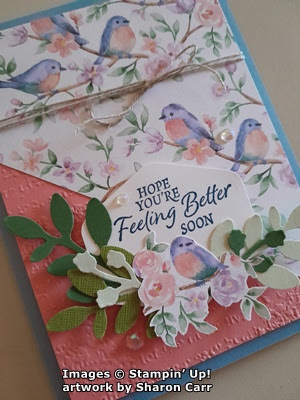
I chose two of the colors on the DSP to make this card.  Boho Blue is the 8 1/2" x 5 1/2" card base on this one.  There is a layer of Flirty Flamingo cut next.  This measures 5 1/8" x 3 7/8".  It is embossed with the Timeworn Type Embossing Folder for texture.

A piece of the Flight & Airy DSP was cut to measure 5 1/8" x 3 7/8".  I put a pencil mark on the left side at 1 3/4".   Then cut from that mark to the opposite bottom corner to cut a triangle piece off the DSP.  The left-over part was attached to the Flirty Flamingo layer using the "green" glue.  Make sure it goes right to the top and side edges.  If it overhangs any, just trim off with your Paper Snips.

With the corner of the paper you cut off, find a bird or two with flowers and fussy cut around them.  You can also cut extra flowers to add to the design if desired.  Set aside for now.

Wrap Linen Thread two or three times around the layers as shown.  Then finish off with a nice size bow.  This is then attached to the Boho Blue card base using Dimensionals.

The sentiment is from the So Sincere stamp set that can be found in the Online Store.  This set has 11 sentiment stamps that cover all your general stamping needs except for holidays.  I love it.  This has been one of my favorite sets for sentiments lately.  This sentiment is stamped on Basic White cardstock with Boho Blue ink.  It's punched out with the Heartfelt Hexagon Punch found in the 2024 Jan - April mini catalog.  

To fill in around the sentiment, several branches were punched with the Bough Punch (pg 148 in A. C.)  This punch has two different branches of leaves. I used a mix of greens for this - Garden Green, Old Olive, Soft Sea Foam.  These different green colors mimic the mix of greens on the DSP.

The green branches were tucked on top of the sentiment and attached with adhesive where they overlapped.  The fussy cut bird and flowers were the last thing to be added to the sentiment label.  This was also attached with adhesive to keep it a little flatter with all those layers of leaves.

The sentiment was finally attached to the card front using four Dimensionals.  This lifts up the whole sentiment layer and makes it stand out nicely.

The final touch for the card front is some Iridescent Rhinestone Basic Jewels.  I love how these tend to pick up the colors they are attached to and match mostly everything.

The inside of the card is Basic White with a skinny strip of the same DSP print attached to the right edge to finish it.  It will give me lots of room to write my own note.  This is one of the cards I'll be sending out right away because I've been needing lots of get-well cards lately.  Need to make even more or else people need to quit getting sick.  I think I'd prefer it that way.

Ok, the first month of Sale-a-bration will be over in a few hours.  That leaves only one more month to go.  Make sure you get what you want before the items are gone.   Just a reminder that the Flight & Airy DSP I used on this card is one of the free items with a $50 purchase.  I think every single print from this paper pack is wonderful and a need-to-have item.  

I've heard a rumor that there's a surprise coming next month concerning Sale-a-bration.  Make sure you check back here for the info after the 1st of February.  

Happy stamping and creating,
Sharon

Thursday, January 18, 2024

Painted Lavender Wishes

 Hello there!  Have you warmed up yet?  I just got back from running errands and I'm so cold.  It seems as I get older, I can't tolerate the cold as easily.  I'm ready to get wrapped up in my fuzzy blanket and chill for a while.  Hmmm, maybe chill is the wrong word to use here.  How about warm up??  Anyway, I've got a card for you today that focuses on the gorgeous Perennial Lavender Designer Series Paper(found on pg 23) that's in the new mini catalog.  If you haven't noticed this yet, you need to take the time right now to check it out.  The colors used and the soft prints are simply fabulous "dahling"!  I just had to find a card layout that really showcased the prints.   This card is also a fun fold.  I think it's called a fold back front card.  It is a pretty card and easy to make too!  win-win

The card starts out with a Pretty Peacock base that measures 8 1/2" x 5 1/2".  It's scored at 1" and 4 1/4" and folded in half and then back again on the 1" mark.  See, so far it's very easy.

The Perennial Lavender DSP is cut at 5 1/4" x 2 1/4" for the checked print.  This gives it a little amount tucked in under the fold over front of the card.  The two strips of the other print measure 3/4" x 5 1/4".  

Attach the checked print to the front of the card using adhesive.  Make sure all the edges are even.  Attach the two strips of DSP - one to the fold over front of the card and the other to the inside of the back of the card making sure they line up evenly.  At this time, I added some Tear & Tape to the back of the fold over flap.  This will keep the flap flat in the front and be nice and smooth.

The Heartfelt Hexagon Punch (pg 12 Mini Catalog) was used to punch a label from Crumb Cake cardstock.  After it's punched out, I used Pretty Peacock ink and a sentiment from the Perennial Postage set (pg 25 Mini Catalog).  This label was attached to the front of the card with adhesive.  The center of the label matches the center of the fold over front and overlaps to the back inside as shown.  Make sure to keep the adhesive only on the part that is the front of the card.

The gorgeous cutout butterfly is also from page 23 in the Mini Catalog.  You get 40 butterflies to use in one pack, and there are 5 different sizes to choose from for your project.  They are all white and you can use either side, depending on what you need.  For my card, I used Gorgeous Grape ink and a Blending Brush to add some pretty color to the butterfly.  It's attached to the label only on the body of the butterfly with adhesive.  

When the card is opened, there is a layer of Basic White that's been hidden behind the flap.  This measures 5 1/4" x 3" to make it line up nicely with the other layers.

This sentiment is also from the Perennial Postage set.  It's stamped with Pretty Peacock ink to match the card.

Final look at this pretty card.  Did you notice the Purple Fine Shimmer Gems that are added to the card?  These are new in the Mini Catalog too.  They have three different purple shade of gems, so you'll have no trouble matching the purples on your project.  They're faceted so they sparkle nicely.  I was pleased at how nice they looked on the Crumb Cake label.  Sometimes putting gems onto a color really diminishes the impact of the gems.  But not these - they're fabulous "dahling" and you'll love them.

That brings us the end of another post.  Hope you were inspired to try this project or at least try out the materials I used.  If you gravitate more towards the softer looks in your cards, I think you'll like this one.  Have fun making this and let me know how it goes.

The products I've used are all in the Jan - April Mini Catalog and at this moment everything is available.  Purchasing these items will make you eligible for a Sale-a-bration freebie.  Remember that Sale-a-bration ends on February 29th.  For every $50 (or $100) you spend, you get to choose one (or more) of the items for free.  And who doesn't like free stamps, dies, DSP, or embellishments?  Woo Hoo!

If you are placing an order soon, please consider ordering from me and using the Host Code at the top of this blog page.  I truly appreciate it!  

Happy stamping and creating,
Sharon

Friday, January 12, 2024

Lots of Beary Cute Cards

 Happy Friday to you.  What a week it's been with the heavy rains, high winds, and flooding going on around here.  Today it's supposed to start in on more of the same.  Wish we would have gotten a bit of this rain in the summer when it was so hot and dry.  Is there some way to gather up some of the rain and save it for future reference?  Hmm.  Something to think about.  Before the rains started today, I made a quick trip to the Post Office.  I had a stack of cards to mail to the shut-ins from church.  It was a large stack, so I figured I'd be better off taking them there rather than waiting for our mailman to take them all.  Even though the cards were designed in December and some of the items are now retired, I figured you might like to see the cards that were mailed for January.

I love the wintry look of the card.  It's a good  fit for January cards, right?  Let's walk through the steps to make this card.

I started with a card base of Gray Granite that measures 8 1/2" x 5 1/2".  It's scored and folded in half as usual.  The layer with the Aspen Trees is Basic White Thick cardstock.  It measures 4 1/8" x 5 3/8".  The die was laid in the center of this and run through my Big Shot.  I went through and back again to get a good cut on all the tree limbs.

The Balmy Blue print paper behind this is from A Walk in the Forest Designer Series Paper that was in the Winter Mini Catalog.  I liked how both this print and another snowflake print looked peeking through the trees.  This paper was cut at 4" x 5 1/4" so it's just a tiny bit smaller than the die-cut layer.  It's attached with adhesive at the edges and a few strategic places in the center of the die-cut.  Then it's attached to the card base with Dimensionals.

The bear is from the Beary Cute Bundle that wasn't carried over from the Winter Mini which is too bad in my opinion.  It was stamped with Basic Gray ink to give him a nice dark outline.  The scarf is from the same stamp set and was stamped with Balmy Blue ink.  It was punched out with the Bear Punch.

The sentiment is also from the set.  I love both the wording and the font used on this set.  (I'm hanging on to the set especially because of this sentiment.)  It's stamped in Gray Granite ink on a 1 1/2" x 1" strip of Basic White cardstock.

The bear is attached near the bottom with Dimensionals.  The sentiment is attached about the middle and on the left.  It's attached with Dimensionals also.

The added bling for these cards were three clear Rhinestone Basic Jewels.  I thought that they went well with the frosty feel of the card.

One last look at the stack of cards mailed out today.  It took a bit of time to assemble all of them.  I was thinking of you, Sue, when I was cleaning out all the bitty pieces in the trees.  I know you love your die-cuts, and so do I!

Sorry that most of today's card is using retired products.  But if you have the Beary Cute stamp set and punch, this gives you another idea on how to use it.  Thanks for stopping by to see what's being stamped today.  I need to get back to my new stamps and papers and get crafty!

Happy stamping and creating,
Sharon


Wednesday, September 27, 2023

Retro Christmas Card

Hello stamping friends.  Today's card totally reminds me of cards I received as a child.   My own children received cards similar to this one through the years also.  It's just an easy fun card to make that should bring a smile to someone's face.  Hope you enjoy the idea and are surprised by how easy it is to make.

This card has a lighthearted feel to it that reminds me how much children enjoy the winter weather and look forward to Christmas.  This card is almost totally made from the Walk in the Forest Designer Series Paper that's found in the Mini Catalog.  The purchase of this DSP is a way to reach out and help others too.  Stampin'Up! will donate $3 from each purchase of this paper to support the organizations that help those in need at this time of year.  So, it's a win for you and a win for others when this DSP is purchased.  Thank you for your help!

Now on to making the card.  I started with a regular card base of Basic White measuring 8 1/2" x 5 1/2".  It's scored and folded in half as usual.  Then comes the fun of using this Walk in the Forest DSP!  The snowy dots on the Balmy Blue background is the first layer.  It's cut at 5 1/4" x 4".  It's embossed with the Snowflake Sky Embossing Folder to add extra snowflake texture to the sky.  This is attached to the folded white card base with adhesive.

Can you see all the texture on the background?  I think that step really adds to the total look.  

A piece of Basic White cardstock that measures 2" x 4" was ripped in half lengthwise.  One of these pieces makes the snow along the bottom.  It's attached with adhesive.

The trees are on one of the sheets of Walk in the Forest DSP.  They match in size with the Merriest Trees Dies that are in the Mini Catalog on page 69.  After die-cutting a whole forest of trees 😉I chose two to go on this card.  The larger tree has adhesive mostly in the center of the tree, leaving the ends of the branches free to curl up a little.  The small tree overlaps the larger tree and is attached with Dimenisionals.  The trees are kept to the left side of the card to leave room for the bear.

The bear is also from that same sheet of DSP.  It coordinates with the Beary Cute Punch found in the Mini Catalog.  He was punched out and then attached to the card front using Dimensionals also.  

The sentiment comes from the Brightest Glow stamp set.  I love the word joy and tend to use it a lot for Christmas.  It's stamped on a strip of Basic White cardstock with Misty Moonlight ink then fussy cut to use here.  Small bits of Dimensionals are added under it to raise it from the card front.

Two of the new Adhesive-backed Snowflakes were added to the background.  These snowflakes are an Online Exclusive only and come in three sizes and three colors - copper, gold, and white.  They are a nice extra touch here.

The card was basically finished, but I wasn't quite happy with it.  Thinking back on all those Christmas cards ages ago, the one thing that really stands out in my memories is all the glitter.  Remember the raised glitter on all the detail?  I have some retired Star Dust glitter glue that is from years ago but is still useable.  So, on all the edges of the tree branches and on the snow underneath, scribble-y lines of this glitter glue were added to highlight the design.  Yes!  That's just the look I was going for and was perfect!

Hope you enjoyed my Christmas card that was a walk down memory lane for me.  It was fun to make and used almost no stamping, just the Walk in the Forest Designer Series Paper that provides all the materials.  If you don't have the punch or dies, you can always fussy cut these images.  Easy peasy.  Thanks for stopping by to see what's new.

Happy stamping and creating,
Sharon

Tuesday, September 12, 2023

All About Autumn in Moody Mauve

Hey there!  I don't know about you, but I am so ready for the weather to cool off a little.  I'd still like some sunny days mind you, but the heat has really been intense this summer and I've had enough.  So let's get on with the lovely, crisp fall weather here!  Trying to make my own fall weather, I've been making more fall cards with the All About Autumn 6" x 6" Designer Series Paper.  It also uses the Autumn Leaves Bundle for all the leaves decorating this focal point.  The Designer Paper is finally back in stock so make sure you order it soon in case it ends up on back-order again.  I've been holding off on posting a couple cards waiting for it to come back in stock, so let's get started with a super gorgeous fall card using Moody Mauve for the main color.  Yes, I know.  That isn't the color I think of for fall, but check this out and you might just change your mind!

Isn't this beautiful?  I just love it!!!  The mix of beiges, mauves, and grays is just fabulous!

Start with the card base of Moody Mauve that measures 11" x 4 1/4" and is scored at 5 1/2".  This makes the card a side fold which is a little different than usual. The middle layer for this card is Crumb Cake.  This measures 5 1/4" x 4".  It brings more definition between the DSP and the card base.  The DSP layer with all these gorgeous fall leaves measures 5" x 3 3/4" and is attached directly to the Crumb Cake with adhesive.  These layers are attached to the folded card base using Dimensionals.

Before I got started on the focal area, a 3" piece of natural ribbon from the Copper & Natural Ribbon Duo was added to the card front with adhesive.  Before attaching, a thread was pulled out from each end until there was about 1/2" fringe.

Now that the base is out of the way, on to the many parts of the focal point.  The sentiment is from the Autumn Leaves stamp set.  It's stamped with Moody Mauve ink onto a piece of Very Vanilla cardstock.  It's punched out with the 1 3/4" Scallop Circle Punch.  The layer behind it is Moody Mauve punched with the 2" Circle Punch.  They are attached using adhesive.

The leaves are a mixture of stamped and die-cut leaves from the set.  I stamped some with Moody Mauve both full strength and stamped off.  These were die-cut using the coordinating die from the set.  There are a couple leaves die-cut from the All About Autumn DSP - mauve with the copper design on them.  The small maple leaves and the larger oak(?) leaves are cut from the Oxidized Copper Specialty Paper.  (So gorgeous!!!)  The Crumb Cake branches are trees from the Horse & Sleigh Dies.  The small open-work stems are from the Darling Details Bundle and cut from Gold Shimmer Paper.  The leaves and branches were all built up and attached to the back of the sentiment layers.  After all the pieces were attached, the sentiment was attached over the ribbon using Dimenisonals.  At this time, the three little open-work stems in the gold shimmer were tucked in underneath the focal point and attached with adhesive.

The inside of the card is Very Vanilla to match the front.  I haven't decided on a sentiment in here yet.  Or I just might write a longer note instead.  We'll see...

The two oak(?) leaves attached in the corner were both die-cut from the same piece of DSP that had been used for the card front.  I added them so you can see both sides because I couldn't decide which way I wanted them to show.  Both of the designs together work out nicely and I like the mix.

Going back to the front of the card, I realized it could use a little more bling.  I guess the gorgeous Oxidized Copper leaves just weren't enough for me.  After trying all my different embellishments, I chose to use the Adhesive-backed Sparkle Gems in the Champagne (gold/copper) tone.  They seem to add enough extra sparkle without being too outrageous.  Yes, I like my glitz, but there is a limit as far as I'm concerned.  Yes, to each person his own tastes are the best.

Thanks so much for stopping in today to see what I have to share with you.  Feel free to leave a comment if you'd like.  It's always good to hear what you're thinking about my ideas.  I did mention that the All About Autumn Designer Series is back in stock.  I know several of you have been waiting patiently, so get it while it's available.  While shopping, check out the Online Exclusives, kits, and Clearance Rack that are available for you.  


And don't forget to look at the October Paper Pumpkin kit that you can pre-order until October 10th.  It looks like it's going to be adorable.  Create sparkling cards filled with warmth and light using the Home for the Holidays Paper Pumpkin Kit! 
Each kit comes with eight cards, four each of two designs, with festive coordinating envelopes. The shimmery details and traditional Christmas colors are sure to help you create cards that bring cheer and joy to any recipient. 
The kit this month also features special glitter glue! What a great way to add some extra twinkly details to your cards. And the best part? Your October Paper Pumpkin Kit will arrive in a beautiful box that coordinates with the theme and design of the cards in this kit. What a great way to bring inspiration to your crafting experience!  Subscribe by 10 October to get this cozy, Christmas village-themed kit!  Remember you can subscribe for just the one month or keep your subscription going until you're ready to take a break.   It's all about the ease of getting a crafting kit each month sent right to your door.  Ask me about information if you're interested.

Happy stamping and creating,
Sharon

Wednesday, August 30, 2023

Fun Fold Scenery Card

Hello stamping friends!   Hope you're having fun creating lately.  I've gone back to the lovely One Horse Open Sleigh Designer Paper for my inspiration today.  It's an Online Exclusive that's available right now.  If you don't have this yet, you really should consider this purchase.  The winter scenes shown on this paper is just gorgeous!  I have trouble cutting into it because I don't want to miss any of this goodness.  But cut away I did, and I love the card that emerged.  So simple yet elegant, and super quick to boot.  When you need all those Christmas cards to fill your list, this card is a winner.

You've got this wonderful wintry look as soon as you pull it out of the envelope.  I hope you can see the pretty white snowflakes sprinkled across the card.  They just add a subtle touch to the finish of the design.  Are you ready to make this card?

Start with a card base of Lost Lagoon cardstock that measures 8 1/2" x 5 1/2".  It's scored at 2 1/8" and 4 1/4".  Fold the card in half as usual.  Then fold back at the other score line so the inside of the card now is the front panel of the card.

The One Horse Open Sleigh DSP is 6" x 6".  One full print sheet is used to make this one card. First the DSP is cut across the bottom to take off 3/4".  This leaves a length of 5 1/4" to fit the card front.  Next a 2" strip is cut from the left side of the sheet.  This will be the front.  The 4" that are left will be the inside of the card.  You can attach these layers onto the Lost Lagoon card base at this time.  Make sure the top and bottom edges line up nicely.

Next a piece of Basic White cardstock is cut for the inside of the card.  This measures 2" x 5 1/4".  The sentiment for the inside of the card is from the Brightest Glow.  This is stamped with Real Red ink onto the white panel you just cut.  After stamping, attach this inside the card with adhesive.  Make sure the top and bottom edges line up with the other two panels.  This panel gives you plenty of space to write a small greeting to friends or family, but it's totally hidden when the card is closed.

I really like the "joy" sentiment in the Brightest Glow stamp set.  It's stamped on a Basic White scrap using Real Red ink. Then punched out with the smaller oval of the Double Oval Punch.  There was a debate with myself about using the larger scallop oval to punch a Real Red layer but it was decided no.  It made the sentiment area way too heavy looking, so it came off the card and I stayed with simple.  

The snowflake accents were added at this time.  There's one of each of the three sizes.  Oh yes, the snowflakes are an Online Exclusive also.  Make sure you check it out.  The last little bits of bling are the Loose Holly Gems and Sequins that can be found in the new Mini Catalog.  They are just a cute little accent that adds so much to the card.

Here you've got a last look at the finished card standing on a table.  Such a pretty wintry accent just sitting there.  And wasn't that an easy card to make?  Just perfect for getting ready for the holidays.  And yes, I'm just a little obsessed with this One Horse Open Sleigh DSP.  The prints just take me back to my childhood - outside playing in the snow with my siblings.  It was fun, but pretty cold.  This way I can enjoy the look but not freeze my fingers and toes.  😄

Remember, just a few more days before you can get your hands on all the goodies in the new Mini Catalog - September 6th!  And there are so many new goodies to choose from!  I still want to try everything, but I'm trying to exercise some restraint!  Not sure how good that's working out.

Thanks for coming by today.  Happy Christmas card making.  This is one of my very favorite traditions every year.  It just blesses me to think of my family and friends who will be receiving these cards.  Hope the cards sent will bless others too.

Happy stamping and creating,
Sharon

Wednesday, August 9, 2023

CASE-ing Peggy Noe

Hello, hello!  Hope you're all doing well and staying happy.  Of course, if you're stamping and creating, you must be happy!  Right?  It always makes me happy to create even when things don't go quite as planned.  You know what I mean?  This morning I was looking at a blog post by Peggy Noe at prettypapercards.com.  I saw a lovely simple card idea and I just had to make it - my way.  Now that it's finished, I might like her version better than mine, but that's all right.  I like to look at someone's idea (or more than one someone's ideas) and go downstairs to my stamp room and create by making my version of "what I remember".  That sometimes really makes me laugh because my version ends up being nothing like the original.  But that's ok too.  So it was with this card.

Here's the simple card I ended up making.  If you go to her blog, you'll see some glaring differences.  First the color.  I changed it from Berry Burst to Pool Party.  Big difference!  I added the card base of Pool Party that measures 8 1/2" x 5 1/2" that's folded in half.  The Basic White layer measuring 5 1/4" x 4" is also cut.

The dragonflies were punched from Basic White cardstock with the current Dragonfly Punch.  One large and 5 small ones were punched.  I kind of got carried away with the number of small dragonflies.
Another large dragonfly was punched from Vellum.  A last dragonfly was punched from a scrap of More Dazzle Specialty DSP in the Champagne color.  The wings were trimmed off this last one to keep only the body.

We're not done punching yet.  The smaller oval in the Double Oval Punch was used on Basic White for the sentiment.  The Bough Punch was used on Basic White cardstock to punch 3 sets of leaves and 3 flower stems.

Next it was time to do some coloring.  Using Pool Party ink and a Blending Brush, a minute bit of color was added to the center of the white layer that was already cut making sure to keep it very light.  The white dragonfly and the 3 flower stems were colored with the same ink and Blending Brush.  This time the color was added more heavily.  Then the sentiment from the Go To Greetings was stamped in Pool Party ink onto the center of the punched oval.  

Just about all that's left to do is assemble it all.  The Vellum dragonfly was attached to the colored one using Mini Glue Dots on the body only.  The glittery body was layered onto this with Mini Glue Dots also.  It was attached to the card front with Dimensionals cut in skinny strips to place under just the body so the whole dragonfly hovers above the card.

The white leaves were trimmed at the stems and tucked under the dragonfly.  The oval sentiment is attached with Dimensionals.  The little dragonflies were attached with one Mini Glue Dot on the center of each body to hold in place.

The Dark Pool Party Blends marker was used to add the spatterings.  Just flick the tip from the inside of the lid to get the spatters.  You can add as few or as many as you like.  Just be gentle with the tip of the marker so it doesn't get ugly and unusable.  This is a juicy new Blends marker that I used so the spatters are fairly large.

Lastly the gems were added to the dragonfly.  Yup, this really upped the glitz factor on the card.  Peggy only used one on her card, but I got carried away again.  These gems are from the Glossy Dots set and are the Pool Party color of course.

Ok, that's my version of her simple card.  It only took about 30 minutes or less to make, so it's a perfect idea for when you're in a hurry and need a card now.  I'm thinking that changing the colors, sentiment, and amount of dragonflies and gems would give you a very versatile card that would be handy to have on hand.  I've still got a few ideas rolling around in my brain about changes to the card idea.  Hmmm, I might have to make another card soon and go with these other ideas.

Okay, today's reminder is about using your Bonus Days coupons.  Don't forget that at the end of August they expire.  So use them soon!  The Kit Sale is going on this month also.  Some really great kits for you to choose for yourself or as a gift, and they're 30% off.  Woo Hoo!  

And last, but certainly not least, your new September - December Mini should be arriving in your mailbox soon!  Yay!!  Ordering will commence September 6th.  Are you excited?  This always gets me revved up to start on my Thanksgiving and Christmas cards.  If you do Halloween cards, there are some adorable ideas that you'll just love.  

Be sure to stop in again soon to see what's happening here.  

Happy stamping and creating,
Sharon

Thursday, July 20, 2023

Layering Leaves in Blues

Hello friend!  It's been a while since my last post, and I apologize for that.  Seems like I've been running into the problem of supply issues.  I really hate to post a card when I know the major items are on backorder and will be for a while.  There's almost nothing more frustrating than wanting to order a stamp set and you can't get it for another couple of weeks or longer.  I know because there are some items I'm waiting for myself.  So today, I sat down to make a card and decided to use the Layering Leaves set (page 96).  As far as I know they are available.  It's one of those few sets that do not have a coordinating die set, but there is a punch (page 148) that works.  So that's where we're going today.

Like I mentioned, I was thinking of going for a blue card to match the weather - kind of blue-gray and sprinkling.  You know what kind of day I mean.  The base of the card starts with Night of Navy.  Always a good choice when working with blues.  It is cut at 11" x 4 1/4", scored at 5 1/2" and folded in half.  The first layer on this is Boho Blue to get those grayish tones in from the weather.  It measures 5 1/8" x 3 7/8".  If you hate to do the eighth inch cuts, you can make it 5 1/4" x 4".  This will give you a smaller navy border, but a larger Boho Blue border.  Your choice.  The next layer is one of the Countryside Inn Designer Series Paper prints.  I love this floral with the solid and open-work flowers and leaves throughout the pattern.  This is cut at 5" x 3 3/4".  It's attached to the Boho Blue layer with adhesive.  Then attached flat to the card base with adhesive.
The focal point is all attached to a Basic White cardstock piece that measures, 4 1/8" x 2 3/4".  It's backed with a piece of Night of Navy that is 4 1/4" x 2 7/8".  Before attaching together, let's do a little stamping.

The Layering Leaves are used here.  The more open leaf set is stamped twice on Boho Blue cardstock with Night of Navy ink.  Check how the coordinating punch will work before stamping the leaves on the cardstock so as not to waste lots of cardstock.

On the Basic White layer, stamp the veined leaf set with Night of Navy ink.  I stamped it close to center about 1/2" down from the top.  Then stamped the fill-in stamp with Night of Navy ink that had been off-stamped.  This makes it a little darker than the Boho Blue leaves.  

There are also two of the little buds punched from the More Dazzle Specialty Paper (page 127).  These will add a pop of interest because of their sequin-like sparkle.   

Lastly the sentiment was stamped on Basic White with the Night of Navy ink to match.  I chose 'hello' from the Layering Leaves set.  Good number of general sentiments that can be used every day.  The sentiment was die-cut with the Stylish Shapes die set.

Now it's time to put it all together. I added adhesive behind the sentiment, then started attaching the stems to it.  When I had them positioned the way I liked, I ran two strips of Adhesive Strips to the top and bottom of the label.  These hold all the stems in place and give it height when it's attached to the card.  

A double bow of 2022-2024 In Color Baker's Twine was added to the card.  There was about 14" used to make the double bow.  The Starry Sky color was used because it blended nicely with the Night of Navy used here.  The bow was attached with Mini Glue Dots.

The inside of the card has a layer of Basic White that measures 5 1/4" x 4.  The sentiment from the Layering Leaves set was stamped in Night of Navy ink.  The same leaves that I used on the front were added to the left of the sentiment.  The same Night of Navy ink was used but was off-stamped before stamping onto the card.  A 3/4" strip of the same print was added to the bottom of the white layer to finish.

Looking at the finished card, I decided maybe it wasn't quite finished yet.  Three gems from the Tinsel Gems Three-Pack were added for more interest.  These are the Misty Moonlight color, but I liked how they accentuated the different blues on the card already.

Well, that's it for now.  I think everything used here is actually available.  And nothing is retired either!  Hallelujah!  I seem to have a hard time staying away from my retired stash!!  I really like how the card turned out with the mixture of blues.  And I'm really liking the Layering Leaves used with the Countryside Inn DSP.  What a lovely mix together!

Don't forget that Bonus Days are still going on until the end of July.   For every $50 you spend, Stampin'Up! will give you a $5 coupon to use next month.  What a nice bonus!  Make sure you hang on to your Bonus Coupons!  The code number from each will be needed next month to redeem them.

Thanks for stopping by.  Hope you're enjoying your summer - heat and all!

Happy stamping and creating,
Sharon

Thursday, February 2, 2023

Valentine Cards Anyone?

Hello Friend!  Glad you stopped by today.  I have been busy making cards for the shut-ins here from church.  I think I've found my little niche again.  There are 29 shut-ins this month, so I've been busy with Valentine cards for everyone.  It's interesting to try not to make the cards too mushy and sweet, because honestly I've never met these people.  Usually, I make special cards for family and friends that I try to fit to each person.  Not so much this time around.  I figured it wouldn't make any difference whether I used current or retired products, so the cards are a mixture of both.  It was great even using up some of my stash of DSP that tends to get out of hand.  Of course, you have no idea what I'm talking about, do you?  I mostly used one layout for the cards, then when that DSP ran out, I switched to a different DSP and a different layout for the card.  Hope these cards spark your imagination and you try out the layouts for many different cards.  These are very basic, go-to layouts that work for many different occasions.  Just change up the DSP and stamping and away you go.

Here's an overview of most of the cards that were made.  There were a couple odds and ends from figuring out the DSP I wanted to use, or just playing around with different stamps that ended up being way too time consuming or too frilly for making 29 cards.  Some of these cards are being sent to men, so you know - no flowers and ribbons and lace, etc.

It was interesting trying to find all the different DSP's and stamps that I used.  I wasn't really going to post these cards, so each one of the items was put away after using.  Hence having to find them all again!  Silly me, I really should know better!

This is the idea I planned to use for all 29 cards.  After cutting all the pink Butterfly Bijou DSP into strips that measured 2" x 5 1/2", there wasn't enough of the DSP to make all of the cards. I decided to work with what I had and go on from there.  The circles were cut with the largest Stylish Shapes circle die.  I stamped this Adorable Owls (Sale-a-bration freebie!) stamp on the center of each of them using Memento Tuxedo Black ink.  I also used strips of Basic White cardstock to stamp the sentiment which comes from the new set - Country Bouquet found on pages 9-10 in the January - April Mini Catalog.  The sentiments were die-cut using the new Something Fancy Bundle found on pages 15 & 17 in the same Mini Catalog.  I love the words, fonts, dies, everything about this bundle! 

The owls were all colored with Stampin'Blends in Crumb Cake Light & Dark, Mango Melody Dark, and Old Olive Light for the eyes.  A heart was punched from Polished Pink cardstock to match the layer behind the DSP.  The card base was Blushing Bride.

After coloring nine of those little owls, I needed a break.  They didn't take very long to color, but I was getting bored doing the same thing over and over. So, I decided to just stamp and punch hearts to go on some of the card fronts.  I used the Country Bouquet set for this.  The hearts were stamped with Polished Pink and punched out with the coordinating Country Bouquet punch.  It needed another heart, so I added one that was punched directly from Polished Pink cardstock for some contrast.  The hearts and sentiment were all attached with Mini Dimensionals.

Ok, more done, but this is where I ran out of my DSP that I wanted to use.  On to something else...

Look what I found when I was going through my stamps and DSP stash!  Don't you love it?  There are two different DSP packs used here - the background pieces are from the Ice Cream Corner DSP and the heart is punched from a piece of the Pleased As Punch DSP.  I think these are both from last year, but they could be older.  

I love the heart used with the sentiment from the Sweet Ice Cream set.  And I even dug out my remaining TerraCotta Tile cardstock for the base of the card.  I totally love and miss using this color.  It was one of my forever favorites.  The ink I used for the sentiment is Cinnamon Cider because it goes so well with the "sugar cone" background.  It was punched using the Double Oval Punch that is in the current Annual Catalog.

That's about it for most of the cards that were made.  How did you like the "blast from the past"?  Do you still own some these items?  Or do you purge all the leftovers that you haven't used for awhile?  I'm glad I held onto my things.  It's fun to go through your stash and find just the right item for making the idea that's dancing around in your imagination.  It was also fun planning out these cards for the shut-ins.  This reminds me so much of making the cards to send to the military.  I loved getting together with all you wonderful ladies and doing a lot of visiting while putting the cards together.  My goodness, did we ever make a lot of cards over those ten years!!

Well, thanks for coming back to see what I've been doing lately.  Don't forget there is still one month of Sale-a-bration to take advantage of those freebies.  I know you are a savvy shopper and want to make those dollars spread as far as possible.  Sale-a-bration is a great time to make your purchases to get the added benefits.  Thanks for all you do!  I love hearing from you when you call or write.  You are so special to me!

Happy stamping and creating,
Sharon

Wednesday, January 4, 2023

Sneak Peek Hearts

Hello there!  When I got up this morning, I was thinking we ought to consider building an ark.  It was pouring rain and had been raining for several hours.  The creek behind our house was really over the banks - more so than we've seen it since we moved here.  I'm so thankful we live up on a hill, so we don't have to worry about flooding anymore.  If this was going on in Michigan, I'd expect water up to my hips at least.  Thank God that isn't the case anymore!  Wow, the rain is just absolutely crazy right now.  Today's post shares a cute little card featuring the Country Bouquet Bundle shown on pages 9 & 10 in the new Mini Catalog and the pretty coordinating 12" x 12" Country Floral Lane Designer Series Paper.  It's just so sweet.  Hope you like it.

Isn't it cute?  The card starts out with Sweet Sorbet for the base that measures 8 1/2" x 5 1/2".  It's scored at 4 1/4" and folded in half.  Next there's a layer of Basic White that measures 5 1/8" x 3 7/8".  A layer of the sweet Country Floral Lane DSP in Sweet Sorbet with teensy white hearts is next.  It measures 5" x 3 3/4".  This layer is adhered to the Basic White layer to give a very thin frame of white showing all around just to separate the two Sweet Sorbet colors.  Sometimes that skinny little frame is more effective than the larger 1/4" frame.

Before going any further with this design, I spattered this with Wink of Stella.  It's very hard to see this in any of the pictures, but the sparkle it adds is subtle and just right.


Next, I stamped the two hearts with Sweet Sorbet ink and the two leaves with Mint Macaron ink.  They are both punched out with the coordinating Country Bouquet Punch that is part of the bundle. 

I thought a circle shape would look nice under the hearts.  I had a leftover 2 1/2" circle in Mint Macaron from some Christmas cards I made.  Then used the 2nd largest circle from the Stylish Shapes Dies set to cut a stitched circle from Basic White cardstock.  These are just about the same size, so there was no layering here.  Instead, the Mint Macaron circle is offset quite a bit to show it off more.  They are attached together in the overlap area, then attached to the card front with Dimensionals.  The two hearts and leaves were attached to the circles with Dimensionals too.

The sentiments are from the same Country Bouquet bundle.  They were stamped on Basic White with Mint Macaron ink.  The words were fussy-cut instead of using a punch or die-cut.  The first part of the sentiment was attached flat at the top of the card.  The 2nd half of the sentiment was popped up with Dimensionals on the white circle.

The design needed something else.  I tried several ribbons, but they were too much for the design.  I was thinking of using White Baker's Twine, but then I saw the 2022-2024 In Color Baker's Twine assortment.  Oh my, this was just what I needed.  I used two strands of the twine to make the bow.  It's attached to the card front with a Mini Glue Dot.

For bling on this card, I remembered some small red and white tiny hearts from a couple of years ago.  They were the perfect touch and almost the exact size of the hearts on the paper.  When they were added to the card, they were placed right over the existing hearts.  Too cute!

So that's my first Valentine for the year 2023.  My goodness, I'm still trying to remember that we're into another year, and now I'm jumping ahead to Valentine's Day already.  But the Country Bouquet bundle and DSP are darling, and I wanted to make sure you saw it stamped up.  Now I'll have to make something with the set that isn't for Valentine's Day.  I'm sure I can think of something if you give me enough time!  😄 
    
Are you ready?  Tomorrow morning - January 5th - the new Mini Catalog and Sale-a-bration start!   I'm so excited to see what you like.  Let me know what your favorites are, and if I have the sets, I'll try to post a project using them.  Have fun!  If you have any questions concerning any of the products or Sale-a-bration, please contact me.  I'd love to hear your thoughts and opinions.

Happy stamping and creating (and shopping!),
Sharon