Friday, November 26, 2021

Christmas Pines Card

 Hello dear friends.  Hope you had a wonderful, meaningful Thanksgiving.  Did you have a turkey with all the trimmings?  We did, and I think I'm still stuffed.  I might only have enough energy today to type up a blog post, and that's about it.  Today's card is a mix of several die-cutting sets.  Seems like I've been doing that a lot lately.  I start out thinking I will focus on this one set today, and next thing I know I'm pulling out other stamps and/or dies to add to the card.  So I guess you just take my ideas and work with them however it works for you!  That's what usually happens with me.  I see something on my computer upstairs.  By the time I get downstairs and start pulling out stamps and paper, I've totally forgotten just what it was I saw and work out something else entirely.  CASE - Copy And Share Everything is a way of life when it comes to stamping.  We all share, and everyone's ideas seem to come together just a little differently.  And that's part of the magic.

Today's card starts out with a base of Cherry Cobbler cardstock cut 5 1/2" x 8 1/2".  This was scored and folded in half.  

The first layer is Basic White cardstock that was embossed with the Merriest Frames Hybrid Embossing Folder.   This layer had actually been embossed over a week ago.  I had already used the Blending Brushes with Soft Succulent and Evening Evergreen inks to softly color the embossed images.  And I tried to do something with this off and on for the past week with absolutely no success.  How frustrating!  But today my creative muse must have been sitting on my shoulder because the ideas just flowed and here we are!

The coordinating dies have a stitched rectangle that fits inside the embossed frame with some extra room. I die-cut it in Basic White for the sentiment.  Then cut a very thin frame around it with Cherry Cobbler cardstock.  I wanted a specific sentiment for this card, and unfortunately the sentiment is from a retired set - Peaceful Boughs.  I love the wording and use it for my cards each Christmas.  So it was stamped on the white using Cherry Cobbler ink.  Using adhesive, it was attached to the Cherry Cobbler cardstock then set aside until needed.

In the picture here, you can easily see the soft color on the embossed images.  So pretty as is, but I wanted more.

Ok, the next step is where things get a little off the wall.  I wanted to add some greenery under the sentiment layers, but wasn't sure what I wanted to use.  I ended up die-cutting some of the pine needles from Evening Evergreen cardstock with the Christmas Pinecone Dies - the more detailed one.  (2nd die set)  It was too much greenery and covered up the embossed layer, so I cut it apart and attached just sprigs of pine needles behind each corner of the sentiment.  When I added more along the sides, it got overpowering.  So those came off to be used at a later date.  The Christmas Trimmings Dies have some small holly leaves that I die-cut from Soft Succulent cardstock and tried those.  (3rd die set!)  Yay!  Looks like I had a winner!

After attaching the pine needles to the Cherry Cobbler layer, I attached the whole layer to the card front with Dimensionals.  So far it was looking good.  The holly leaves were tucked around the design and attached with a Mini Glue Dot each.

I wanted a bow under the sentiment.  Both the Evening Evergreen and Soft Succulent 3/8" Open Weave Ribbon would work, but I liked the softness of the Soft Succulent color best.  The ribbon was tied into a bow and attached with two Mini Glue Dots.

Now we come to the options of bling or no bling.  And if yes on the bling, which one?  I almost left it plain, but it seems I'm turning into a bling-aholic!!  Oh No!  So after trying several options, I settled on the Holiday Rhinestone Basic Jewels in the Cherry Cobbler tone.  I couldn't stop at my usual three and ended up tucking in five around the design.

Whew, one stamp set, but three different sets of dies to complete this card.  But I love how it turned out!  So it's all worth it, right?  Now I need to get down to my work table and get everything put away again so I can find the top of my table.  What a mess!

Hope you like my card and got a chuckle from my foibles with making it.  I'm sure your card making efforts go much more smoothly than mine.  By the way, my son's down visiting from Michigan and today is his birthday.  Happy Birthday Michael!!!  Man, is he ever getting old!  😏  Oops, I guess that means I'm getting even older!!  ha ha

Hope you're having fun going crazy with all the Black Friday sales.  I'm happy to be tucked in here at home and spending my time creating.

Blessings and love,
Sharon

Wednesday, November 24, 2021

Sweet Gingerbread Card

Hi friends!  It's almost time for Thanksgiving, and that means the Christmas is right around the corner.  And that means that it's time for another Christmas card idea for you.  This one uses an easy fun fold idea that I hope you'll like, along with some sweet gingerbread 'cookies'.  Yum!

Isn't this cute?  I love the 'cookies' that are actually die-cut from the Gingerbread & Peppermint 6" x 6" Designer Series Paper.  It doesn't get too much easier than that.  There's almost no stamping on the card either on the outside or the inside of the card.   Just a little die-cutting and it's just about finished.  Let's get to it...

The card base is Real Red cardstock cut at 11" x 4 1/4".  It's scored at 4" and 9 1/2".  Then both ends are folded in to make the card.  The Heartwarming Hugs 12" x 12" Designer Paper is used to match up with the Gingerbread & Peppermint DSP.  The left hand side of DSP measures 3 3/4" x 4".  The right side measures 1 1/4" x 4".  These pieces were attached using Multi Purpose Liquid Glue.

Ok, now to the fun part.  I knew I was making a number of these cards, so I grabbed the Gingerbread Dies and the Gingerbread & Peppermint DSP and went to work die-cutting a small pile of gingerbread cookies.  I cut stars and snowflakes, ornaments and bells.  And they looked good enough to eat!  They are definitely frosted fancier than any gingerbread cookies I've ever made!!  I also cut some round candies and bits from the leftovers of paper.  So much fun.

I thought the Tailor Made Tags Dies would make a good sentiment layer.  I die-cut the largest tag from the Kraft 6" x 6" Paper Pack in the July-December Mini Catalog.  The Kraft Paper fits in so nicely with the gingerbread theme.  The sentiment is from the Frosted Gingerbread stamp set and is stamped with Early Espresso ink.  I added a short length of Real Red 3/8" Ruffled Ribbon to finish the tag and then used Dimensionals to pop it up on the left side of the card only so it won't seal the card closed.

On this card, I attached two of the snowflakes to the card front.  The one of the right is only attached to the tag and not the right side of the card.  There are Mini Dimensionals under parts of the snowflake on the bottom left.  I added two of the little bits I had die-cut, and 3 Real Red Rhinestones to finish the front.

The inside of the card has a layer of Basic White cut at 5 1/4" x 4".  This has a cute lacy border stamped on the bottom using Crumb Cake ink.  This reminds me of the pretty frosting patterns on the cookies.  The sentiment is from the same set and stamped in Early Espresso ink.  Lastly, three of the die-cut candies were attached in the bottom right corner.  Yes, a card almost good enough to eat.  But please don't.  I'm sure it doesn't taste as good as it looks!  😄

Now I need to get to baking a pie or two and make that jello salad my daughter loves so much.  Lots to do before sitting down to eat that yummy Thanksgiving dinner!  Just counting all the blessings God has showered me with throughout all my life.  Of course there have been many ups and downs over the years.  Who hasn't had them?  But God has been with me every step of the way and continues to bless me each day.  I pray God will bless you this day and touch your heart with His love and grace.

Happy Thanksgiving (a day early)!
Sharon

Tuesday, November 23, 2021

Christmas Pinecones

 Hey there.  Back again with a Christmas card to share today.  I love the Painted Christmas Designer Series Paper and thought it was time to make another card using the gorgeous prints.  After looking through them, I decided on the print with the small pinecone and pine needle clusters all over it.  With that picked out, the rest came together pretty easily.

The card starts with a base of Soft Suede cardstock cut at 11" x 4 1/4", scored at 5 1/2" and folded in half.  I wanted to make the sizing of the layers a little different than the usual, so the Crumb Cake cardstock is  cut at 4 3/4" x  3 1/2".  This way more of the card base shows up to frame the main images.  The DSP print is cut down to 4 1/2" x 3 1/4".   

There's a band across the card that measures 3 1/4" x 1 1/4" and is cut from Evening Evergreen cardstock.  Inside this band is a panel of another print from the same Painted Christmas DSP.  In fact, it's the back side of what I just used on the card front.  I love these two prints together.  I have a feeling I'll have used up all of these two prints before I make much of a dent in the other prints in this package.  Do you find you gravitate to certain prints in each package of Designer Series Paper and tend to use them up before you get to all the others?  Or is that just me??

At this point, the DSP has been attached to the Crumb Cake cardstock with adhesive.  The second print has been attached to the Evening Evergreen band, and this has been attached to the DSP layer with adhesive also.

I didn't want to cover up all the DSP and band, so I chose a smaller sentiment from the Tidings & Trimmings stamp set.  This was stamped on Basic White with Evening Evergreen ink.  It was punched with the Label Me Fancy Punch.  It didn't stand out from the background enough, so I used a Blending Brush and the Evening Evergreen ink to define the outside edge a little.  It was then attached to the card front using Dimensionals.

The pinecones were stamped from the Christmas Season stamp set.  They were stamped on Crumb Cake cardstock using Crumb Cake ink for the bottom layer and Soft Suede ink for the detail layer.  They were die-cut using the coordinating Seasonal Labels Dies.  When trying to get the placement right, I thought it needed a touch of gold to enhance the look.  The berry branch from the Christmas Trimmings Dies was used to die-cut a couple branches from Gold Foil Paper.  These are just tucked in around the pine cones and brighten the whole card up.  The large pine cone was attached with adhesive, but the smaller one was popped up with Dimensionals.  There is a small knot of the 3/8" Open Weave Evening Evergreen Ribbon to accent it.  That's attached with a couple of Mini Glue Dots to hold in place.

The sentiment on the inside was from the Inspired Thoughts stamp set.  It's stamped in Evening Evergreen ink onto a Basic White cardstock piece cut at 5 1/8" x 3 7/8".  The edges of this were also accented with the Blending Brush and Evening Evergreen ink.  It's then attached to a 5 1/4" x 4" layer of Crumb Cake cardstock. Finally it is then attached to the inside of the card, and the card is finished.  One more card down, ready to get addressed and sent out in the mail.  How many more of them do I need to make yet?  Who knows, but I think it's a great, big bunch of them!  Got to keep making those cards...

Hope this card layout gives you some ideas and gets you creating.  It's a similar layout to cards I did earlier in the October, but this time I used DSP instead of stamping underneath the band.  It's a great layout to use when you're stumped for ideas, and you can quite literally come up with hundreds of ways to use it with whatever papers and stamps you have on hand.  The sky really is the limit with this layout.

Just a reminder that if you're placing an order, I'd appreciate you using my Current Host Code tucked at the top right corner on my blog page.  Also, if you'd like to purchase a gift card for a friend or family member for Christmas, I'd be happy to make one up special for you.  Please do it soon, so I can make it and get it to you in the mail in time for Christmas!  We wouldn't want your gift sitting in the Post Office somewhere on Christmas Day.  So let me help you make someone happy for Christmas! 

Thanks for stopping by today.  It was a good day for stamping and sharing.  I need to get in as many ideas as possible before the time runs short.  Keep checking back often to see what's new.

Happy stamping and creating,
Sharon

Sunday, November 21, 2021

Eden's Garden Again

Hi there, and happy Sunday to you.  Hope you had a chance to spend some time communing with God again this morning.  Really looking forward to my Sundays lately, because I'm getting so much out of the Pastor's sermons.  This idea of choosing our 'one person' to pray for every day about having a chance to talk to them about the saving grace of God has been a real thought provoking plan.   To reach at least one person that you really care about for Christ is so powerful.  It's been on my heart for weeks now, and hopefully I can plant seeds that will reap a heavenly reward.

My goodness!  I need to get off my soapbox and get back to sharing what I've been making lately.   I've been playing around some more with the Eden's Garden suite of products.  They're really quite pretty and make card-making easy.  This layout is something I've used so many times in the past, but it always turns out so nicely that I go back and use it over and over again.  

The card base for this card is Soft Succulent and it's cut at 11" x 4 1/4".  It's scored at 5 1/2" and folded in half.  The Basic White layer on the card front is cut 5" x 3 3/4".  

I drew a faint pencil line across this just a little above the center.  This would be my guide for stamping the leafy sprigs across the card.  I started with one of the smaller sprigs and stamped it three times across the top and twice towards the bottom using Soft Succulent ink.  In between these, I stamped the larger sprig with Evening Evergreen ink to fill it in nicely.  

The leafy banner die was used to die-cut a strip of Evening Evergreen cardstock.  Laying it across the card, it just didn't stand out like I had hoped.  So I cut a 1" x 3 3/4" strip of Soft Succulent cardstock to place behind it.  That really made the darker green stand out nicely and showed off the pretty leafy ends.  The Soft Succulent strip was attached to the card front with adhesive.  The dark leafy strip was attached over this using Dimensionals so make it really stand out.

I used one of the sentiments in the Eden's Garden stamp set to coordinate.  A skinny 1/2" strip of Basic White cardstock has the sentiment stamped on it using Evening Evergreen ink.  It was trimmed close to the ends with Paper Snips.  This fit perfectly inside the Evening Evergreen layer and was attached with adhesive.  

Of course it needed some bling, so I added one of the Garden Gems on each end of the Evening Evergreen banner to accent the words.  Then I couldn't stop myself there, and added three more of the iridescent gems to the card front.  Love the bits of bling!  The iridescence really makes them glitter and shine.


Since the outside of the card turned out so nice, I went ahead and stamped the same look inside to match.  The cardstock is cut at 4" x 5 1/4".  The same leafy sprigs were used to stamp off the edge of the bottom.  The same two colors were used too.  I like carrying the outside of the card's into the inside, but sometimes I struggle to find just the right look.  This time it was easy and I love how it turned out too.  The Basic White cardstock piece was attached inside the card using adhesive.  

And there you have it.  A quick and simple card layout that's pretty and looks elegant too.  When you're stuck for some inspiration, try using this layout with different stamps and colors.  I think you might be pleasantly surprised by all the beautiful cards you can make with this plan.

When you place an order this month, please use the Current Host Code shown in the top right corner of the blog page.  I truly appreciate your orders.  It helps to keep me inspired to make more cards to share with you!

Have a very blessed day!
Sharon

Saturday, November 20, 2021

Cork & Leaves for Fall

 Welcome!  Glad you could stop by today for my 100th blog post at this address.  And it only took just shy of a year to do this many.  Hopefully I can keep up the pace and do even more posts in the coming year.  Today I'm sharing one of my Thanksgiving cards that have gone out in the mail yesterday.  I've been working at them 15 minutes here, and another 15 minutes there.  You know, when you've got that stack of cards to make and you can only work on them in snatches of time.  But they're finally finished, and I'm very pleased with the finished card.  It's everything I expected it to be.

One big surprise about making this card - I totally love working with the Cork Paper!  I wasn't even planning on buying it, but I thought it would look great for the background on this card.  So I broke down and made the purchase, and I'm so glad I did.  Yes friends, I struggle with what to purchase too, just like you!  You know I can't just get everything, even though sometimes I'd like to!!  But the Cork Paper has been a lovely surprise and so easy to work with.  Now I need to see what else I can make with it!

The card starts out with Cajun Craze cardstock as it's base.  It's cut at 8 1/2" x 5 1/2" and folded in half.  Then comes the layer of Cork Paper.  This is cut at 5" x 3 3/4" and attached with MultiPurpose Liquid Glue.   Set this aside while doing all the die-cutting.

The wreath comes from the Seasonal Swirls Dies in the July-December Mini Catalog.  There are 3 different wreath dies, and they're all quite different - pine boughs, leaves, or stars, with little bits to coordinate with each wreath to cover all the end of year holidays.  So this is a very versatile set.  I die-cut the wreaths from Soft Suede cardstock.  Again I forgot the Adhesive Sheets on the back until I was almost done, then added it for the last four wreaths I cut.  I think I need to have those Adhesive Sheets setting out on my table at all times so I remember them!!  They do make life easier.

Then on to die-cutting all the leaves. I chose the leaf spray from the Forever Flourishing Dies set.  This gives you lots of leaves for very little effort.  I cut these in So Saffron, Pumpkin Pie, Old Olive, and Cajun Craze cardstocks, one of each color for each card I was making, so there was a goodly stack of them when I was finished.  

Next it was die-cutting the little pumpkin from the Seasonal Swirls Dies.  These were cut from Pumpkin Pie cardstock.  Again, a cute little pile of pumpkins.

Now on to putting it all together.  The wreath went on first with either MultiPurpose Liquid Glue or the Adhesive Sheets where applicable.  I did use the MultiPurpose Liquid Glue to attach each of the leaf sprays, angling them as I stacked them up so all the colors would show.  I attached one pumpkin in the center of each leaf cluster using a Dimensional.  There, that part was finished.

The last thing needed was the sentiment.  It's from the Sparkle of the Season stamp set that coordinates with the dies used.   I chose to stamp it on Bumblebee cardstock using Cajun Craze ink.  Then just trimmed it up with Paper Snips to fit the card.  It was attached with the MultiPurpose Liquid Glue onto the card front. 

No bling on this card for me.  I thought it was perfect just the way it was.  Can you see all the wonderful texture of the Cork Paper?  It looks like little strips of cork with all the texture included.  And the feel of it is wonderful!  I'm so glad I stepped out and tried something new.  It's well worth it!!

And in case you haven't noticed, I've almost switched out entirely to using the MultiPurpose Liquid Glue.  It gives me a bit of wiggle room when attaching layers to get them just right.  And it's great for attaching things with lots of texture.  So if you haven't tried using that yet, give it a try.  Just remember that a little goes a very long way so keep a light touch when applying the glue.

Ok, that's it for another blog post.  Hope you learned something new and are inspired to try out some new products.  It keeps things fresh and exciting.  

If you're ordering soon, please use the Current Host Code shown at the top of the blog page.  I appreciate all of your business and all of you too!  Have fun stamping and creating.  If you have any questions about my projects or ordering, you can always contact me at sharoncarr50@gmail.com.  Or just leave a comment down below and I'll get back to you.  My heart is full to overflowing with thanks for all you wonderful people!  How blessed I am!

With thanks,
Sharon

Friday, November 19, 2021

Thanksgiving Leaves

 Hey there!  Hope this finds you doing well and enjoying your fall.  I can't believe it's almost time for Thanksgiving already.  Where does the time fly?  Before I get all my Thanksgiving cards sent out, thought I'd better take a picture or two and share the ideas with you.  Let's get right to it.

Staying with some warm fall colors, I started with a card base of Cinnamon Cider cardstock cut at 8 1/2" x 5 1/2" folded in half.  The next layer up is Bumblebee cardstock cut to 5 1/4" x 4".   The next layer is Very Vanilla cardstock cut to 5" x 3 3/4".  This layer was die-cut with the  Stitched Greenery Die that doesn't actually cut, but gives this lacy, leafy, stitched look.  I had used this die before, but wasn't ever really impressed because I just left it plain.  Well, this time I used my Blending Brushes and first Bumblebee ink lightly over all, and then a bit of Cinnamon Cider ink more on the outside edges.  Wow!  This added color just totally popped the stitching and I love the look!  I'll have to try this a lot more often now that I know how cool it really can be.

After adding the color, this layer was attached with MultiPurpose Liquid Glue to the Bumblebee layer, and then attached to the card front with the glue also.

I thought the bold leaves from the Stitched Leaves Die set would be a wonderful contrast to the smaller leaves of the greenery I just did.  The largest leaf was die-cut from Cinnamon Cider cardstock.  Love how the stitching on the leaves mimic the background.  I then die-cut two of the medium leaves using the 2021-2023 In Color Shimmer Specialty Paper.  This is a pretty colored vellum with a subtle shimmer on one side.  I used the Pale Papaya color and it adds a lovely shimmery look to the card.  

I wanted to add a darker color to the mix, so I die-cut two leaf sprays with the Eden Dies and Cajun Craze cardstock.  I think they create a fun addition to the mix.

The sentiment is from the Sparkle of the Season stamp set.  It contains several fall and Christmas sentiments that I've used quite often lately.  This is stamped on a  1/2" scrap of Bumblebee cardstock using Cajun Craze ink.  Then just trimmed down on the side edges with Paper Snips.

Before attaching the sentiment, I colored a length of the White 1/4" Crinkled Seam Binding Ribbon using the Dark Cajun Craze Blends.  I colored it with just a few swipes of the Blends and it dried super quick so I could use it right away.  I used about a 4" strip and folded in half then attached it under the sentiment.  The sentiment was then attached to the card using Dimensionals.

I did make several of these cards because I liked it so much.  On some of them I changed up the sentiment to this.  It's one of the sentiments in the Love of Leaves stamp set that coordinates with the dies I already used for the leaves.  I just love it when everything comes together and works out nicely without a bunch of fuss.  Now I just need to get these in the mail before it's too late!  😏

If you're placing an order soon, please consider using the Host Code shown at the top of my blog page.  It's greatly appreciated!!

Thanks for stopping by to see what I've been making.  Hope you're inspired to get out your stamps, ink, and paper and have some fun!  Just enjoy yourself and create.  It's much better than therapy and cheaper too!

Happy Autumn!
Sharon

Thursday, November 18, 2021

Eden's Garden, Just Because

 Hey there!  Hope this finds you doing well and in a crafty mood.  I've been playing with my new Eden's Garden Bundle over the weekend.  This went so much better than the first sit down with this Bundle.  The first time around, I was so focused on making my samples something other than green, because that's what everyone else was doing.  I felt I needed to do something different so I wouldn't be copying what you've seen already.  Well, enough of that!  There are so many different ways to put the green cardstocks and DSP together without copying!!   So I finally sat down and just had fun with it.

Here's my card using all the parts of the Eden's Garden Bundle with both the Soft Succulent and Evening Evergreen colors.  I love how simple this came together!  Especially after struggling with it last time around.  

The card starts with a base of Soft Succulent cut  8 1/2" x 5 1/2" folded in half.  The first layer is one of the lovely green prints with just a tiny speckling of gold from the Ever Eden Specialty Designer Series Paper.  On each of the papers, one side has the addition of gold foil in different designs.  This print has teeny tiny dots.  So pretty!!  The DSP was cut 5 1/4" x 4"  and attached to the card base with adhesive.

Next, the large wreath die was used to cut the Evening Evergreen cardstock into this gorgeous open-leaf design.  Isn't it just beautiful?!?   If I'd been thinking, I'd have used some of the Adhesive Sheets behind the Evening Evergreen cardstock so I could have just peeled it and stuck it down.  Alas, I forgot about that and had to use my MultiPurpose Liquid Glue on the solid leaf images to hold it in place.  It's not really hard, but whenever you can make something easier and quicker, why not?

The leafy banner was die-cut from Soft Succulent cardstock.  It was attached across the center of the card using Dimensionals.  Now it's time for the sentiment.  I  chose to use the Lovely You stamp set this time.  The sentiments have a mix of fonts on each stamp which is a look I love.  And the sentiments seem to cover many of the everyday sayings you might want to use.  This was stamped on a scrap of Basic White cardstock using Evening Evergreen ink.  It was punched out using the Label Me Fancy Punch.  I stamped closer to the top so that I could add a few of the leaf parts that are scrap left-overs after die-cutting the wreath and banner.  Can you see where they pop out of the die-cut piece?

Did you notice the pretty rhinestones?  They're part of the Eden's Garden package.  There are marquise cut green tones and the round ones are Cherry Cobbler.  The rhinestones have an iridescent sheen to them, so on this shot it's really hard to tell the color.  But believe me, they're quite lovely.

Can you see the little dots between the greenery in this picture?   Those are the tiny gold foil dots.  I couldn't get a picture that really showed how nice the paper is.  So I guess you just need to take my word for it... or order some for yourself!  😄

That's it for this post.  I want to remind you that you too can get the Eden's Garden sneak peek items now through the end of the year - or until they run out.  The Ever Eden Specialty DSP, the Cotton Paper, and the Garden Gems all will be unavailable after they run out.  They will NOT be in the new mini catalog coming out in January.  So if you want them at all, now is the time!  The Eden's Garden stamp set and the Eden Dies WILL be in the next mini catalog.  So it's up to you to get them now or not.

If you're reading this on Nov. 18th, Stampin'Up! is having a Seasonal Sale.  This sale is only items from the large Annual Catalog.   Sorry I'm catching it at the end of the sale.  With friends in from MI I'm kind of all off kilter and not on top of things.  So Sorry!!!

     All regular cardstock is 10% off
     All SU! ink pads are 15% off
     All dies are 20% off

Hope you're enjoying some nice, crisp fall weather.  It's still pretty warm here, but the temps will be dropping the rest of the week.  But I have to say, I've truly been enjoying the weather in the low 70's.  It's been colder at night, and the leaves are changing colors - and they're falling a lot too!  Dear hubby is outside trying to corral those leaves as they fall today.   Have a very blessed day!

Happy stamping and creating,
Sharon

Saturday, November 13, 2021

Wintry Welcoming Woods

 So sorry I've been absent for several days again.  Friends were down visiting from Michigan, and we stayed way too busy for me to give any thought to getting this card posted right away like I thought I would.  Oh well...  What's that line about the best laid plans?  But we had so much fun that it was worth getting behind on my posts.  At least I think so!  😁  That said, I guess we'd better get moving along on sharing the card.  Right?

Let's get right to the dimensions of the cardstock on this one.
*card base is Basic White 8 1/2" x 5 1/2"
*Balmy Blue layer is 5 1/4" x 4"
*Night of Navy layer is 4" x 3 3/8"
*Basic White layer is 4" x 3 1/4", and small piece for the punched sentiment layer

First, the the Balmy Blue cardstock was embossed with the snowflakes in the Wintry 3D Embossing Folder on the right side of the layer.  This has multiple styles of snowflakes and also swirls in the half-size embossing folder.  Very pretty!

On the Basic White layer, I used a Blending Brush and Balmy Blue ink to lay in a very mottled sky area to give it a look of clouds in the sky.  This was done on the top 3/4 of the cardstock piece. The birch tree trunks were stamped with Crumb Cake ink leaving a little space bare at the bottom.  The ground stamp was also done in Crumb Cake ink, but this time it was off-stamped to give a more shadowy look.  The snowflakes were stamped with Night of Navy ink in a random fashion on the top half of the cardstock piece.  Keep it kind of light so you don't have a blizzard going on!
At this time, the white layer is attached to the Night of Navy layer, keeping the top and bottom even with a skinny frame on the two sides.   This is then attached to the Balmy Blue layer you already embossed.  It's attached with adhesive.  A length of White Crinkled Seam Binding is wrapped around this and tied into a soft bow.  This is attached to the folded Basic White card base with Dimensionals.

The last thing needed is the sentiment for the card.  I decided to use one of the sentiments that I really liked from the 2021 October Paper Pumpkin kit.  The words just seemed to fit this card perfectly!   They were stamped on Basic White cardstock with Night of Navy ink.  It was punched out with the Label Me Fancy Punch in the current catalog.  After punching, I decided it needed a few of the snowflakes also.  These were stamped with Balmy Blue ink just a bit at the edges.  The label was attached over the ribbon using Dimensionals.

After much debating with myself about the use of bling or no bling, I decided to leave it plain and just enjoy the clean, wintry look.

Hope you think this idea was worth the wait.  I sure enjoyed making this one.  In fact the idea just seemed to come together with no issues at all.  Sometimes cards just need to sit off to the side and let the idea ferment in my thoughts for awhile to come together nicely.  Know what I mean?  But this one was easy and I love how it turned out.

Thanks for stopping in again to see what's been going on here.  If you'll be ordering soon, please feel free to use the current Host Code shown at the top of the blog site.  Thanks so much for your ongoing support.  You are really appreciated!  Now I need to dust, vacuum, and do the laundry to get ready for our next visitors!  Oh, we are so blessed that our friends are making the long trip to come down to visit us!  To make a trip that takes so many hours, that surely shows true friendship!!!

Happy stamping and creating!
Sharon


Sunday, November 7, 2021

Autumn Welcoming Woods

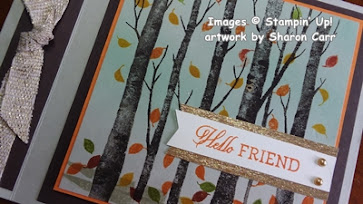
 It's so funny sometimes.  Well, at least I think it is.  When a new annual catalog or mini catalog comes out, I always seem to gravitate to just a couple of sets that just call out to me and I have to get them.  Are you that way too?  The funny part I was talking about is that many times it takes me a month or more to wrap my head around those new sets that I love and decide what to do with them.  It seems the ones that I just like alot are easier to sit right down and stamp up some projects very quickly.  And the sets that I just love require more time and thought.  It seems sort of paradoxical and maybe you don't have that problem.  But I finally got my act together and got out the Welcoming Woods stamp set to do some creating.  I first made a fall card because that's what it is right now.  I was trying to re-create what was going on outside my windows, and maybe I managed to do that.  Let me know what you think.

I started with a base of Sahara Sand cardstock because it has been so gray outside.  I wanted to give it a look of an overcast day and I think I captured that look.  The Sahara Sand was cut to 11" x 4 1/4", scored at 5 1/2" & 4 1/2".  The extra score is made to turn this into a book binding fun fold.  The area between the folds is glued together with Multi Purpose Liquid Glue.   

There are two pieces of Early Espresso cardstock cut - 4" x 4" square, and 4" x 3/4". The skinny piece is attached between the two score lines on the front.  The other piece is attached to the front area.

Next there is a piece of Sahara Sand cut to 3 3/4" x 3 3/4" square.  This is where the stamping magic happens.  First I used Pool Party and a Blending Brush to unevenly blend on some color for the sky area behind the trees.  I took the color down about 3/4 of the way to the bottom of the cardstock piece making some parts lighter and some darker.  The birch tree trunks from the Welcoming Woods set were stamped in Early Espresso ink in the center.  Sahara Sand ink was used on the stamp that lays in the ground line between the trees.  I stamped this a couple times to anchor the trees.  Then the fun part comes.  I wanted to show leaves falling from the trees and also laying on the ground.  This set includes a stamp with 6 leaves scattered on it and that's where all these lovely fall leaves come from.  First I stamped Pumpkin Pie leaves a couple of times.  Then went back in using only three of the leaves on the stamp inked with Cajun Craze ink.  Changed up the color again and added Crushed Curry leaves the same way.  As a last accent, I inked only one of the leaves on the stamp with Old Olive ink and scattered a few of those around.  I can't believe how much this resembles our backyard at the moment.  (We do have a little red showing up lately since the temps have been dropping to the mid to low 30's at night though.)

This layer was attached with adhesive to a Pumpkin Pie layer cut at 3 7/8" x 3 7/8".  This was attached to the Early Espresso layer using Dimensionals.

The sentiment is from the same Welcoming Woods set.  It's stamped on a 1/2" strip of Very Vanilla cardstock using Pumpkin Pie ink.  The Banners Pick a Punch was used on the left edge only.  I added a 3/4" strip of the gold brushed metallic paper behind this.  These were attached flat to the card front using adhesive.  

The ribbon is the Fine Art Gold Ribbon to go nicely with the brushed gold paper.  It wraps around the 'binding' part of the card and is tied in a square knot. 
 
It still needed something else, so after checking in my bling stash, I found the Metallic Pearls and the gold ones were added to the sentiment.  I used two of them to look more like nailheads attaching the sentiment.

Thanks for joining me today.  Hope you've enjoyed our walk in the autumn woods to soak up the gorgeous fall colors.  Let's do this again.  But next time, we'll do a wintry woods look.  OK?  If you're planning on ordering soon, please use the current host code shown at the top right corner of the blog.  I truly appreciate your orders, and I love hearing from you too.  Be sure to leave a comment once in awhile so I know you've been lurking in the shadows of my blog.  Enjoy the gorgeous display of color God has painted throughout the landscape!

Happy creating and stamping,
Sharon

Thursday, November 4, 2021

New Eden's Garden Stamp Set Bundle

 Oh how I love it when Stampin'Up! brings out some goodies for us before the new catalog comes out.  This gives us all time to play with something new and different.  And that's what the new Eden's Garden is all about.  This bundle will be available in January when the new Mini Catalog premiers, but it's available for you right now!   It even has some coordinating items that won't be available after this pre-order period.  So if you're at all interested, now's the time to jump on this while all the items are still available.  Ordering info will be at the bottom of this post.  Right now I want to share a few things I've made with this bundle.

This card shows two of the dies from the Eden's Garden Bundle and also two of the prints from the Ever Eden Specialty Designer Series Paper.  I really love these green prints and all the greenery stamps that coordinate with the pretty paper.  This card starts out with an Evening Evergreen base cut at 8 1/2" x 5 1/2", scored and folded in half.  The first layer is a sort of herringbone green-on-green print that is pretty awesome by itself.  Then you flip it over, and that's the print I used to die-cut the lovely leafy wreath-style image.  The whole paper has a gold leafy-striped print that's over-the-top bold.  It's really gorgeous, but I'll probably use it in only smaller bits because I usually prefer more subtle prints.  With all the cut-work in this leafy wreath, I thought it would be a perfect way to bring in some gold, but not have it be overpowering.  This was attached to the card front using a light touch of Multi Purpose Liquid Glue.  If I had been thinking ahead, I'd have used the Adhesive Sheets on the back before die-cutting.  Hindsight, duh....
The pretty brushed gold paper from the Gold and Rose Gold Specialty Metallic Paper made a nice soft gold looking wreath after it was die-cut with the smaller twig and berry die in the set.  I had thought this would make a pretty Christmas card, so I looked for a sentiment that fit inside this nicely.  This sentiment from the Snowflake Wishes set seemed to be just what I needed, especially because this card does sparkle!  I stamped it with Evening Evergreen ink on a scrap of Basic White cardstock.  This was trimmed to fit under the smaller rectangle wreath.  Then it was attached to the card front using Dimensionals for lift.

It needed some kind of bow to finish it off.  The Simply Elegant Trim looked nice with it, so I made a double bow with the gold trim.  I tried a single bow first, but it got lost on the card because of everything else going on.  It needed the weight of a double bow to make it work.


The inside of the card was finished off with a layer of Soft Succulent cut to 5 1/4" x 4" attached first.  Then a layer of Basic White went on top.  The "Love & Joy" sentiment from the Christmas To Remember stamp set was stamped on this using Evening Evergreen ink.

I must admit I'm still thinking about adding some gold Gilded Gems to the card.  I haven't decided if it needs even more sparkle.  Any comments???

I've made two more cards with this bundle (or at least portions of this bundle).  Let me show you what I've done so far.

An autumn card using Cinnamon Cider, Bumblebee, Old Olive, and Very Vanilla cardstock.  The stamps are from this bundle, along with the pretty die-cut leafy edge on the bottom of the Bumblebee cardstock layer.  Ink colors used are Cinnamon Cider, Old Olive, and some blending on the edges of the Very Vanilla with Bumblebee ink.
The tag used the Banners Pick-a-Punch on the ends.

The ribbon is a retired copper metallic ribbon that coordinated nicely with the fall colors.


A Fun-Fold wintry, thinking of you card that was made in the book binding style.  Balmy Blue, Night of Navy, and Basic White cardstock were used.  Night of Navy was the ink color for this card.  The wreath image behind the snowflakes was made using two of the stems/branches from the set stamped four times each.  This makes a very quick and simple wreath.  The die-cut snowflakes are from the So Many Snowflakes dies.

The ribbon is the White 1/4" Crinkle Seam Binding that was easily colored with the Balmy Blue Dark Blends.
The Subtle Shimmer Sequins were used on the snowflakes and teeny ones are scattered around the wreath.


160849   EDEN'S GARDEN COLLECTION   $82.00


Stems, sprigs, berries, and twigs abound in the beautiful and bountiful Eden’s Garden Collection! Explore the elegance of Eden with this exclusive, early-release collection. Only available while supplies last!


The Eden’s Garden Collection includes:

EDEN’S GARDEN CLING STAMP SET (10% OFF)
• 10 cling stamps
• Suggested clear blocks: a, b, d

EDEN DIES (10% OFF)
• 5 dies
• Largest die: 5-1/4" x 3-7/8" (13.3 x 9.8 cm)
• Use with Stampin’ Cut & Emboss Machine

EVER EDEN 12" X 12" (30.5 X 30.5 CM) SPECIALTY DESIGNER SERIES PAPER
• 12 sheets of patterned paper: 2 each of 6 double-sided designs
• Acid free
• Lignin free

EVER EDEN 12" X 12" (30.5 X 30.5 CM) COTTON PAPER
• 10 sheets: 5 each of 2 colors

GARDEN GEMS
• 140 pieces
• 2 shapes in 3 sizes: round (3 mm, 4 mm), marquise (5 x 4 mm)
• Adhesive-backed

Product colors: Cherry Cobbler, Evening Evergreen, gold foil, Soft Succulent

Add ink, cardstock, and adhesive to complete your projects.


157832   EDEN'S GARDEN BUNDLE   $52.00


157823   EDEN'S GARDEN CLING STAMP SET   $23.00


157831   EDEN DIES   $35.00


159996   EVER EDEN 12" X 12" SPECIALTY DESIGNER SERIES PAPER   $15.00


159997   EVER EDEN 12" X 12" COTTON PAPER   $8.00


159277   GARDEN GEMS   $7.00


Ok ladies, that's it for today.  If you read all the way down to the bottom here, I'm so proud of you!  This is a really nice bundle of goodies.  And as you can see from the samples I've already made, this collection is very versatile and can be used throughout the seasons.  

Thanks for stopping by to see what's new around here.  If you're planning on ordering, please use the Current Host Code at the top of my blog page.  Thanks a million, or maybe even more!

Hugs, 
Sharon

Wednesday, November 3, 2021

Black & White Christmas

Good morning friends!  Today I'm sharing a card that is a collaboration between my daughter and myself.  She's having some friends from both church and work over next week Sunday to make some Christmas cards.  Not a single one has ever done any stamping or knows anything about the process of making their own cards.  So this will be interesting to say the least.  She has a great sense of style and very definite ideas of what the cards should look like, including color, layout, etc.  Let's just say that I made several ideas that she turned down or did some tweaking, and this one had a few adjustments made to become this final card they'll make.  It did turn out nicely, and I hope these ladies will be happy with what they make.

She wanted a black & white card and liked the layout I had used for some Thanksgiving cards a couple weeks back, so that's where this started.

The card base is a half sheet of Basic Black cardstock cut at 11" x 4 1/4", scored at 5 1/2" and folded in half.  I cut two pieces of Basic White at 5" x 3 3/4", one for the front and one for the inside.  The front piece was die-cut about 1 1/4" up from the bottom edge with the Giving Gifts Dies using the Santa and reindeer die.  Truly, this is why I got this bundle in the first place just to get my hands on those rectangle window dies.  They are just so cute!

The sentiment comes from the Time of Giving set that coordinates with the above dies.  It was stamped with Real Red ink to add just a pop of color to all the black and white of the card.  The sentiment goes with the image and also fit the space nicely.


We struggled to find the perfect paper to go behind Santa, because she wanted something sparkly black.  This is the closest we could come.  I'm not sure how many years ago Stampin'Up! had this designer paper, but it's been awhile.

Luckily I had just enough to make the cards for her friends.  We ended up needing a piece about 3 1/2" x 2" for each card.  This was attached behind the window with adhesive.  Next the white layer was attached to the folded black card base with adhesive.  It was tucked in right at the top edge so there was more black showing at the bottom edge.

We also had some discussions about the ribbon, and I think we came to a great decision to use the Black Glittered Organdy Ribbon.  Isn't it pretty with the card?  It's still black, but the sheerness and sparkly glitter are perfect to make it more festive.  Also added two small rhinestones, one on either side of the sentiment, to add a little more sparkle.

The inside uses the 2nd piece of Basic White cardstock that was cut.  The sentiment we chose was another retired item from my stash of retired Christmas sentiments.  (You can never have too many sentiments to choose from as far as I'm concerned!)


Here's one more picture of one of the cards we'll be making on Sunday.  I hope the ladies will like the style and colors used.  We've also got a card that's more traditional red and green but with a fun twist, and a third one that's Misty Moonlight and Shaded Spruce in color.  Each card has a specifically different style to it, so hopefully each lady with find at least one she's really happy to have to share at Christmas time.  

It's been almost a year since my last class I held in Michigan and I truly miss the planning and deciding what to have for you ladies each month.  This has been a real time of rethinking what I want to do and how I want to do it.  Yes, I love holding classes and sharing with ladies how to make cards that they are proud to send out to family and friends.  Still trying to find an avenue to do this here.

That said, I miss all of you, my friends, that I've met through this Stampin'Up! business and the classes I've held each and every month for years!  Thank you so much for being a part of the joy in my life for so many years, and becoming great friends along the way!  What a blessing you've been to me, and I hope I've been a small blessing in your life in return.

If you're planning on ordering this month, I'd be grateful if you'd use the Current Host Code shown at the top of this blog post.  I appreciate all your support, both now and in the past.  During this month of Thanksgiving, you're one of my greatest blessings!  And I'm so thankful for you.  😁

Have fun creating and stamping,
Sharon

Tuesday, November 2, 2021

Peaceful Cabin in Blue

 Hey y'all!  I finally got my Peaceful Cabin Bundle on Friday, so I spent some time working with it over the past weekend.  That was fun and entertaining.  Before I go any farther on this post, I just need to interject something here - I'm so bummed that we didn't get even one little trick-or-treater stopping by our home.  The neighborhood was so quiet we could hear all the crickets - literally!  Rick and I sat out at the end of our driveway all excited to meet some families, or even just the kids from the neighborhood.  But there were none at all that showed up with their happy faces and giggles.  So sad.   😢😢  And now what am I ever going to do with all that candy?!?

Okay, enough of the sad story and let's get back to the fun stuff.  I love blue and white Christmas cards, don't you?  I've always thought they look so classy.  So that was what I planned to make with on my first attempt at using this new stamp set and matching dies.  Here's what I came up with...

The cardstock is all white on white with Night of Navy ink through out.  Pretty basic, but it was interesting trying to get a nice balance of open space and images.  The base of the card is a half sheet of the White Thick cardstock that is scored and folded in half.  The next layer is Basic White cut at 5 1/4" x 4".  This was embossed with the Evergreen Forest 3D Embossing Folder making sure the embossed trees were quite close to the top of this layer.  This was set aside until I could see how the card came together.

Next I stamped the cabin in Night of Navy ink on a piece of Basic White cardstock that was trimmed to 5 1/4" wide x about 3 1/2".  I made sure the chimney of the cabin was right near the top of the piece of cardstock so the bottom would be blank.  This was die-cut with the matching die.

Next up was stamping the trio of trees on another piece of Basic White cardstock.  This was cut 5 1/4" x 3 1/4".  Again the stamping had the largest tree right near the top of the cardstock piece.  This was also die-cut with the matching die.  When layering these together, I wanted to make sure there was space behind to show off the embossed background, but didn't want the cabin and trees too separated.

At this time, the sentiment from the Peaceful Cabin set was stamped in Night of Navy ink onto the bottom right corner in the snowdrift.

At this point came the shuffling of pieces on the card front to see where the final layout would be.  It seemed like there was still way too much bare white showing for my liking, so I stamped just a light sprinkling of stars/snowflakes in the sky with Balmy Blue ink.  The two stamped and die-cut layers were attached together at the bottom of the tree layer with adhesive.  I tucked in a Dimensional between the roof and the trees to make the cabin sit forward a bit.  Then the two layers together were attached to the card base with Dimensionals.  

The card still looked a little bland, so I stamped and die-cut the fence.  This was attached with Mini Dimensionals.  A few of the Subtle Shimmer Sequins were attached to the sky area with a dot of Multi Purpose Liquid Glue to hold in place.

Well, I don't know about you, but I do like how this turned out.  This might be the style of some of my personal cards that go out this year.  Especially since we've moved here to the south where I'm not expecting to see just too much snow for Christmas.  I guess I'll just have to make some of my own snowy scenes!

Thanks for stopping in today.  If you plan on ordering soon, please consider using the current host code at the top right of this post.  And my clever husband set it up so you can just click on the host code and it'll take you right to the Stampin'Up! website.  Thank God for handy husbands!  He really does come in handy quite often.  Shhh... don't tell him that I was bragging on him again!

Happy stamping and creating!  It's definitely the best therapy!!
Hugs,
Sharon